Students: Part 2
Celine Macaraniag

Celine Macaraniag
Hi, I’m Celine! I am a senior bioengineering student with a concentration in cell and tissue engineering. I am excited to be joining the Pulmonary Critical Care division this summer to learn more about current existing clinical problems in the hospital. I hope to enhance my knowledge about user-centered design for medical devices and patient treatments through this program and apply them to future projects and research.
Celine Macaraniag Blog
Celine Macaraniag Blog
Week 1: A little bit of everything
Celine Macaraniag Blog
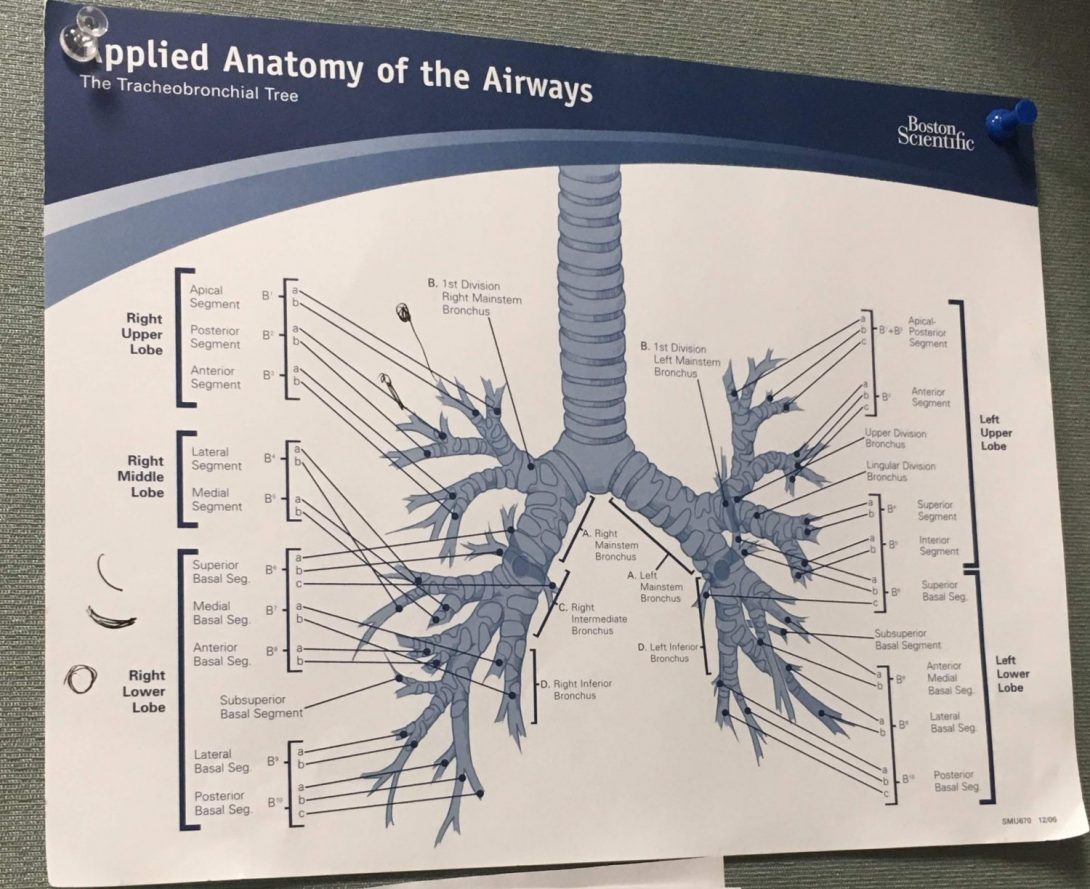
During our first week of clinicals, my partner and I got to see a little bit of each of the parts of the Pulmonary, Critical Care, Sleep, and Allergy Division. The division consisted of the intensive care unit, the pulmonary clinic, the pulmonary function test lab, and the sleep center. We went to all these different areas and met several attending physicians, residents, fellows, and medical technologists. On the first day of clinics, we got to visit the intensive care unit or the ICU, where we followed a team of doctors to each patient’s room and listened in on their care plan for the day. During clinics, we shadowed Dr. Jeffrey Jacobson and Dr. Dustin Fraidenburg and got to observe their workflows and interactions with different patients. We also got to witness a bronchoscopy procedure, specifically, a transbronchial biopsy and a bronchoalveolar lavage (BAL). We met Dr. Muhammad Najjar in his sleep clinic, where we got to learn about sleep studies in patients who have may have sleep disorders. Finally, we got to visit the pulmonary function test lab where pulmonary function tests or PFTs are performed.
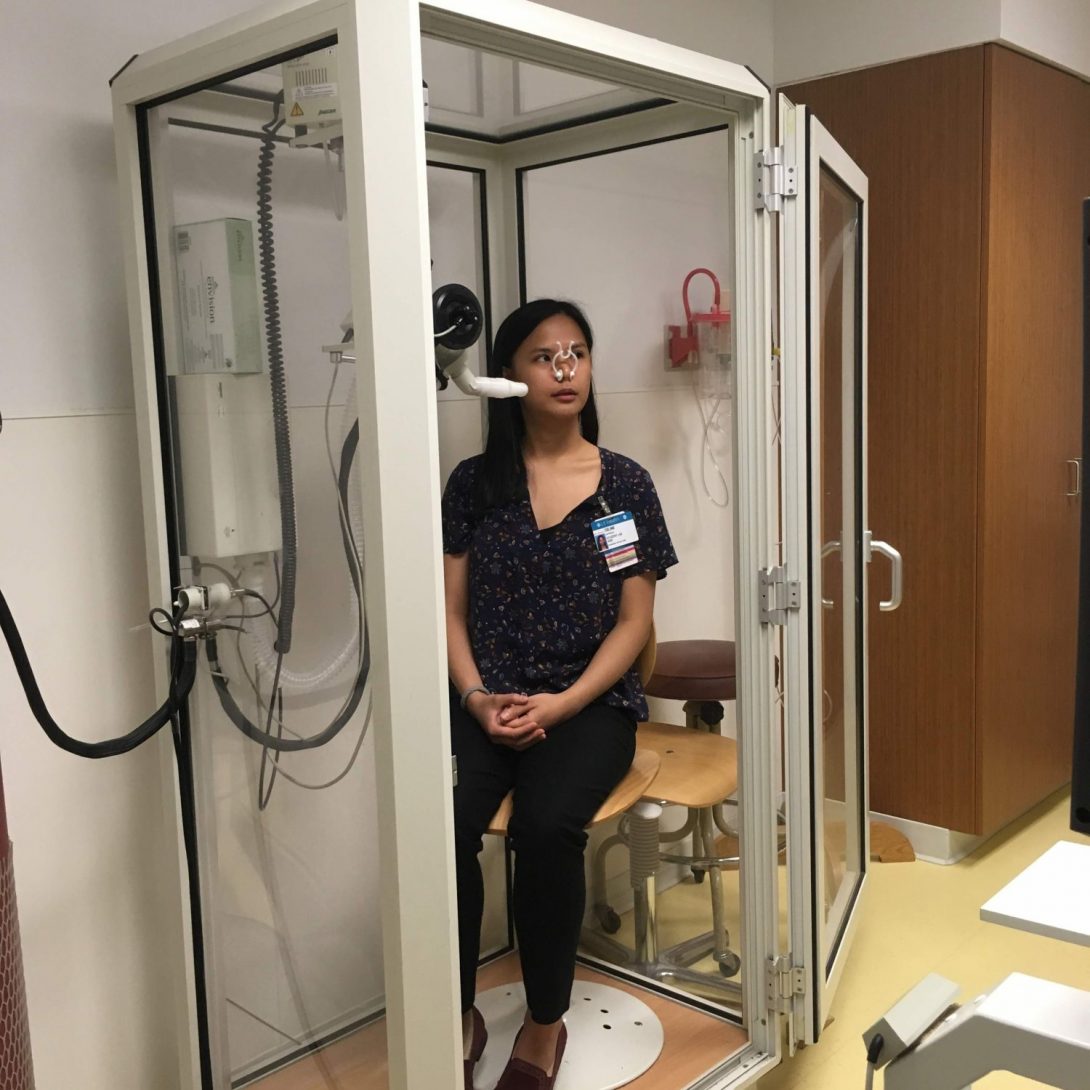
While we saw many important areas in the division, I will focus on the pulmonary function lab for this blog. In the pulmonary function lab, the PFTs are conducted by a technologist to measure a patient’s lung volume, capacity, and other flow rates. Ryan and I were lucky enough to get to try this test out ourselves. We agreed that the test went well for the both of us. The equipment used, called body plethysmograph, was comfortable for both of us, since the equipment was adjustable to accommodate the user. In the end, we even got to review our measurements and determine that the health of our lungs!
Another test they do is what’s called a six-minute walk test. This test is used to measure a patient’s walking distance in 6 minutes. This helps the pulmonologist to determine if the patient needs some oxygen help from an oxygen tank. During our observation, Ryan noticed that there were several obstacles in the hallway where the test was taking place. Several objects were placed by the sides of hallway such as a hospital bed, some cleaning supplies, a wheelchair, etc. This was the perfect opportunity for us to apply the AEIOU framework:
- A- Activity: The walking test. Technologist walks patient back and forth the hallway for 6 minutes.
- E- Environment: The hospital hallway. Other people in the hallways interrupted the test (other patients being wheeled in and out of rooms).
- I- Interaction: Technologist walks with patient during the test while wheeling around a monitor and an oxygen tank.
- O- Objects: Monitor, oxygen tank, wheeling device, clipboard, stopwatch. Other objects not used for test: bed, chair, cleaning supplies.
- U- User: Pulmonary technologist and patient.
This test fits perfectly in the AEIOU framework and it helped us identify problems in the activity; for example, the objects in the hallway and other people walking in and out of rooms interrupted the test several times which made the test less accurate. I also noticed that the tech had to bend lower to reach his clipboard to write while also walking; this can potentially cause some handwritten mistakes. The test can be improved by either the following: 1) switching to a different location where no objects/people will interrupt or 2) find a way to get rid of the extra objects that act as obstacles and alert people walking in the hallway that a test is being done. In this way, people will know to avoid blocking the way where the patient is walking. The main goal is to make the test as accurate as possible so that proper assessment can be done.
Week 2: PFT Lab
Celine Macaraniag Blog
We had yet another insightful week at the Pulmonary Critical Care unit! Ryan and I got to see a lot more of the pulmonary clinics, the ICU, and the sleep clinic. For this blog, I will focus again on the Pulmonary Function Test (PFT) lab; it seems that my partner and I have found another element to the PFT lab that may need some more improvement.
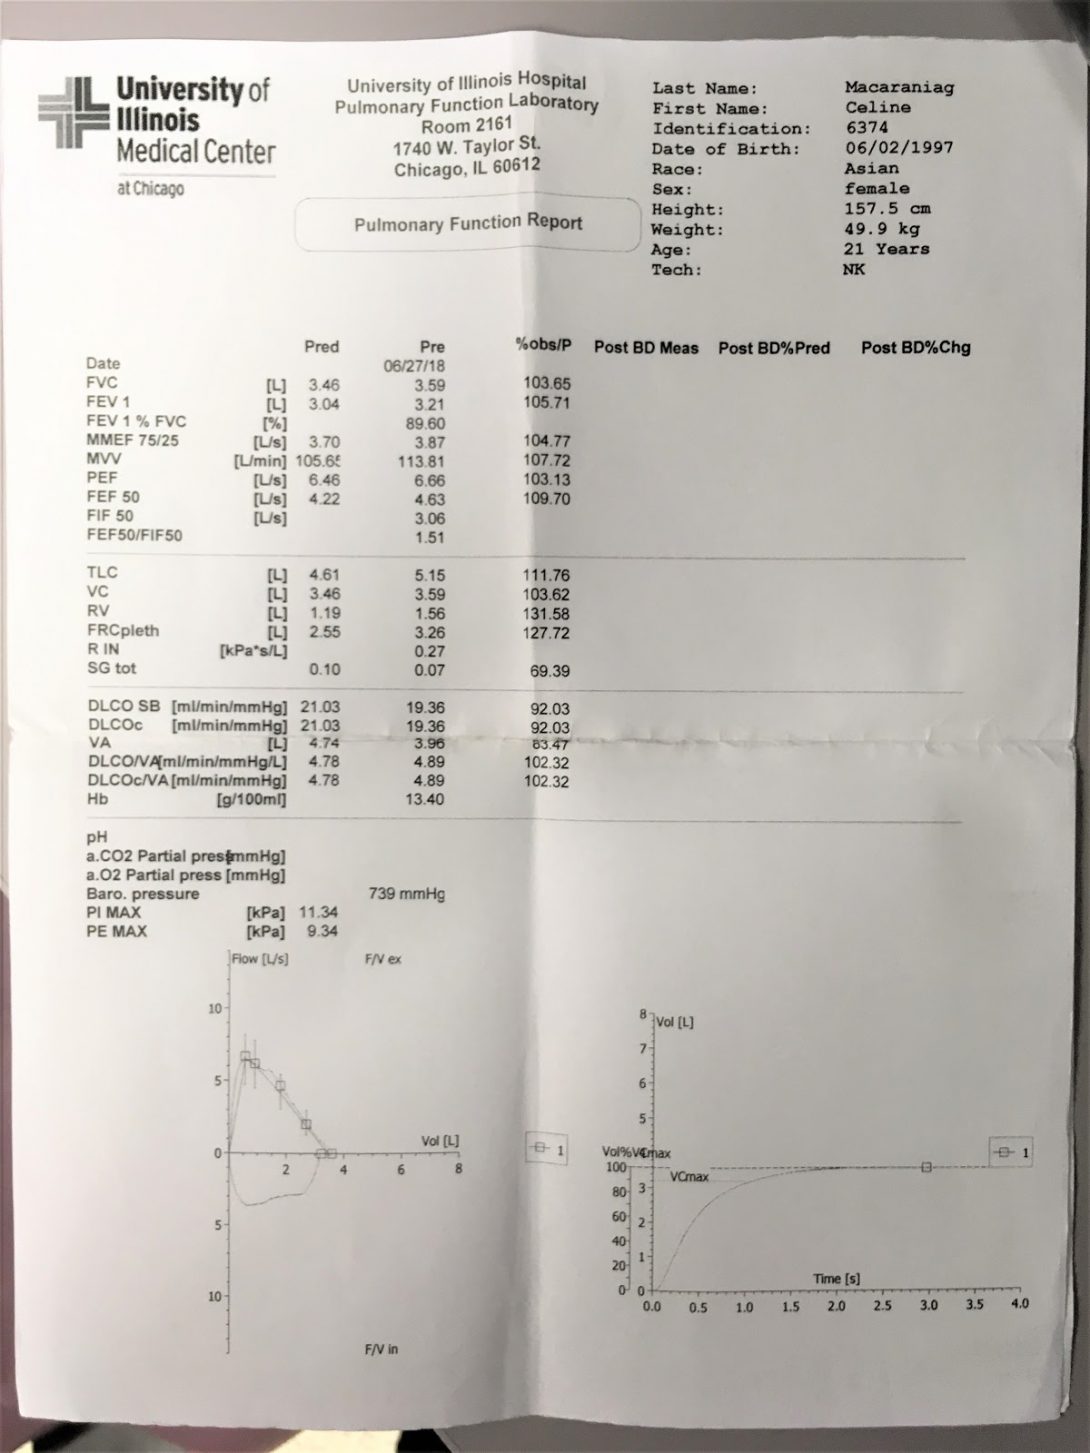
After PFT sessions are completed, patients are usually given a sheet of results listing multiple PFT values for the patient’s physician to read. However, the patients do not necessarily understand these results. I certainly was unable to interpret my own results. I did not know what most of the values on the page meant; there were acronyms next to these numbers as well, and I was only able to recognize those that I had previously learned from an old physiology class. Ryan was able to explain some of them to me, but, he also thought that it would be much better if there was a way to communicate the PFT numbers to people like me who aren’t familiar with them. This led us to try to investigate the PFT lab further to better understand the process.
We came up with a storyboard that details the step-by-step process of a complete PFT. We also identified potential pain points that may complicate each step.
PP = Pain Points
- Patient visits PFT lab.
- PP:Many patients usually cancel their visit; this may be due to weather conditions (i.e. too hot or too cold outside).
- Tech generates PFT report after tests are done. Tech gives hard copy to the patient.
- PP:Tech would have to scan the report and it would take about 4 days for the report to get into the system.
- Patients try to decipher their PFT report.
- PP:Patients may not understand what their report means.ÂÂ
- PP:Independent research may lead to more confusion.
- Patients give their hard copy of the PFT report to their physician.
- PP:Patients may lose their hard copy of the report. Or they may forget to bring the report to their visit to the clinic.
- Physician reads PFT report.
- PP:The physician only sees most recent PFT, but may want to see progress of patient and would need to find PFT reports from previous visits.
- Physician educates patient about their lung health.
- PP:Patient may still not fully understand. Physician may educate patients about essential details, but miss out on an opportunity to build patient understanding of their condition.
Identifying these potential pain points was beneficial in trying to learn more about how PFTs are conducted. We wanted to fully understand the process to try to come up with ways to better the system so that patients can have more insight to their own lung functions and therefore have a more active role in their health care.
Week 3: Needs Statements
Celine Macaraniag Blog
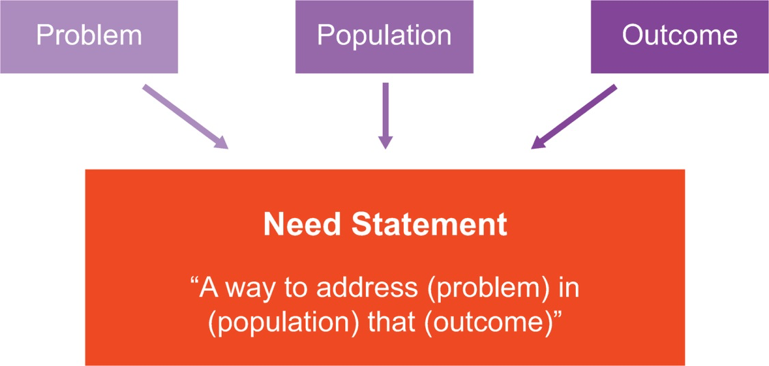
This week, Ryan and I went back to all the parts of the Pulmonary Critical Care unit to find more potential areas of improvement. We also started coming up with different iterations of needs statements for our initial idea on improving the layout of pulmonary function test (PFT) reports.
To recap, the PFT reports, generated by the pulmonary technologist, consists of several values that determine a patient’s lung function. This document can be very confusing to the patient. Â An image of the actual PFT report can be seen below.
Celine Macaraniag Blog
Image
Celine Macaraniag Blog
This week, we tried to focus on finalizing our needs statement and developing some high-level specifications for our project regarding the pulmonary function test reports.
After talking to our mentor, Dr. Dudek, we found out that UIH is beginning to integrate a new electronic medical record system. This means that the current the electronic system for medical records will soon be replaced. Because of this, making changes to the current system will be rendered useless. However, we would still like to create something that improves patient education about their lung condition.
We brainstormed on different concepts for improving PFT reporting and came up with these specifications: intuitive, appealing, easy to implement, and effective. To better communicate patient PFT reports, we thought that a more intuitive and appealing method should be used so that patients will show more interest in the otherwise very intimidating set of numbers. The PFT values aren’t actually difficult to grasp; for example total lung capacity is the maximum amount of air contained in the lungs after taking a deep breath; and this number can determine lung restriction. Simple definitions like these are great for all patients to have a better idea of what their PFT reports mean. A good example on how this can be done is shown in the graphic below.
Week 5: Last Days
Celine Macaraniag Blog

Image
John Marsiglio
John earned both his B.S. and M.S in Chemical Engineering from Northwestern University. His interest for innovation was first sparked by an internship at a speciality chemicals company in the Joliet, IL. Before coming to medical school, John worked in drug product development at GlaxoSmithKline’s global vaccines R&D center in Rockville, MD, while spending his weekends backpacking in the Mid-Atlantic. In the IMED program he hopes to leverage his knowledge of transport phenomenon, materials science, and process design to produce innovations that could be clinically relevant.
John Marsiglio Blog
John Marsiglio Blog
ABCs and AEIOUs of Anesthesiology
John Marsiglio Blog
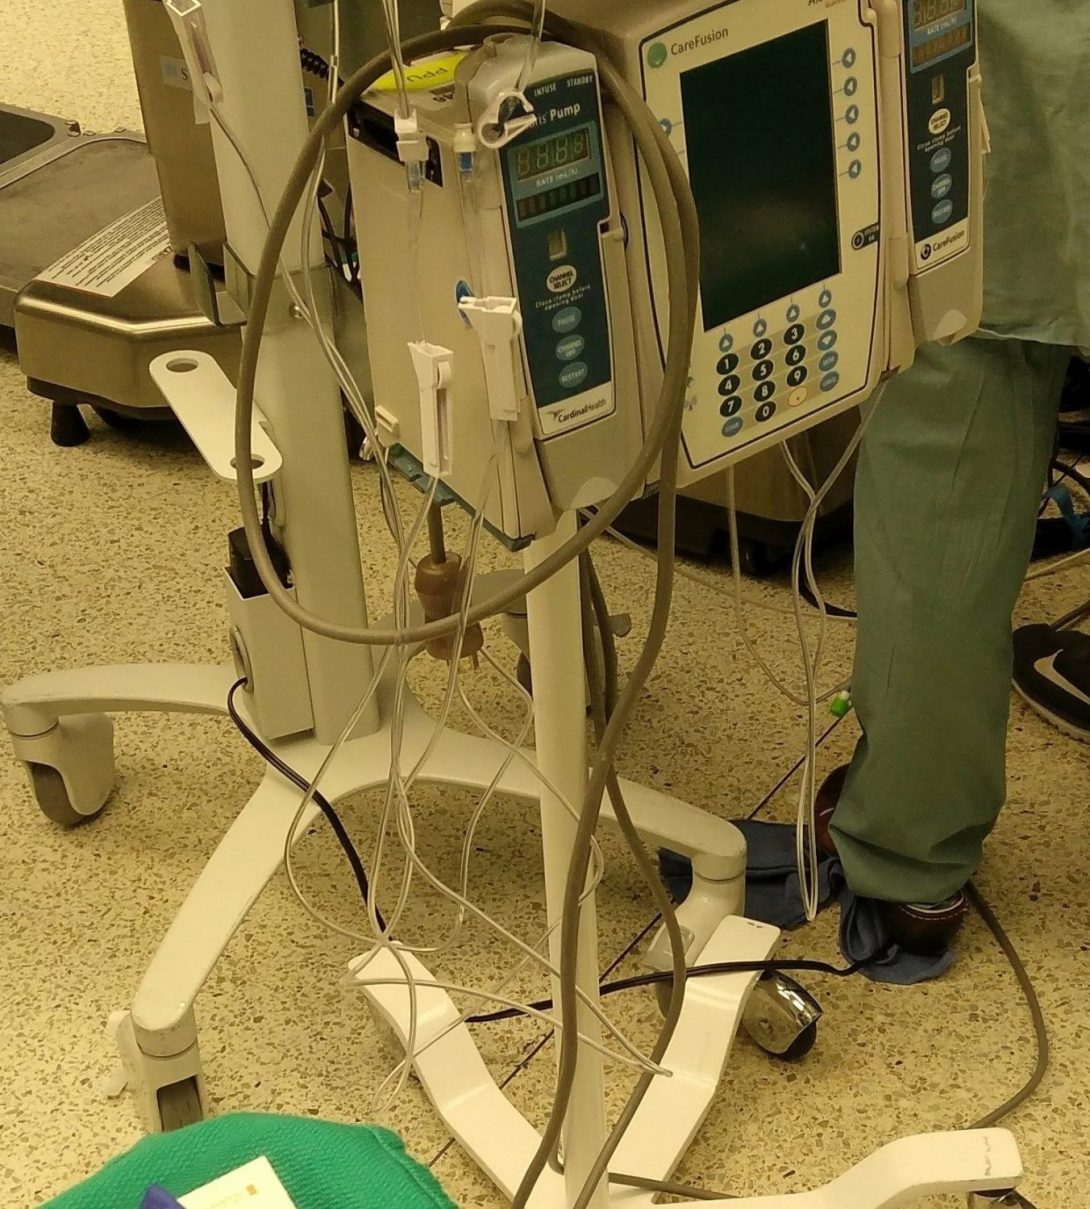
My first day in the OR began bright and early at 6:30 on a Tuesday. I met with Austin Buen-Gharib, a senior in bioengineering to begin our clinical day in the anesthesiology department. From an outsider’s perspective the OR is a buzz of activity, everyone moving quickly to complete their tasks, kind of like a bee hive. We met with Dr. Nishioka, medical director of the OR and anesthesiology attending, and he wasted no time bringing us to check in on a resident doing the anesthesiology for a coronary artery bypass graft. From a lay person’s perspective anesthesiology is often an afterthought. Patients are far more focused on the surgeon than the anesthesiology team. Seeing the anesthesiologists view of the surgery it quickly became apparent to me that the anesthesiologist does a lot more than the patient might expect. Throughout general anesthesia the anesthesiologist must pay careful attention to the patient, and anticipate all possible risks to the patient’s vitals that surgery may entail. The anesthesiologist must also interpret screens of readings, and be able to make adjustments to various instruments to keep all vitals within range.
Austin and I are lucky to have Dr. Nishioka as a mentor. He’s happy to spend the day with us, patiently answering our questions and guiding us through the different OR’s. After a few days Austin and I began to generate some ideas that could fit into the AEIOUs of our design framework. One of the first things we noticed about the OR was the mess of cords everywhere. There were many times when OR staff struggled to roll equipment over the mess of cords. We thought surely there could be a better way. Another idea we liked talking about was how the different anesthesiology attendings communicated. Dr. Nishioka carries at least 2 phones at any one time, and if he’s the case board runner he’ll carry 3. There have been a few times where he’s had to talk on two phones at once. As a first pass at applying the AEIOU framework to the latter situation:
- Activities – Communication between different attendings on OR statuses
- Environment – OR/recovery room/pre-op
- Interactions – Physician-Physician Interaction
- Objects – phones, texts and visual displays
- Users – Attendings, residents and anesthesiology technicians
For our next steps we will have to consider other inefficiencies in the OR, along with their impact on patient experiences and physician time wasted. We will also have to consider what sort of issues are the cause of the problems, and what other factors are at play. We realize that some issues we see may be due to structural problems with the hospital that we might not be able to change, while others we might have a good chance at taking a stab at a solution. We look forward to the next few weeks of refining our ideas and moving forward to address one of many clinical needs.
Problems abound!
John Marsiglio Blog
I think after two weeks in the OR with anesthesiology what astonishes me the most is how many inefficiencies could be streamlined. I think the average person has the impression that an OR is this kind of sleek assembly line- staff moving from patient to patient in a calm, cool way, just like on the TV shows. In reality, like any job environment, there are any number of things that impede smooth workflow, and of course act as stressors on the staff.
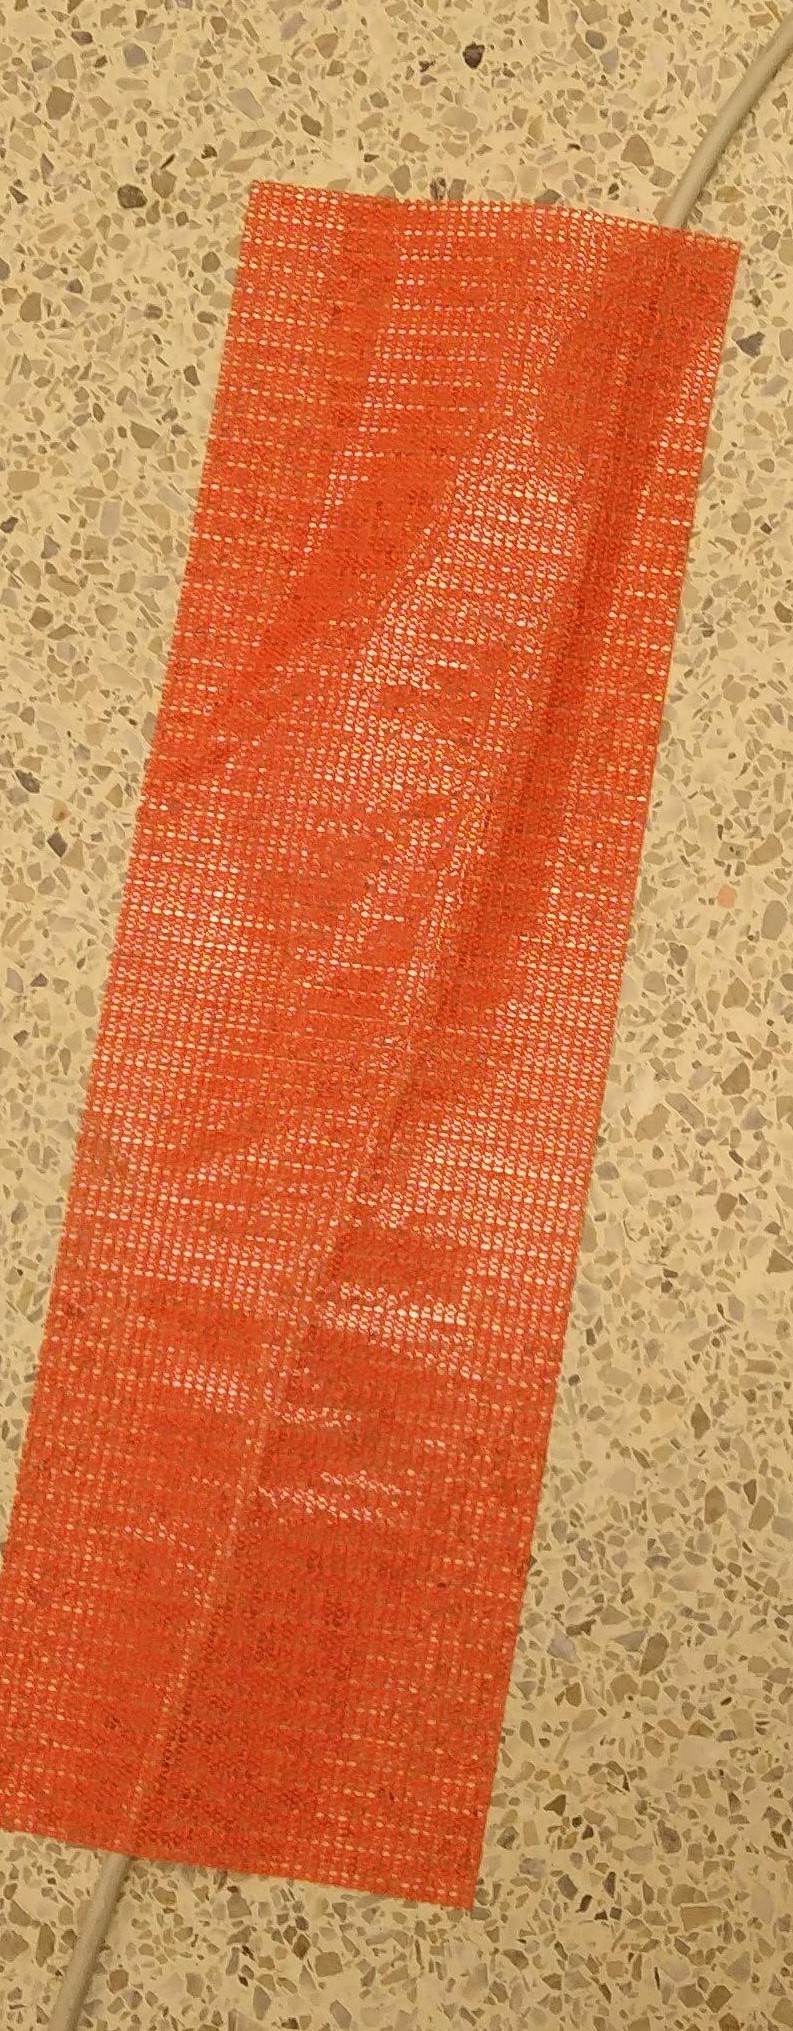
From our perspective these inefficiencies represent opportunities for innovation. Offhand Austin and I have begun noting all of the potential problems our project could tackle. One piece of wisdom Dr. Nishioka gave us was to also think about the impact of our project, while something that benefited UIH would be nice, something that could benefit all hospitals would be even better. A good example of this is the cords in the OR. While many of UIH’s ORs have a jumble of cords on the floor, one OR we visited had a disposable strip (photo above) that immobilized the cord. While cords in the OR is still a problem, it’s clearly only a problem in some of UIH’s ORs, so it would be a very narrow problem. He also pointed out that another common problem innovators run into is failure for the intended populations to adapt, citing a recent program UIH had implemented that had low compliance. Our next steps will have to involve taking all the opportunities we see and narrowing down on them based on their clinical impact, staff interest in using that innovation, and of course how feasible it’d be for us to complete in the remaining few weeks of clinical immersion.
In the next week we hope to set aside some time to get our ideas out, start considering how they fall based on impact, interest, and feasibility, and storyboard a few to further ratchet down on the meat of the issue.
Needs and Problems
John Marsiglio Blog
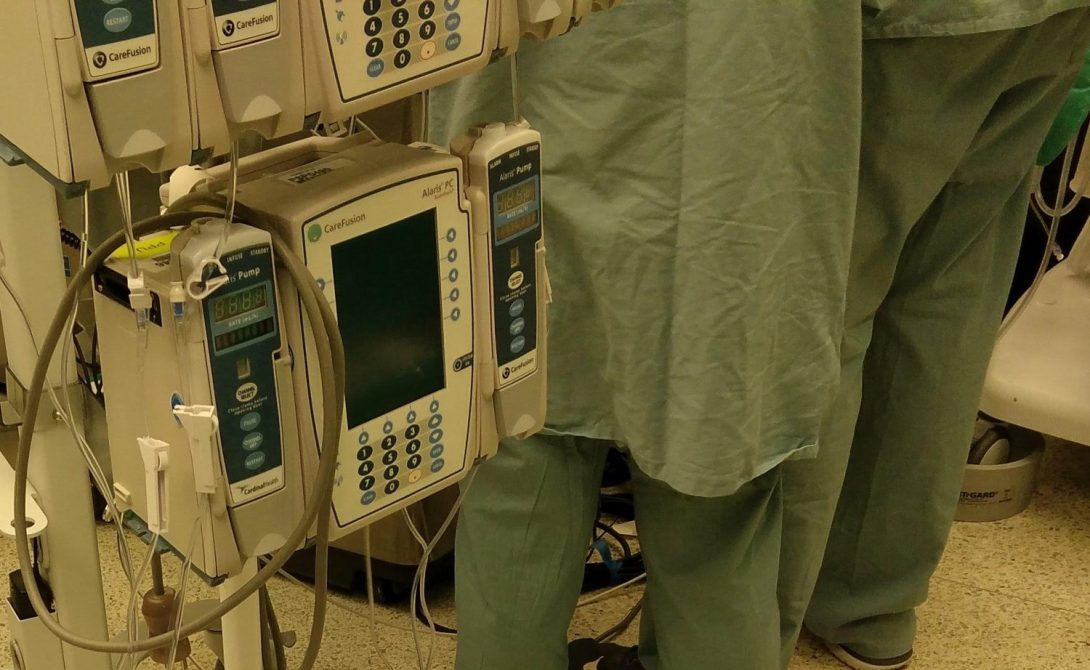
This week our topic on needs statements really got Austin and I thinking. We have seen so much in the UIH OR’s so far, and frankly there are just so many needs. This week one case that really stuck with me was following Dr. Nishioka while he was board runner for the day’s anesthesia cases. The function of board runner is to basically track all the surgeries going on in all OR’s, trying to give residents and attendings breaks when needs, and working to balance add-ons and other changes to the schedule. While it doesn’t sound terribly overwhelming, it does boil down to Dr. Nishioka running around the different ORs from 6am-6pm. This job is so stressful for a few reasons. There’s the problem of the add-on, where a case comes in that does need to be done that day, like an appendectomy, and there’s the problem of an emergency, where a room needs to be opened right now for a patient in need. The latter was the case when a woman came in with a ruptured uterine cyst. These emergency cases obviously can’t be helped, and there isn’t much to do for the add-ons either to make it easier on the anesthesiology team. However, while an short term observer may think that these two things are the source of most of the stress for the board runner, as a long term observer I’d disagree. It seems to me that the most stressful part is that cases aren’t starting on time, which leads to delays snowballing, and trouble staffing. There are many reasons why a case doesn’t start on time. Some aren’t things we can control, like a patient being late, or another case lasting too long, or even a more difficult than anticipated procedure. However, reasons for delays are most often something we can fix, like patients not being brought to the room on time, surgery delays, or anesthesia delays. Dr. Nishioka’s project, the iShuddle, seeks to help address these problems by having the charge nurse announce at the end of each case when staff need to be back in the room, and before beginning the next case announce if there is a delay and what is the reason.
The only problem is that we’ve rarely seen this system used. Yes everyone has been trained and they are supposed to use it. We’ve conducted some interviews and staff seem to not use it for many reasons, it being another task to manage, being too busy, or thinking that it might become a blame game. Austin and I have heard a lot about the issues with the iShuddle and the issues it seeks to address. We spent a lot of this week drafting needs statements, and found it more difficult than expected. We’ve also been wondering what exactly is the problem with the iShuddle? Is it not a good system, is it too cumbersome, or is there something about the culture or maybe incentives that could need to change for it to be effective? We hope to further explore these questions next week.
Spectacles and Specifications
John Marsiglio Blog
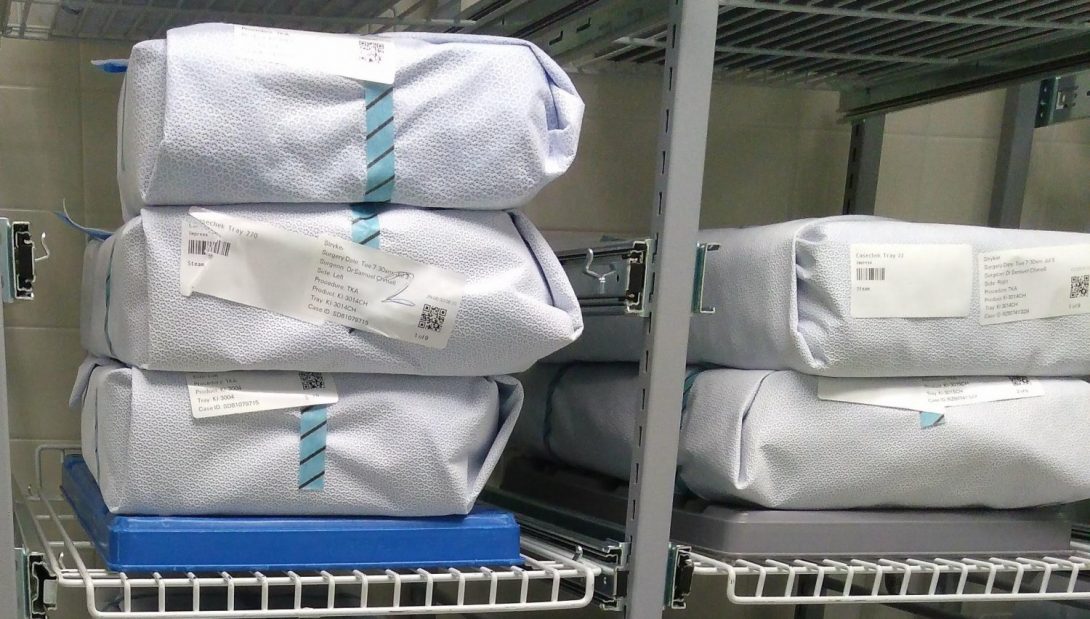
This week in the OR Austin and I spent considerable time discussing what specifications will help improve turn over time. I think we’re beginning to appreciate just how difficult a problem this is to tackle. It seems like with each person we talk to about turn over times we get a new reason for why they are consistently behind. From these different conversations we tried to hone in on the broader problems, and from there took a stab at thinking about what kind of improvements would eliminate that problem. Moving forward we generated a list of specifications.
From this list of specifications we decided that some were much more important than others, especially considering the difficulty there has been adopting the iShuddle system. Austin and I each assigned weights to the specifications, and we can broadly place them into three categories: very important, moderately important and not very important (the “would be nice” category”). We identified predicted impact on turn over time and willingness to adopt both as very important. This is because turn over time is our goal, and willingness to adopt is a huge struggle for the current system. This brings to mind a past lecture where we went over that something cannot be considered an innovation unless it is adopted and used. Secondly we identified ease of implementation and ease of use as moderately important specifications. Both are important as they would be big factors the hospital administration would consider when asked if they’d adopt a new system. Finally we thought a few other specifications would be good to include, but that they weren’t super important. These were cost, time to implement, and finally safety. While all variations we thought of were very safe, we felt that safety should always be a consideration in healthcare.
We applied this list of specifications to the different ideas we brainstormed in class the past week. I thought we had some good ideas, from an alexa integrated mobile app, to a buddy system, to getting more patient involvement. The ideas that shown through were the integrated mobile app, an alexa feature, and finally using a team system for staff between the OR’s to try and drive turn over time. In the final two weeks we hope to refine these ideas into a single valid concept that could have a big impact on UIH turn over time.
Adieu to Anesthesiology
John Marsiglio Blog

In our second to final week in anesthesiology Austin and I set out to hone in on how best our final project could help the anesthesiology department. This involved taking our list of specifications and figuring out how features of a mobile app (our highest rated idea), and an alexa app (our second highest rated idea) could address these specifications. We started out with about 8 core app features. These included ToT trackers, patient tracking, pre/post op task trackers with alerts that would be able to also keep track of time to return to the OR, and a feature to keep track of the ToT cause of delay. These features succinctly addressed the core specifications of our project. However, after more talking our list began to balloon to around 30 items. These extra 20 or so features didn’t directly meet the core specifications, but were all items that we thought “would be nice” based on the conversations we had with nursing and other OR interest groups.
We took this list to Dr. Nishioka and he gave us some really good advice. While it may seem to us that these extra 20 or so features would be nice, they could hurt the app. There are many people would have trouble adapting to new technologies, and more features doesn’t always make something better. Too many features will clutter the app, and make it more difficult for people to use. This was fantastic advice. Taking that in mind, Austin and I went back to the drawing board and talked about what were must haves in an app to address our core specifications, and what features, while potentially nice to have, would clutter up the app. Moving in that direction we cut back on our list of features to around 15 key features. Moving forward Austin and I hope to conceptualize our mobile app, along with it’s alexa capabilities, and present to Dr. Nishioka and members of the process improvement committee at UIH.
Closing thoughts: Overall CI has been a great experience and I’d like to thank Dr. Nishioka for being a fantastic mentor, Dr. Felder, Susan Stirling, and Kimberlee Wilkens for leading a great course, and finally my partner Austin Buen-Gharib for all his hard work, dedication, and being an all around great partner!
Asra Mubeen

Asra Mubeen Blog
Asra Mubeen Blog
The Beginning of my Journey
Asra Mubeen Blog
Wow! My first week at the OB ER was a very unique experience for me. We were observing Dr. Aparna Ramanathan and I had the opportunity to oversee some of the procedures. Dr. Ramanathan was very sweet in explaining to us the general medical terminology used in the OB ER. She showed us around the ER the first day and also the physician’s room. I noticed that in the physician’s room where the medical students, attending physicians, and residents were staying there were a lot of charts and dashboards posted. A white board covered with charts particularly stood out to me. These paper charts tracked the size of the cervical expansion during labor were heavily used by the entire medical staff in the OB ER. These contained helpful information but also since there were many users, it became unclear as to who was tracking what on the charts. I was also shocked that all these charts were on paper! I thought everything would be digitized by now.
Good vs Bad Design
Asra Mubeen Blog
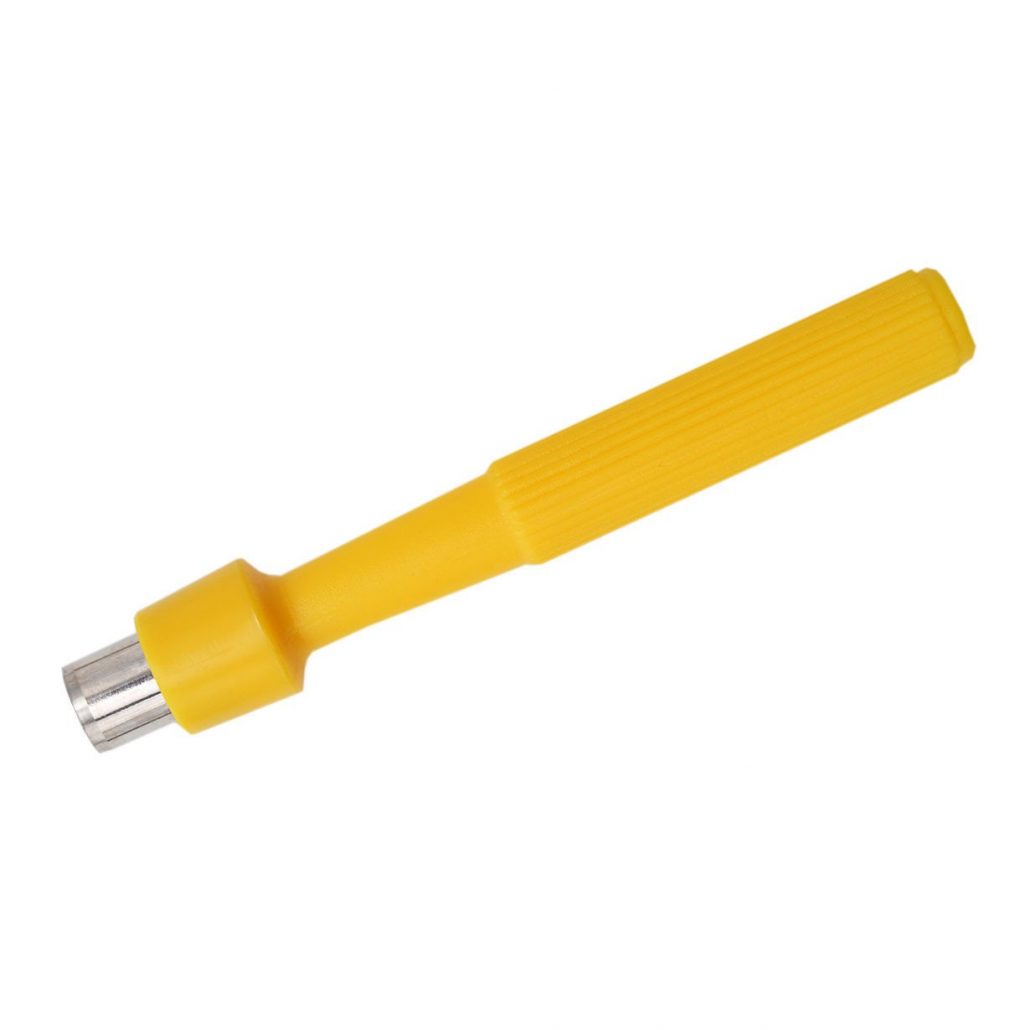
The next day at the clinic I had the opportunity to see Dr. Ramanathan perform a biopsy on a patient. At first, I thought the biopsy would be a long procedure but it turned out to be about 10 minutes with the help of the efficient tools the doctor was using. A particular tool stood out to me which was the punch tool (picture taken from Google Images). This tool was small enough to help with the biopsy of the pubic area. Instead of using scissors to make an incision in the skin to remove a fragment, the punch tool easily marked the skin area for the biopsy and with one easy insertion into the skin the circular skin fragment was removed for biopsy. The doctor did not need to use tweezers to hold or position the skin for the scissors to cut through. And of course, Lidocaine was used to numb the skin and silver nitrate was used to clot the blood from the incision. After the procedure, I asked the doctor more about the punch tool. She told me it was very simple for her to use and this tools also comes in different sizes for different types of biopsies.
My next shift was a night shift at the OB ER. During this shift, a medical student joined Dr. Ramanathan to help with the examination. I was able to watch the medical student perform a cervical speculum design. After the exam, the doctor gave me a brief history about speculums. Before plastic speculums metal speculums were used and even in some clinics today metal speculums may be used. The speculums used at the OB ER at UIC are made from clear plastic and have a built in light source. Instead of an on/off switch, the built-in LED turns on with the easy removal of a red tag. The plastic speculums are also disposable as compared to the metal speculums. The clear plastic helps examine the inner structures and it is also easily adjustable.
During night shifts, Dr. Ramanathan introduced us to “mini huddles”. I found this idea very interesting because these huddles helped the physicians and residents relieve stress and team bond. They switched off shifts and updated each other about the current patients in the room. They used one typed sheet of paper with a summary of all the patients in the OB ER during the huddle. These huddles were an excellent place where I applied the AEIOU framework.
A = Activities: Physicians provided patient summaries such as complications/risks, history, chronic illnesses, labor progress, and tests completed.
E = Environment: Resident’s staff room
I = Interactions: Physicians and residents update their charts and then sign off.
O = Objects: Charts created from Excel were shared and provided to physicians to quickly write down any notes.
U = Users: Physicians, nurses, midwives, and residents.
One particular bad design that stood out to me was the user interface of the ultrasound machine in the patient exam rooms. The controls on the ultrasound machine were disorganized with a tiny keyboard that made it hard for the doctor to type while wearing gloves. However, I was told by the medical staff that there are other ultrasound machines they use in the OB ER that work better and are easier to use.
Overall, I think this week was a blast! I really liked following Dr. Ramanathan around and she did a nice job explaining things around. I also met with my amazing partners to summarize some good and bad designs explored this week. I look forward to working with the team and coming up with a project design.
My First C-Section
Asra Mubeen Blog
The next day was a very eventful day for me. My teammates and I were each assigned a resident or physician to follow during the day so we could each see new procedures. I was in Labor & Delivery, Haley was observing D&E procedures, and Michael was at the OB OR. During the first third of my shift, I was called to watch an unscheduled c-section. When I was called by the physician, I was not prepared to see a c-section and when I was called I became a bit scared only because I did not know how to get ready for it! Luckily, a medical student took me under her wings and took me to a closet full of gear. I quickly put on the cap, shoe covers, and mask and then literally ran to the OR. I did not want to be in anyone’s way so I chose a corner to stand near the newborn baby’s bed. The surgery immediately started and within three minutes the baby was out! I was literally shivering when I saw this all happen four feet away from me. The baby was handed to the pediatric fellow and then placed onto his bed. The fellow was sucking the fluid out of the baby’s body when I noticed one of the nurse’s rummaging through the bed’s drawer. My eyes were on the patient as the resident was suturing the uterus. I heard the nurse say “we’re missing a small mask for the baby”. I faced the nurse and she asked me to quickly run to the other room and grab a small mask. I did not even know which room she was talking about but all I knew was the small mask was needed immediately for the baby. So I sprinted out of the OR and entered the nearest empty room I could find. I found the exact table drawer they were rummaging through, grabbed the mask, and ran out to the nurses. The baby was healthy and soon enough the father came to see his newborn son with tears in his eyes. I had mixed feelings as I stood there still watching the suturing. The suturing took the longest and overall the procedure was about 40 minutes long. Lastly, the mother was transferred to another bed and transported to another room. I walked out of the room and turned on my phone to check the time only to see many messages from my teammates about another cool procedure starting in about ten minutes. I knew this day would be eventful and busy at the same time and I loved it. (Photo courtesy of Michael Zhao)
Oophorectomy (story)
Asra Mubeen Blog
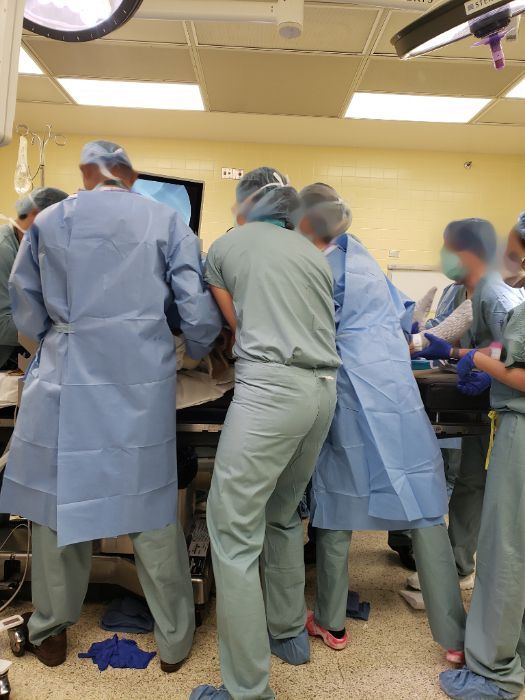
The procedure my teammate Michael called me down to see with him after my first c-section was an oophorectomy (ovary removal). This was the longest procedure thus far that I had watched. It was more than two hours. Michael handed me my gloves and shoe covers so I could quickly wear them and immediately enter the OR. When I entered the room, the general surgeon was there checking his laparoscopic equipment. We had about 15 people in the room including many medical students. For the first half of the procedure, the general surgeon would remove the gallbladder then the gynecologist fellow would remove the ovaries. The surgeons and the fellows were set up and the surgery began. The screen was turned on and the general surgeon explained to the students the major structures in the abdomen shown on the screen. Next, the general surgeon located the gallbladder and cut through the adhesions to remove it. Cutting through the adhesions was a slow process because the surgeon had to make sure that the correct adhesions were being snipped. During the surgery, Michael and I did observe a bit of a snafu. In the midst of cutting through the adhesions, the fellow from general surgery froze for 20 seconds. The attending turned his gaze from the screen to the fellow as she muttered “why is the gallbladder moving?”. The attending then looked down and yelled “the patient is sliding off the table!”. The attending covered the patient and the equipment with new drapes and within seconds almost everyone in the room was crowded near the patient to help adjust the bed. Meanwhile, Michael and I scribbled down notes as we watched the chaos in the OR. After ten minutes of adjusting the bed and scrubbing back in, the cholecystectomy resumed.
We noted that the bed was not really designed for an obese patient. When the general surgeon adjusted the bed to access the gallbladder, it was at a 45 degrees angle enough for the patient to slide down. The straps around the legs of the patient helped resist the patient from sliding left or right but not downwards. Some extra support right behind the hips or even behind the legs might have prevented the patient from sliding.
Later, the gynecology team took over. The gynecology procedure was shorter (about 15 minutes). They first had to identify the ovaries away from other structures. With our patient, only one of the ovaries was removed because the other ovary would require more adhesions to cut through. The attending identified the ovary as normal and recorded that cutting through the adhesions was not necessary. The other identified ovary for removal was then isolated from the internal structures by grasping it and pulling it away from the uterus. The suspensory, broad, and ovarian ligaments were clamped or ligated. The net pouch was inserted through the laparoscopic opening and the ovary was placed into it. The net pouch was then retracted and pulled out fairly easily. Errors could have occurred if the net pouch did not open large enough to fit the ovary. For this procedure this was not the case because the ovary is a small structure (about 1.5 cm in diameter). The other laparoscopic tools such as the grasper and camera were pulled out of the abdomen and the with the help of a medical student the fellow sutured the four laparoscopic openings. Local anesthesia was injected and the procedure was now over.
We walked out of the OR to hear the students and residents talking about the patient sliding off the bed. My next procedure would be another c-section in less than twenty minutes. I grabbed a snack on my way back up the hospital realizing that my shift would almost be over and I had forgotten to eat my lunch.
Second C-Section Observation
Asra Mubeen Blog
While observing my second C-section, I was finally able to put all my emotions aside and actually focus on the clinical environment and the medical device usage. This time during my observation of the C-section, I had an EMT student observing with me. The EMT student was not expecting to watch a C-section within the first hour of his OB ER shift. He was shivering because he was so nervous! I reassured him that it would be alright and that I will be there with him as well. This time I knew where all the gear was located for the surgeries and guided him to the closet full of masks and shoe covers. We got ready and walked in confidently into the OR. As soon as the fellow made the incision for the surgery, the EMT student turned to me and whispered to me that he was scared. I assumed that he was scared because he did not know what to expect and did not feel comfortable about what the surgery would entail. I explained to him that there was no need to be scared and that I will help explain to him what was happening. He felt a little relieved that he was observing with another student. I explained to him the steps of the C-section and pointed out a few things in the OR. Soon, the baby was out and he turned to tell me that he was no longer scared at all but super elated. I was happy that I was able to answer a few of his questions during the surgery. I did not get to finish watching the entire surgery because my shift had been over about an hour ago and my teammates were waiting for me.
My team members and I have seen at least one C-section these past three weeks. One common thing that we noticed was that the residents and physicians struggle estimating the total blood loss at the end of the surgery. This was a rather lengthy process. After the surgery, the physician would count the number of laps used and their percent saturation. Next, they would read the amount of blood in the container (see picture) that they had vacuumed. Lastly, any blood on the drapes or dripped onto the floor was also accounted. One of the physicians told me that it was better for them to always “guesstimate” more blood loss than less. It was also difficult to truly estimate the blood loss because of other fluids like the amniotic fluid would also be factored into the calculation.
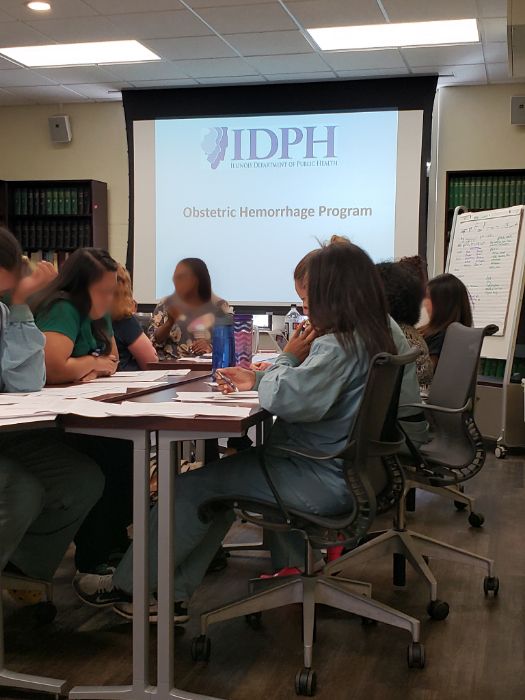
Our team began to discuss ways to make it easier for physicians to calculate the amount of blood loss. Dr. Ramanathan informed us that there was a postpartum hemorrhage program that the obstetrics department would be hosting. I volunteered to attend the program. Here, I learned more about the different ways the physicians handle blood transfusions at the hospital. I also got the chance to practice some suturing! At first, it was difficult for me to guide the curved needle with the needle driver. After I was taught a few techniques and how to properly hold the needle driver by a physician, my suturing improved and I was able to practice suturing on an artificial uterus. [I may have poked my finger with the needle during my first try ? ]
User Needs Identification
Our focus for this week was user needs identification. We found numerous areas at the hospital and clinic where we identified user needs. Our goal as a group was to address an observed problem among an audience in order to achieve an outcome. Continuing with the blood loss estimation process we can identify the user needs.
- A means of calculating blood loss during surgery for OR staff in order to avoid estimation errors. (very broad statement)
- A means of calculating blood loss during OB/GYN surgeries for OR staff in order to avoid estimation errors. (narrows down to type of surgeries)
- A means of calculating both accurately and efficiently the amount of blood loss during OB/GYN surgeries for OR staff in order to avoid future blood transfusion errors. (describes that calculations must be accurate and efficient and specifies future outcome)
Hysterectomy
Asra Mubeen Blog
We were scheduled to observe a 2.5-hour surgery with Dr. Ramanathan. However, this surgery ended up being about five hours. The surgery was a laparoscopic assisted hysterectomy. The resident informed us that it was not unusual to have a longer hysterectomy than expected. The patient was obese so it was difficult for the physician to access the uterus thus prolonging the procedure. We were able to observe the laparoscopic part of the procedure but our view was somewhat obstructed by the medical staff for the actual removal of the uterus. We did notice one recurring issue during the procedure. The attending used a weighted speculum that was difficult for the physician to position in the cervix. Also, the weighted speculum slipped out a total of four times during the procedure. Finally, a long arm weighted speculum was found in the other OR which was easier to position but even this slipped. Part of the reason for the slipping could have been the high BMI of the patient. Other than this issue the surgery was successful.
Obstetrics Simulation Lab
Asra Mubeen Blog
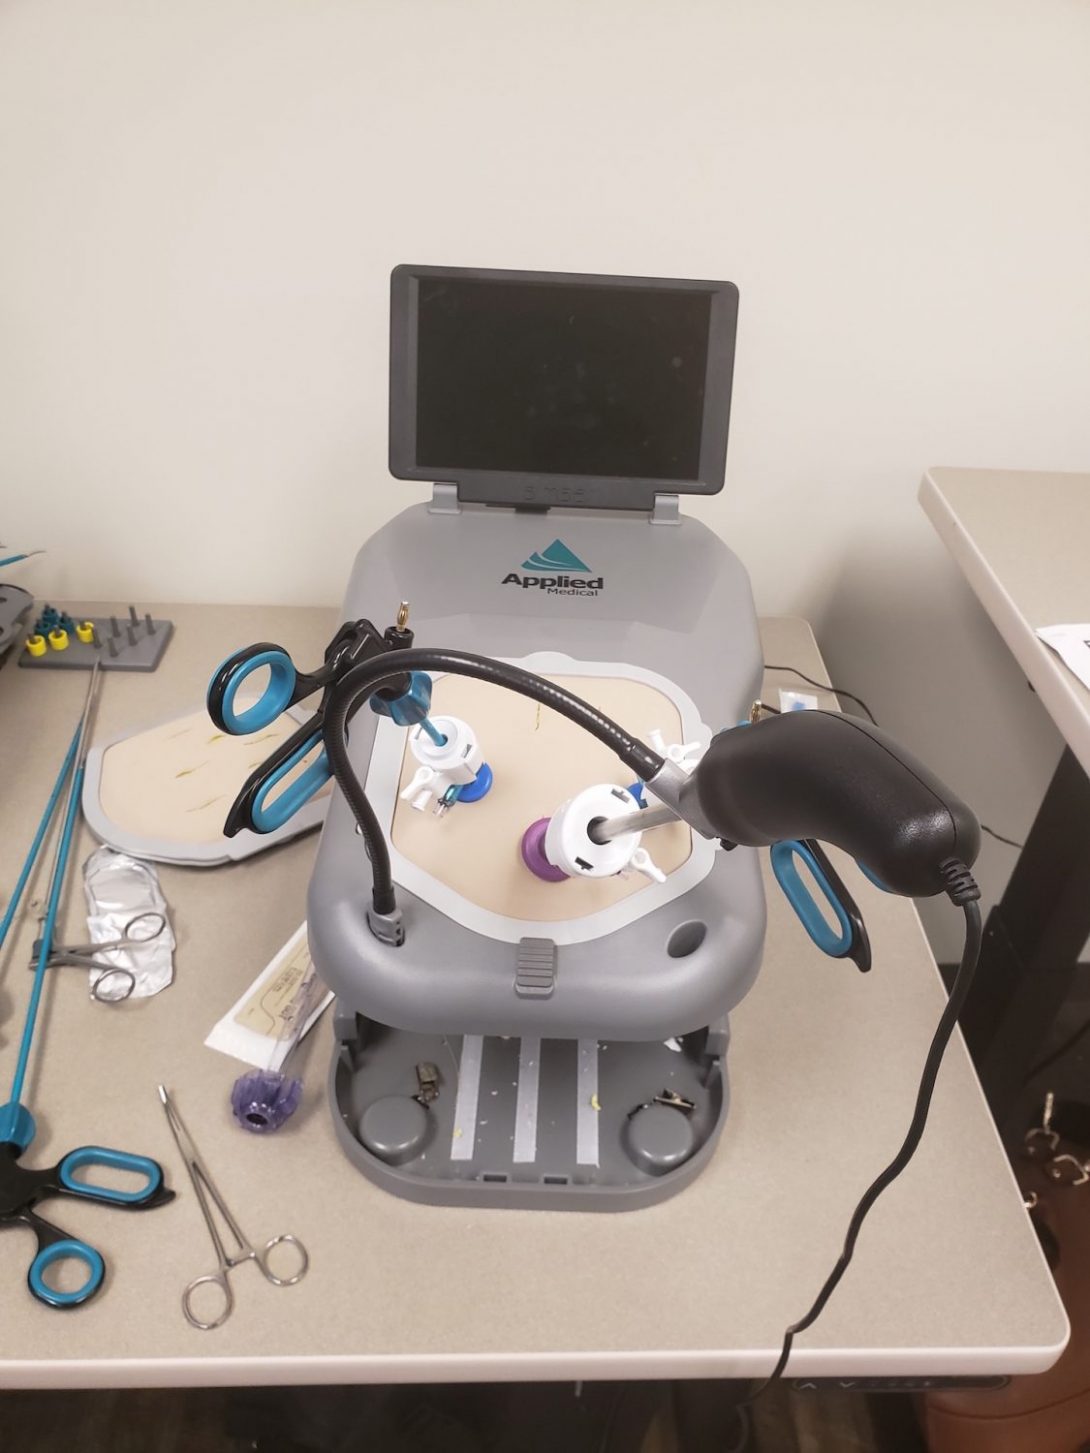
Dr. Ramanathan introduced us to a simulation lab across her office. Here, we had the opportunity to practice a few procedures with her help. My favorite procedure was using the laparoscopic tools to imitate a laparoscopic oophorectomy. The laparoscopy procedure was similar to playing a video game. You had to make sure that your hands and arms were really stable and your eyes were glued onto the screen. Even though when you’re observing a laparoscopic procedure it seems really easy but when you try it, you learn that it requires a lot of practice. In reality, you are conducting the procedure over a very small operative field and your dexterity becomes important. I really enjoyed this hands-on practice and it became addicting to keep trying until you had the perfect grasp.
Ultrasound with Dr. Zamah
Asra Mubeen Blog
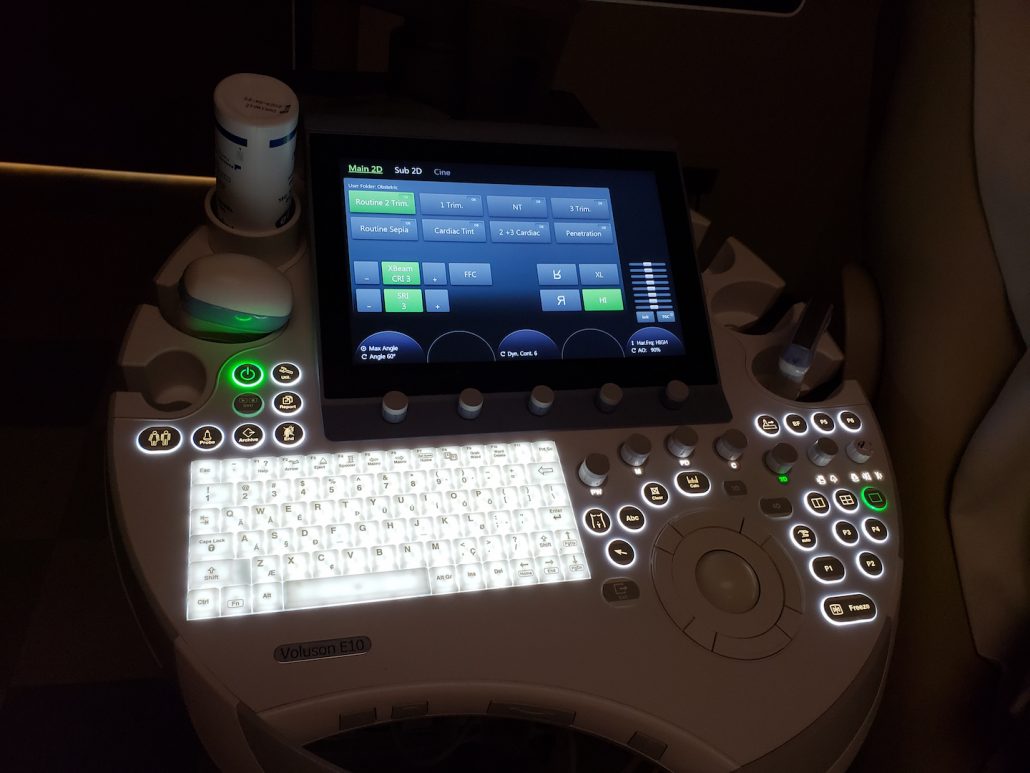
Today at the clinic we were assigned to work with another attending, Dr. Zamah. He is one of the most energetic physician I have met so far. He was excited to hear that we were working on designing a project to improve the OB/GYN practice. He suggested many ideas to us for our project. We had the opportunity to observe a few SIS tests that he performed. I was surprised that a simple solution like saline was used during the test to help make the ultrasounds reports clearer to read and observe any abnormalities. Finally, it became easier for me to understand ultrasound reports after he pointed a few things to us.
Week 4: Design Specifications
Asra Mubeen Blog
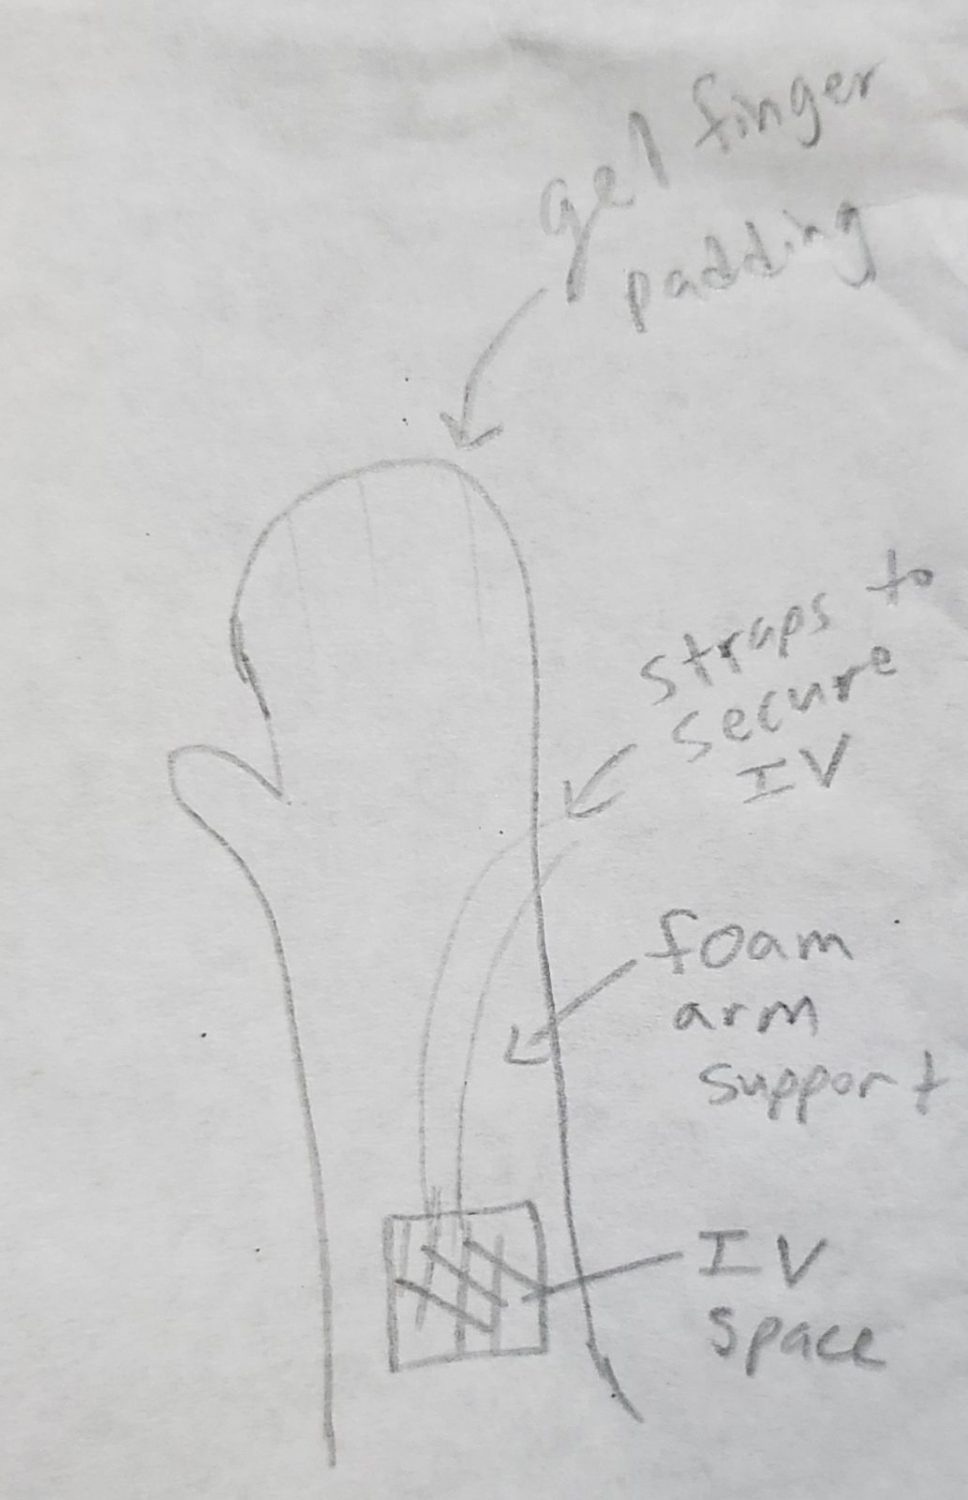
This week we began to narrow our ideas to finalize one project we would work on for the remainder of this program. We had a meeting with Dr. Ramanathan at the end of the week where we presented our top 20 need statement ideas to her. She chose a few of those ideas that she preferred. Then, as a team we selected a need statement we were all interested on working.
Typically, before a GYN surgery a few minutes are spent just setting up for the procedure. These valuable minutes can be used elsewhere during the procedure’s set time. The longest part of the set-up is the upper limb support. The medical staff wraps the patient’s arms with gel, tape, towels, and lots of egg-crate foam. This process is long and many different materials are used as listed. We also noticed that it is not always effective either. During the procedure, we have noticed that the wrapping unravels causing the upper limbs to slip off the bed.
We discussed a few specifications as a group for this need. Our design should be unobtrusive meaning it should provide easy access to IV and is not an obstruction during the surgery. It should also be intuitive enough for a faster set-up. More importantly, it should be effective. The design’s purpose is to prevent skin injuries and minimize pressure points during lengthy procedures. We sketched a few designs and concluded that the mitt design would work the best. [see sketch for design]
Week 5: Conceptualize
Asra Mubeen Blog
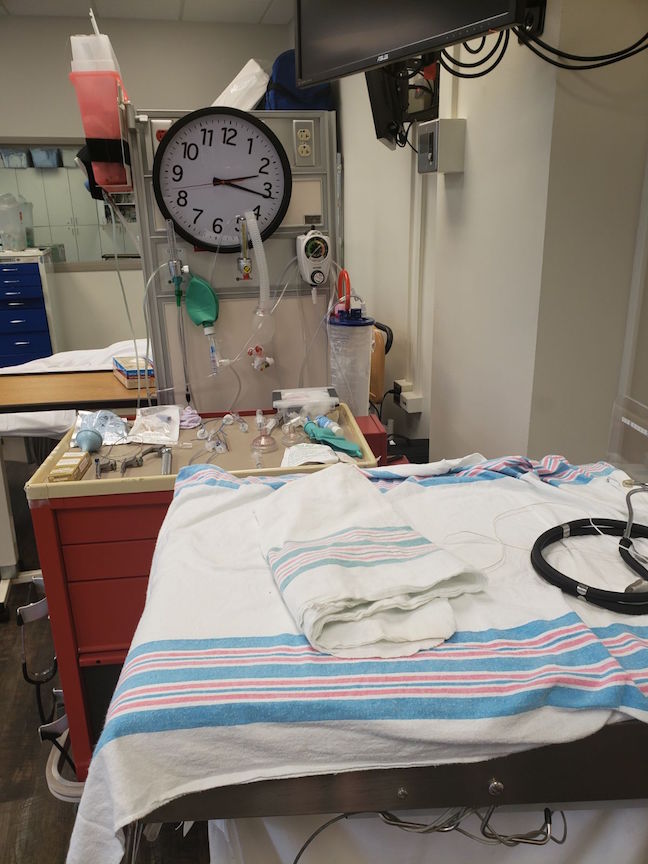
Even though we have already decided on a project to focus our designing and prototyping, this week we still continued to shadow Dr. Ramanathan and kept an open mind. At the clinic, we noticed that the computers were unusually slow that was stressing Dr. Ramanathan. I remember her even muttering “they are painfully slow today and my patients are waiting for me”. I wish we could help out with the computer loading situation. It was a good thing that the patients that we saw at the clinic this week were here for quick visits. One patient just wanted a referral and another one wanted to discuss about a pessary (device used to help with uterine prolapse by holding the uterus up when pelvic muscles are weak–usually weakened by obesity or after many deliveries). I also got the chance to observe some LEEP procedures, pap smears, and colposcopy. From my observations, I can say that these procedures are very PAINFUL. I heard patients yell phrases like “I already want to quit” or “stop, please stop!”. The residents explained to me that only some anesthesia can be used because these are short procedures and sometimes it becomes difficult to reach certain areas of the pubic area to anesthetize. Lastly, Dr. Ramanathan taught me how they insert IUDs at the clinic using a demo kit. I then practiced on the demo kit a few times with the help of a medical student.
Our last day at the OR, we observed a tubal ligation. This was a 30-minute procedure and nine minutes of those were spent on setting up the upper limb support. Gel, blanket, and foam were used to wrap around the arm. They even had to redo the right arm because the first time it was not positioned correctly. This OR observation proved to us that there was definitely a need for our design. We spent the remainder of our week discussing about our project design and the materials needed for it. We went through a few iterations with Dr. Ramanathan before we finalized a design.
Last Week NOOO
Asra Mubeen Blog
Sadly, this is our last week of the internship. Our team spent most of the time in Labor and Deliver testing and adjusting our prototype. We discussed about the materials we would use and explored some material types at the innovation center. Our prototype is ready to be presented. I had an amazing time with my team observing procedures and identifying user needs in the OB/GYN department. I am really glad that I had the opportunity to be a part of this amazing program. Special thanks goes to Dr. Ramanathan for joining this program this year and having us join her! She has been really supportive and resourceful during this internship in making sure that we understand enough of the medical terminology to understand each procedure. Also, thanks to all the mentors of this program who were really helpful in teaching us about the designing process! (Photo courtesy of Michael Zhao)
Lara Nammari

Lara Nammari Blog
Lara Nammari Blog
Week One Notes
Lara Nammari Blog
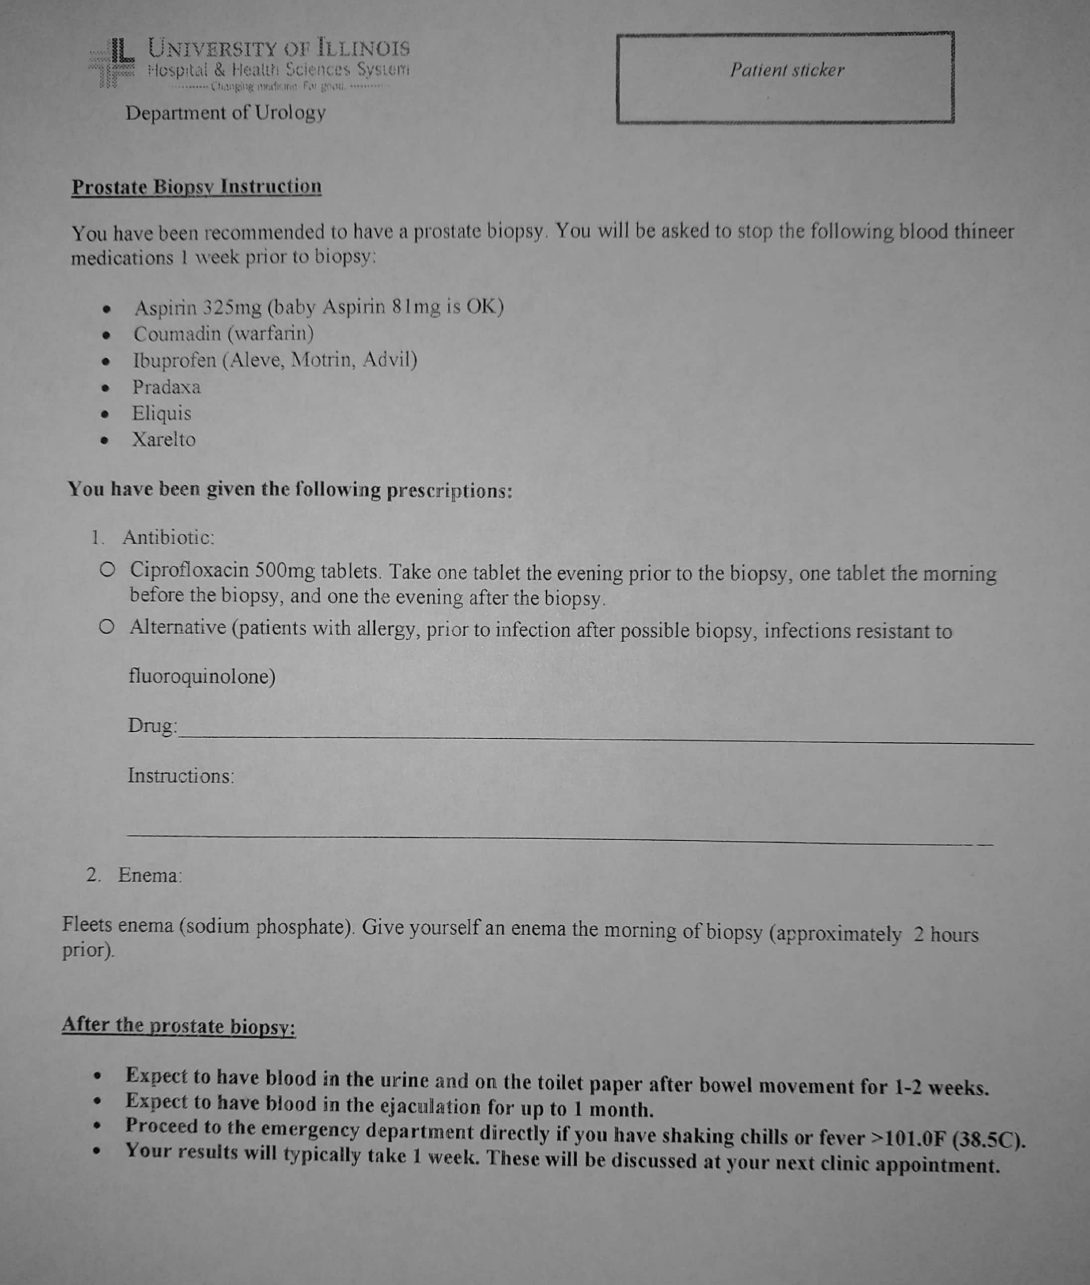
This week in Urology I spent most of my time in the clinic. There were routine procedures that patients weren’t properly preparing for. For example when a patient is scheduled for a prostate biopsy I noticed that they weren’t taking the antibiotics or preforming a fleeting enema. This causes delays in the clinic. The delays resulted in other patients waiting an hour or more to see a doctor, the doctors skipping lunches, and the waiting room being crowded. This can cause stress for doctors, patients, nurses and front desk associates.
The directions for the biopsy are written in bullet points. The patient is supposed to take one antibiotic pill the evening before the procedure, two hours before the procedure and the evening after the procedure. When I asked the doctors why the patients don’t prepare properly I was given a few answers.
- The patient forgets to pick up the prescription for the antibiotics
- The patient thinks that a prescription is needed for the enema and so does not get one over the counter
- The patient takes the incorrect amount of pills
- Ex. The patient took two pills the night before and one before the procedure, so there are none left for the evening of the procedure
- The patient forgets to take the antibiotics
- The patient has so many appointments they forgot why they have an appointment
This is just the doctors’ perspective. Maybe the patients were too uncomfortable using a fleet enema? In the next few weeks I will try to find out the patients perspective. I think there could be an easy solution to this problem that has the potential to make the clinic run more on time. Dr. Abern believes that a step by step animation would help patients better understand the instructions. We will try to create one and test it in the clinic.
Week Two Notes
Lara Nammari Blog
I noticed that during transurethral resection of the prostate (TURP) surgery the attending alerted the nurse that the irrigation fluid bag was empty. This was a problem since TURP requires irrigation fluid on demand. After getting feedback from a surgeon, he felt that the nurses should pay more attention to the level of fluid in the bag. However, I want to spend next week storyboarding with some OR nurses to see what their experience in surgery is like. Once I have a complete understanding of what is going on in the OR it will be easier to identify pain points leading up to the irrigation bag being replaced.
As a team we created a storyboard using the patient perspective of a prostate biopsy. I bolded the pain points.
-
- PCP appointment
- Doctor misdiagnosis
- PCP referral to specialist
-
- High PSA levels
- Abnormal prostate exam
-
- Insurance coverage
- Medical records requests
- Call specialist to make appointment
- Weeks/months in advance
- Long waits on phone
- Resident performs prostate exam
- Uncomfortable patient
-
- Attending decides if prostate biopsy is needed
- Biopsy can cause or worsen erectile dysfunction and nocturia
- Infection risk
- Information about biopsy is presented
- Medical jargon
- Form given to patient about prep instructions
- Patient makes second appointment
- Scheduled a month after initial appointment
-
- Picks up antibiotic and enema for biopsy
- Take one tablet the night before
- One tablet 2 hours before with enema
- One tabet the night after
- Complicated steps
- Patient forgets to take tablets
- Takes too many tablets in a day
- If not prepared cancel/delay appointment to avoid infection
- Picks up antibiotic and enema for biopsy
- Show up to clinic for biopsy
-
- Change into gown/position body
- Uncomfortable/vulnerable
- Receive local anesthesia and probe/ultrasound inserted
- Painful
- Hard to navigate probe
- Sample taken
- Loud alarming sounds
- Change into gown/position body
- Ice area and rest for 48 hours
- Blood in urine, bruising
- Schedule appointment for pathology report
- Wait at checkout desk
- Discuss surgeries and treatment if pathology shows cancer
- Lack of pathology explanation
There are quite a few pain points for prostate biopsy that we will have to explore in more detail about why those pain points occur.
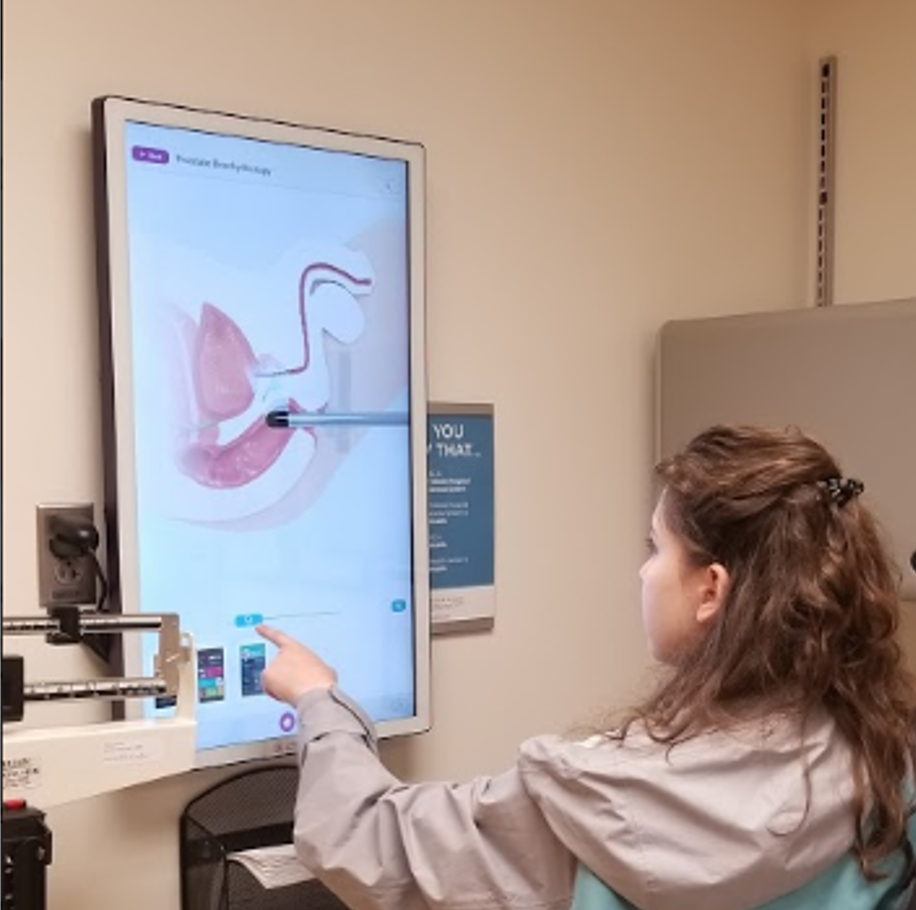
I noticed that there was a touch screen that showed the anatomy of any body part as well as an animation of popular procedures. One of those procedures was a prostate biopsy. I think it is a great tool that will make it easier for patients who don’t understand medical jargon to understand their own conditions and possible procedures.
The picture I attached above is the process of a biopsy explained using the touch screen tool.
Week Three Notes
Lara Nammari Blog
This week we focused on creating and revising need statements. This was difficult for me as an engineering student. A need statement cannot be solution driven in order to accurately assess the problem. As an engineering student I like the creativity that comes with solution designing. Lucky for me the urology department gave a lot of feedback and advice on our need statements.
I made a realization that was unsettling for me. When you are in the clinic it is easy to get stuck in statistics and technicality, rather than the emotions of the patient. We assumed that the reason the patient wasn’t adhering to prostate biopsy prep was due to confusion of instructions. I totally forgot how the patient must feel when they are told they need a biopsy since biopsies are used to diagnose cancer. I forgot the human emotion side of medicine.
Fortunately I was able to attend a group therapy session for cancer patients. It was hard to hear their experiences, but I learned a lot about the patient side of cancer that helped balance our need statements. The patients all agreed that they didn’t remember the appointment where they were told they had cancer. They were still processing the idea of cancer while the doctors were trying to discuss treatment options.They also all agreed that group therapy really helped them feel empowered and learn more about how to deal with the different aspects of being a cancer patient.
This lead us to the need statement:
A better way to lead men with positive prostate biopsy than standard of care that provides higher usage of social services, mental health counselors, and support groups.
Being in contact with people who can help patients cope with the diagnosis can improve the quality of life for cancer patients.
Week Four Notes
Lara Nammari Blog
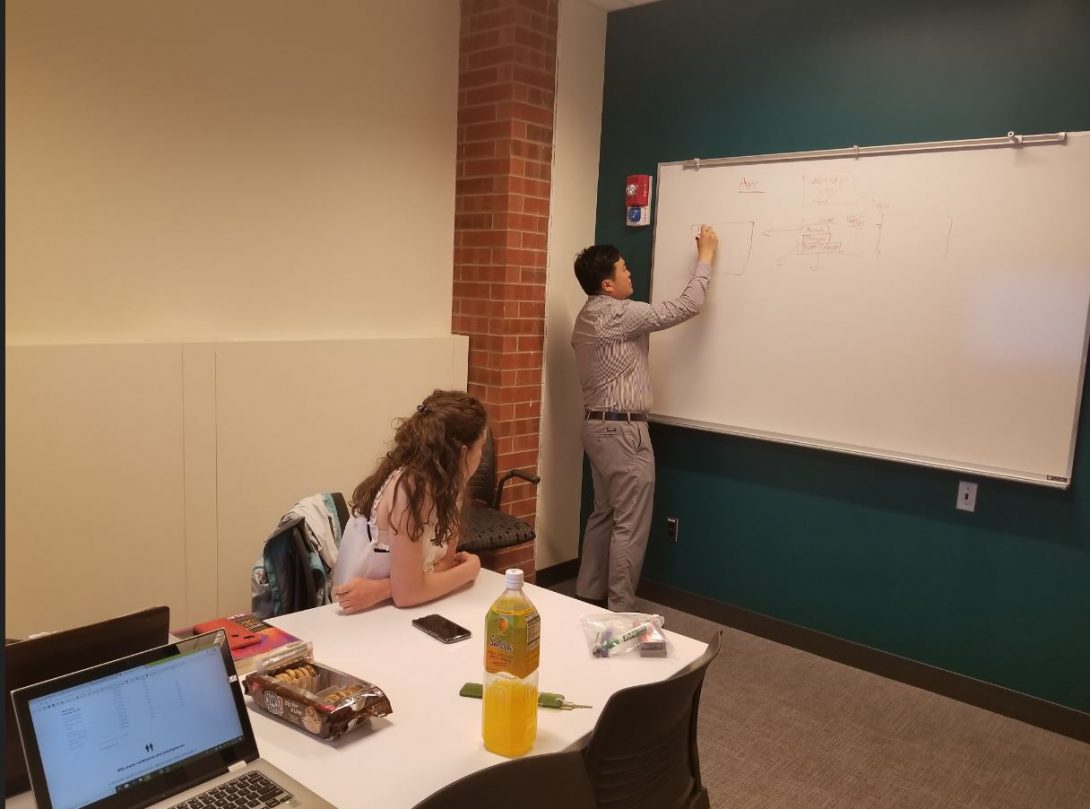
This week we focused on creating high level specifications for our need statement. We decided to explore changing the way medical records are changed between clinics. We first observed this issue when in the clinic, the MAs must requested medical records to be sent over from a primary care physician before scheduling appointment at the urology clinic. The missing medical records resulted in delay of the patients care. One of the physicians said that they will receive the entire patient history file from the previous physicians office and the urology physicians then have to spend time filtering through those irrelevant records. The Miles Square clinic had received a patient history file 200 pages long. One of the Miles Square MA said that it can take a week to get medical records faxed over to the urology clinic. We also checked out the neurosurgery department to see if this process of getting medical records. The neurosurgery team said that the patients bring in their own imaging on the day of appointments. We thought there had to be a better way of transporting records.
Our need statement: A better way to obtain relevant historical medical records for new patients as measured by decreased appointment cancellation/delays and need for repeat imaging.
As a team we discussed the high level specifications for this problem.
- HIPAA Compliant
- Does the solution adhere to HIPAA
- Reliable
- Is the solutions reliable to present the information as needed?
- Security
- Does the solution work interoperably between different healthcare systems
- Ease of Use
- Is the solution easy to use
- Economically viable
- Is the solution economically viable
- Accessibility
- Is there equipment needed to access the data?
- Storage
- Does the device have enough storage?
Week Five Notes
Lara Nammari Blog
This week we further developed two ideas and presented to the UroLab to get feedback. I also presented the ideas to the providers in the urology department. I really appreciate this opportunity to identify problems and come up with solutions while getting immediate feedback from the user. We are learning that it is an iterative process. Most of my time in this internship has been focused on identifying problems and writing great problem statements. The solution comes out of the problem statement, so it must be effective.
Divinefavor Osinloye
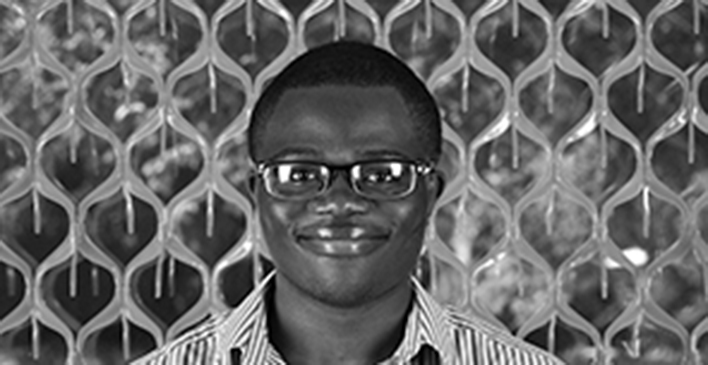
Divinefavor Osinloye
Hello! My name is Divinefavor, and I’m currently 21-years-old. Also, I’m a first-generation, Nigerian-American student, currently about to complete my senior year in bioengineering for my bachelor’s degree at the University of Illinois at Chicago (UIC). My parents won a visa lottery two months before my twin (Prosper) and I were born! We flew (still in our mother’s womb) to America – just in time to be born as natural-born U.S. citizens. Moreover, we were born in Cook County Hospital, now “John H. Stroger, Jr. Hospital of Cook County”, in Chicago, Illinois on May 8th, 1997. Our younger brother, Victor, was born a year and a half after my twin and I, and our littlest brother, Praise, was born about four years after him. We moved from our apartment in Noble Square to our house in Romeoville in 2002, after our littlest brother was born; our father wanted us to have better opportunities in education, as well as a better schooling environment (As you can see, I like to use a lot of parentheses in my sentences)!
Outside of my classes and internships,
I enjoy cooking Nigerian and American dishes, I play the trumpet and some piano, I compose my own television theme songs (and love songs), I enjoy watching inspirational real-life and animated television shows and movies, and I’m a big Jesus’ boy.
That being said, I’m very excited to participate in the Clinical Immersion Program because I get to receive insight from real doctors, nurses, and bioengineering companies. I love to be creative in anything I’m doing, and I hope for that creative energy to transfer over to bioengineering designs. Given the opportunity, I also hope to learn from my peers in this program.
Divinefavor Osinloye Blog
Divinefavor Osinloye Blog
Week 1 Blog (Long version)
Divinefavor Osinloye Blog
Introduction
This past week, I have been directly exposed to about three or four live surgeries in the department of Cardiology per day. Some of the surgical procedures that took place included the Trans catheter Value Replacement (TAVR) Procedure by Dr. Grooves, Atrial- Flutter Ablation by Dr. Wissner, Chronic Total Occlusion (CTO) by Dr. Zippor, and the “Left and Right Heart Coronary Artery Cath” by Dr. Grooves. I was also privileged to have the opportunity to dress in scrubs and a lead coat, and even be able to stand next to the doctor as he was operating with the patient.
“You look like one of us,” a nurse remarked.
However, there were some operating rooms that were tightly spaced, so I did not want to the doctor while he was performing the operation. Therefore, so the nurses assisting the doctor would answer my questions during the live surgical procedures. However, the doctors were super nice and were willing to answer my questions once they had finished. Dr. Wissner, my mentor for the Clinical Immersion Program, even explained step-by-step what he was doing as I stood directly next to him. I really appreciated him for this, as he also let me ask any question I wanted.
Activities- What are people doing?
As you can see, there are many surgical procedures that can done in the Cardiology labs. That being said, cardiologists generally works hand in hand with an assistant doctor the operating room during a given procedure. Moreover, two nurses help the doctor to unseal or wash the materials (unique catheters, pipes, guide metals, scissors and more). Also, one or two anesthesiologists attend at to the patient, monitoring his heart rate and blood pressure, as well as encourage the patient to relax and that he is “doing a great job”. Two more nurses are behind a window, in what I call the “monitoring room”. Here, the two nurse document any material that is used or exchanged, as well as info on the patient (ex. Pulmonary Capillary Wedge). Furthermore, they record info about the patient’s stress test, the patient’s diagnosis, and the doctor’s surgical technique into a computer called “Camtronics”.
Each surgery could last more than an hour, and there were times that I had to shift my feet. Thankfully, the nurses were nice and brought me a stool to sit on! Therefore, one would see nurses resting on stools from time to time.
Once the surgical procedure is completed, the doctor collaborates with the two nurses in the monitoring room and writes a report on that surgical procedure.
Environment- Where are they doing it?
Moreover, the primary settings of operation include the Echocardiogram Lab, the Catheterization Lab, the Operating Room and the Electrophysiology Lab.
Interactions- How are people/artifacts engaged?
It took quite a few surgical cases to finally have an idea of what a cardiologist is generally trying to do, but after asking the nurses, I’ve been able to conceptualize a general structure of interaction for each surgical case:
Two nurses roll in the patient, place him on the procedure table, shave his pubic hair, wipe his body, cover a green blue sheet on his chest and pubic hair, place blue sheet covering on the body, prepare sterile materials for the doctor, dress the doctor, and protect themselves with a heavy lead sheet. Then, an X-ray (or ultrasound) device hovers over the patient’s chest area.
“I make sure the doctor has everything he needs”, said one nurse, “and that he is not kept waiting.”
The doctor’s hand, for the most part of the operation, is always “glued” to the catheter.
The anesthesiologists are attending the patient at his head, ready to administer more sedative medicine in case the patient has pain, as well as encourage the patient.
Objects- What artifacts do you observe?
There are objects that are commonly used in all these labs. Specifically, the Camtronics is a dynamic computer device takes note of the patient heart rate, blood pressure, SpO2 concentration, and more. Moreover, the two nurses in the monitoring room can easily record every intervention, diagnosis, exchanged material, and more in Camtronics, since Camtronics has a menu-list feature for the nurses to choose from. These nurse also speak through a speaker, in which they are able to communicate with the doctor in the operating room, and they are able to see the X-ray of the snapshots of the patient’s heart during the doctor’s intervention.
Moreover, the doctor has a six computers (in a two by three format) where he can view the X-ray of the patient’s heart, which can be detect from an X-ray/ultrasound device hovering over the patient’s chest. He uses some type of catheter to access the entire aorta and coronary arteries, and he has tablet of control handles that he can turn to move these devices and the table of his patient to a desired angle atrium and ventricles.
There also were notable “good” designs and “bad” designs. An example of good designs were catheters. Specifically, Dr. Wissner demonstrated some of the cool features of his ablation-catheter during the Atrial-Flutter Ablation Surgery. After this point, I was able to get a solid understanding of how a basic catheter works: Each catheter has a guide metal that can bend and flex in a desired direction by the push of a lever. On the front of the tip of the catheter is a “balloon”. When this balloon is inflated, it dilates the blood vessels. Finally, each catheter has a “cobalt-chromium” stent that basically holds the blood vessel open so that blood flow is not constricted and blood clots will not form. Specifically for the Atrial-Flutter Ablation Operation, Dr. Wissner used an ablation-catheter. The patient had a right atrium that vibrated so quickly that the blood flow “looped” endlessly, barely even passing into the left ventricle. Therefore, Dr. Wissner used the ablation-catheter, which had electrodes on its tip that could release heat to burn the tissue of the right atrium walls. He used it to draw an ‘ablation line” on the lower wall of the right ventricle. This was in order to prevent the abnormal blood flow from reoccurring again. Moreover, Dr. Wissner said that this ablation line would disturb that blood flow loop and cause the blood to flow to the normally through the atrial valve. Also, two representatives from Boston Scientific were in the “monitoring room”, and they showed us their company’s computer mapping system that was recording all the probing movements that Dr. Wissner made with his Ablation-Catheter in the patient’s right atrium. By the time Dr. Wissner was finished with the surgical procedure, there was a 3-Dimensional model of the patient’s right ventricle and surrounding tissues! Relative to the Ablation-Catheter, the Glide Scope is a “bad” design. For example, my group and I witnessed two Transesophageal Echocardiogram procedures this past week, in which a specialized probe containing and ultrasound transducer was injected into the patient’s mouth, and the camera on it allows the doctor to view what is happening in the heart, since the esophagus “sits behind the heart”. On the first occasion, however, a doctor attempted “eight times” to insert the Glide into the patient’s mouth. However, the Glide failed to enter the esophagus, so the procedure was aborted. “Number one rule in medical school- cause NO harm!” the doctor said. This doctor claimed that that one of the factors that lead to failure of the procedure was due the patients anatomy of her neck (she was obese and had excess adipose tissue in her neck obstructed the glide from passing through).On the second occasion of the Transesophageal Echo, however, there was still difficulty with inserting the glide into the patient, who was much “thinner” relative to the first patient. As a result, the supervising doctor had to intervene. He managed to insert the device, but a noticeable amount of saliva mixed with blood came out of the patient’s mouth.
Users – Who is in the environment?
To reiterate the previous paragraphs, there is one doctor, who works hand in hand with an assistant doctor. Together, they collaborate with one or two anesthesiologists, to notify whether the patient is having pain or is keeps moving. Two nurses help the doctor to open and wash the materials (unique catheters, pipes, and more) he needs. Also, one or two anesthesiologists attend at to the patient, monitoring his heart rate and blood pressure, as well as encourage the patient to relax and that he is “doing a great job”. Two more nurses are behind a window, in what I call the “monitoring room”. Here, the two nurse record info about the patient’s stress test, the patient’s diagnosis, and the doctor’s surgical technique into a computer called “Camtronics”.
Highlights and Conclusion
A highlight of this week was the CTO procedure. It took place last Friday, and I was intrigued to find out that very few doctors are specialized to perform this procedure (to be explained on another blog post).
Another highlight was getting to meet Dr. Rose Gonzalez, who showed us cool bioengineering pace-makers that she diagnoses to her patients. Some of the companies of these pacemakers include Boston Scientific, St. Jude and Medtronic. With that being said, Dr. Gonzalez was very welcoming; she showed us a lot about her work, and she also was very kind and down to earth (plus, I think she just finds my group and me adorable!)
Overall, I have learned a lot this week about how the flow of the heart works, and all the nurses and the doctors were nice and willing to answer my questions. I look forward to the next week, now that I have a better idea on when to engage and ask questions, and when to just watch the procedure.
Week 2 Blog (Storyboard of a Typical Right Heart Catheterization Procedure)
Divinefavor Osinloye Blog
Here is my storyboard based on the observations I made last week of Right Heart Catheterization procedures. These procedures took place in the Catheterization Laboratory of the University of Illinois Hospital and Health Sciences System:
One-Sentence Summary of Problem: Patient is diagnosed with heart failure.
One-Sentence Summary of Solution: Right Heart Catheterization Procedure is applied to observe the patient’s heart pressures.
Storyboard
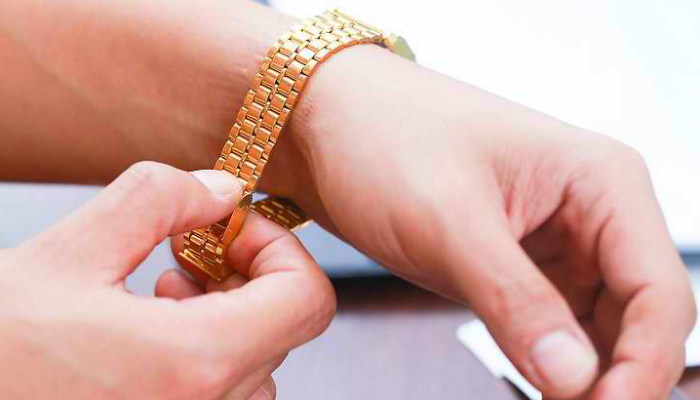
Step One: Remove any jewelry or objects that will interfere with procedure.
Divinefavor Osinloye Blog
Links Cited: https://www.smarthomekeeping.com/wp-content/uploads/2017/07/measuring-metal-watch-band.jpg
Pain Points:
- Patient may not want to remove “good-luck” charms or religious objects that would help them to remain calm during the procedure
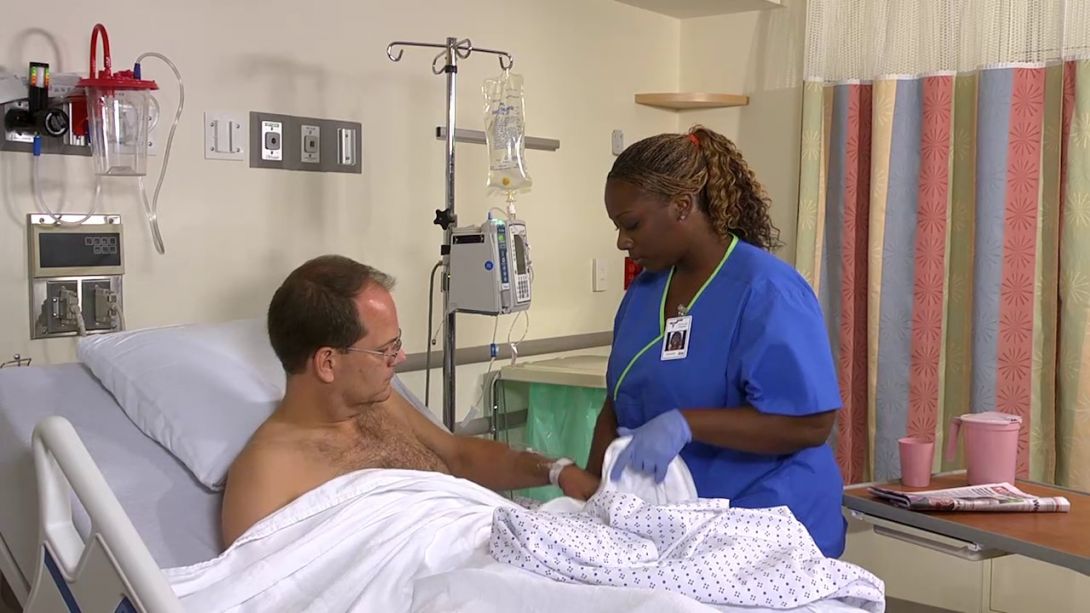
Step Two: Change into hospital gown and empty bladder
Divinefavor Osinloye Blog
(2)
Divinefavor Osinloye Blog
Links Cited: (1) https://i.ytimg.com/vi/g6PEzrOQzdo/maxresdefault.jpg
(2) http://coresites-cdn.factorymedia.com/twc/wp-content/uploads/2014/06/female-toilet-uti-icon.jpg
Pain Points:
- Patient is concerned for his or her privacy.
- Patient may have difficulty moving urinary (or bowel) system
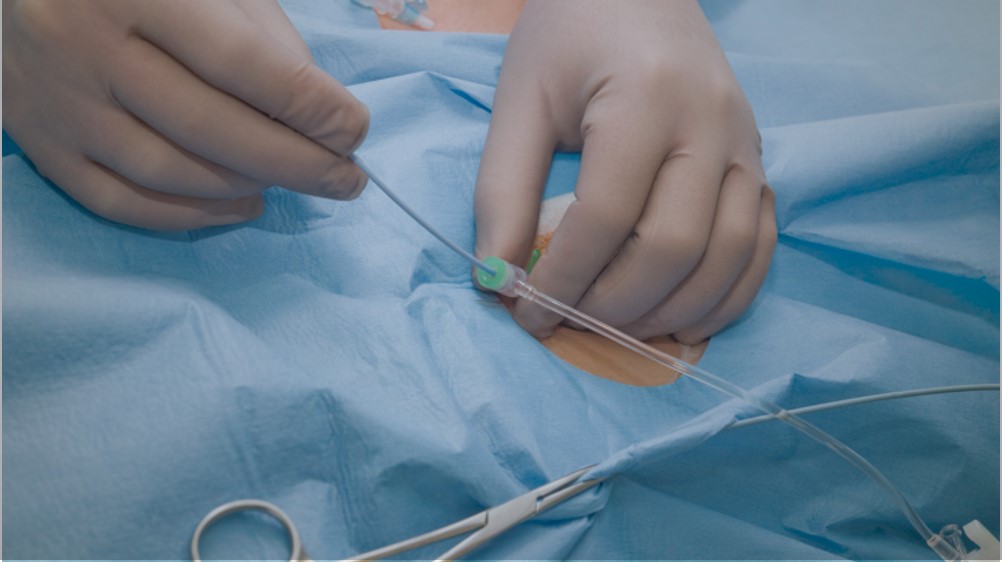
Step Three: Anesthesiologist will apply intravenous (IV) line in patient’s hand
Divinefavor Osinloye Blog
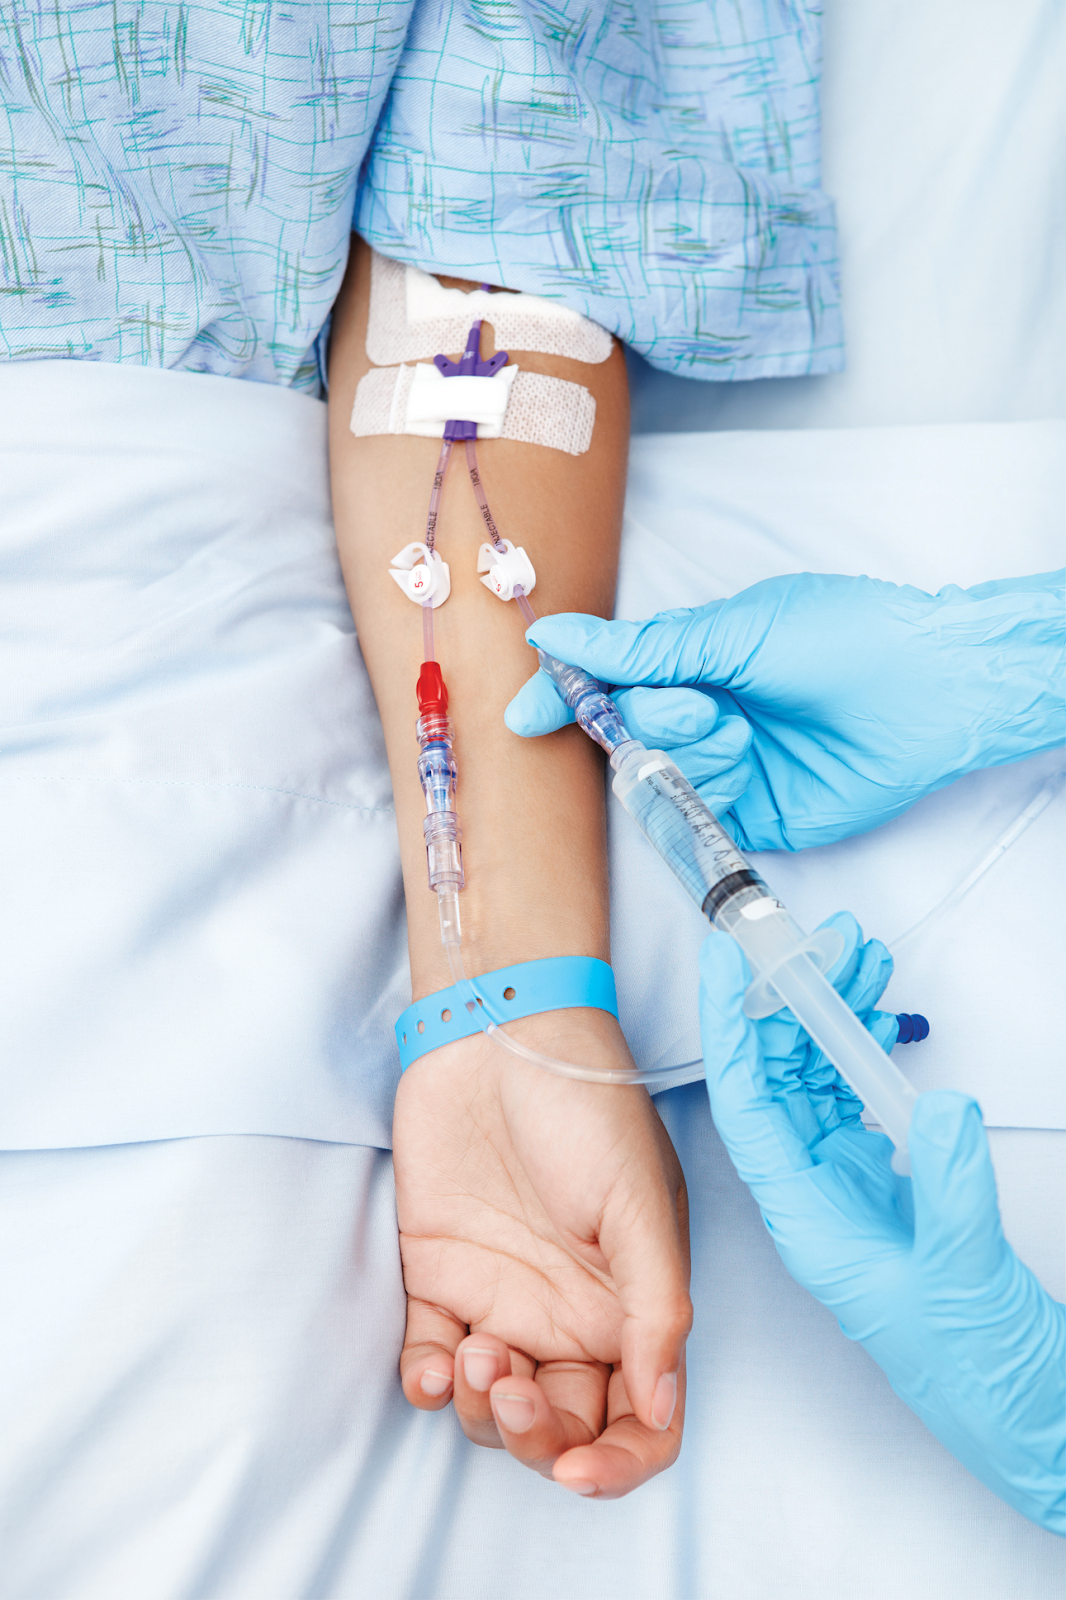
Links Cited: https://upload.wikimedia.org/wikipedia/commons/0/0d/ICU_IV_1.jpg
Pain Points:
- The anesthesiologist may have small space to work with (usually at the head of the patient), since the doctor needs as much space as possible for the procedure
Step Four: Patient should lie supine on back on procedure table
Divinefavor Osinloye Blog
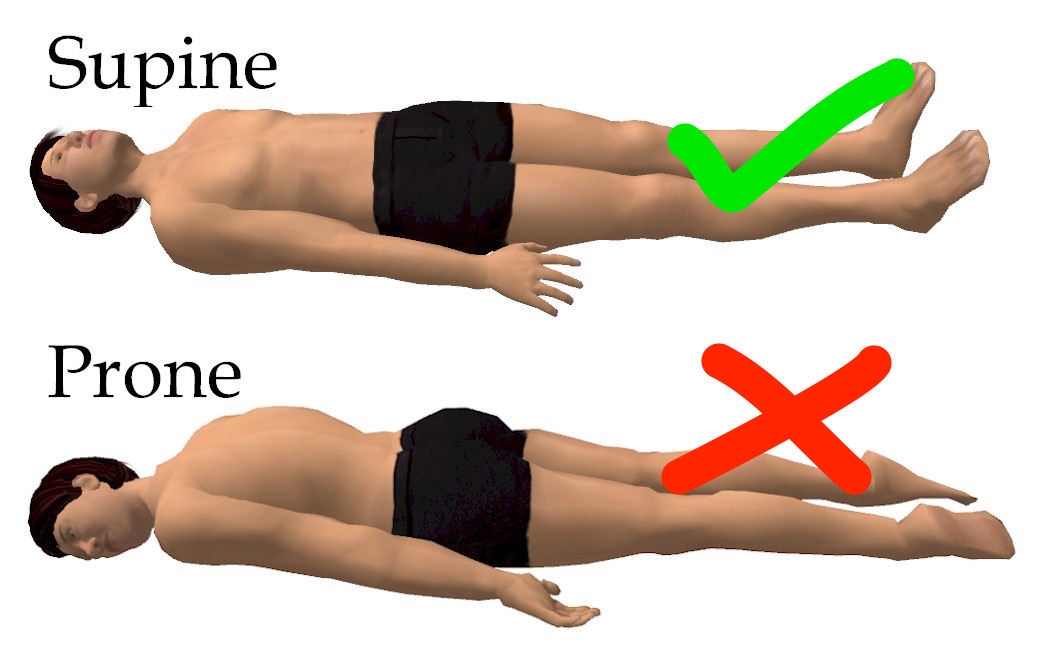
Links Cited: https://beyondgoodhealthclinics.com.au/wp-content/uploads/2015/07/sleep_posture_brisbane_supine.png
Pain Points:
- Patient may experience back pain as he or she lay on procedure table
- On one particular patient had an issue with her sciatic nerve, so she felt excruciating pain as she lay down
Step Five: Patient is connected on electrocardiogram
Divinefavor Osinloye Blog
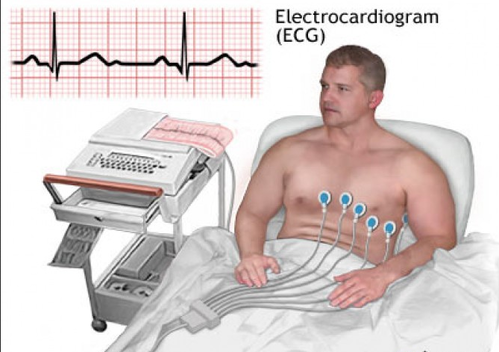
Links Cited: https://5.imimg.com/data5/KB/JI/GLADMIN-10702249/electro-cardio-gram-ecg-test-500×500.png
Pain Points:
- Patient may find the small, adhesive electrodes irritating to his or her skin
Step Six: Apply sedative
Divinefavor Osinloye Blog
Links Cited: https://i.ytimg.com/vi/X-EWklbJMzY/hqdefault.jpg
Pain Points:
- Patient may wake up a few times
- Anesthesiologist has the communicate with patient not to move, keeping him calm and applying more sedative and anesthesia
- Anesthesiologist is concerned about overdosing patients (especially, if they are elderly)
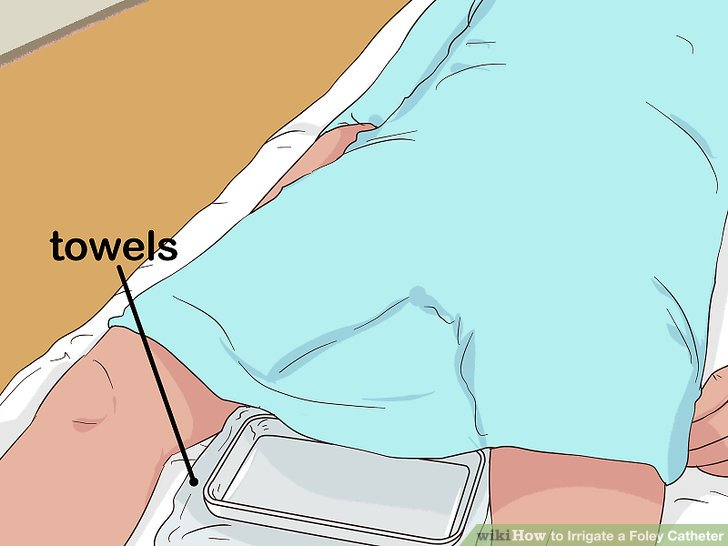
Step Seven: Place sterile towel over groin area
Divinefavor Osinloye Blog
Links Cited: https://www.google.com/url?sa=i&rct=j&q=&esrc=s&source=images&cd=&cad=rja&uact=8&ved=2ahUKEwjdgOuL-pDcAhWUn4MKHSz0BCMQjRx6BAgBEAU&url=https://www.wikihow.com/Irrigate-a-Foley-Catheter&psig=AOvVaw3NrCWB-y5HKyBYmznVicSZ&ust=1531189097862654
Pain Points:
- Patient is sensitive about his or her privacy
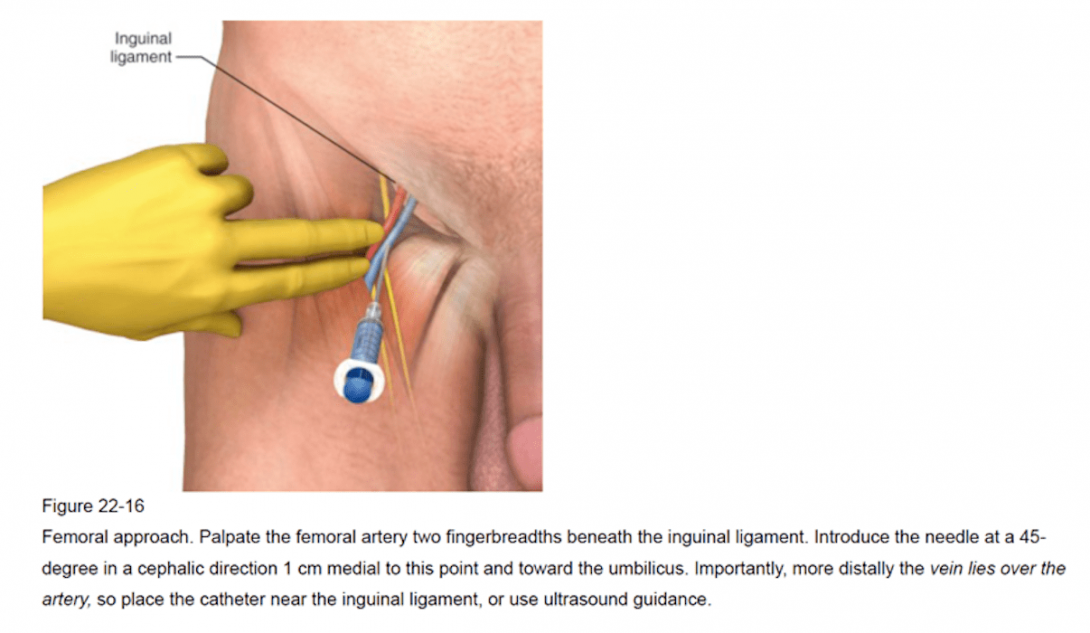
Step Eight: Clean and apply local anesthetic to groin area
Image:
Divinefavor Osinloye Blog
Pain Points:
- Doctor may have difficulty locating correct vein with needle
- Doctor needs to drain some blood out of vein to facilitate path of PA catheter
- Patient’s blood may gush quickly or uncontrollably
- Patient may feel burning or stinging when numbing medicine is applied
- Patient may feel pain from the pressure of the needle puncturing the vein
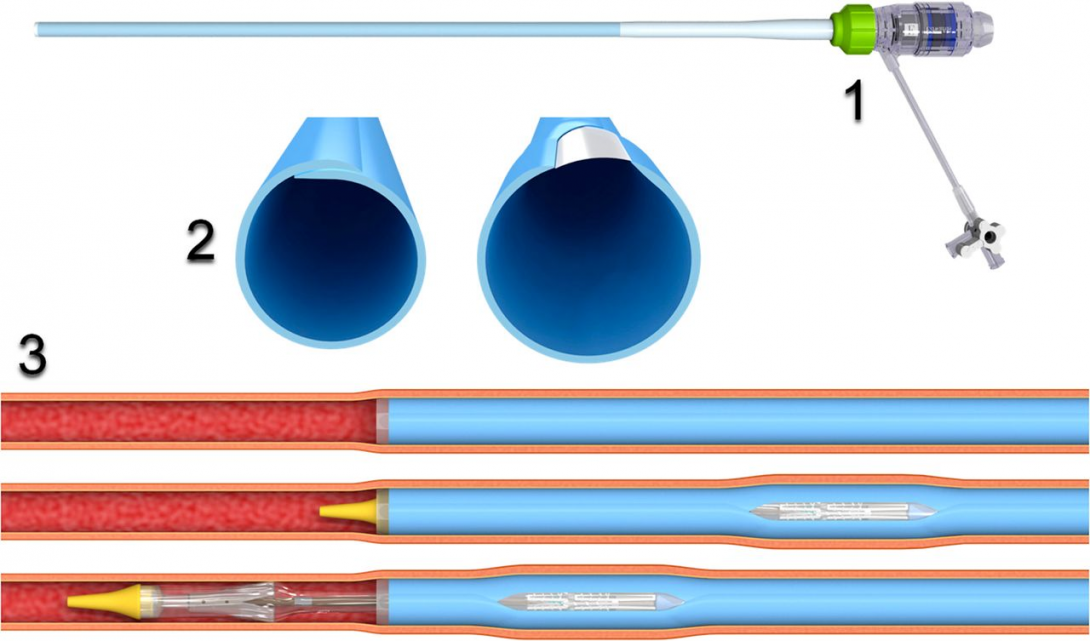
Step Nine: Doctor places an introducer sheath in vein
Divinefavor Osinloye Blog
Links Cited:
Pain Points:
- Patient’s blood may gush quickly or uncontrollably
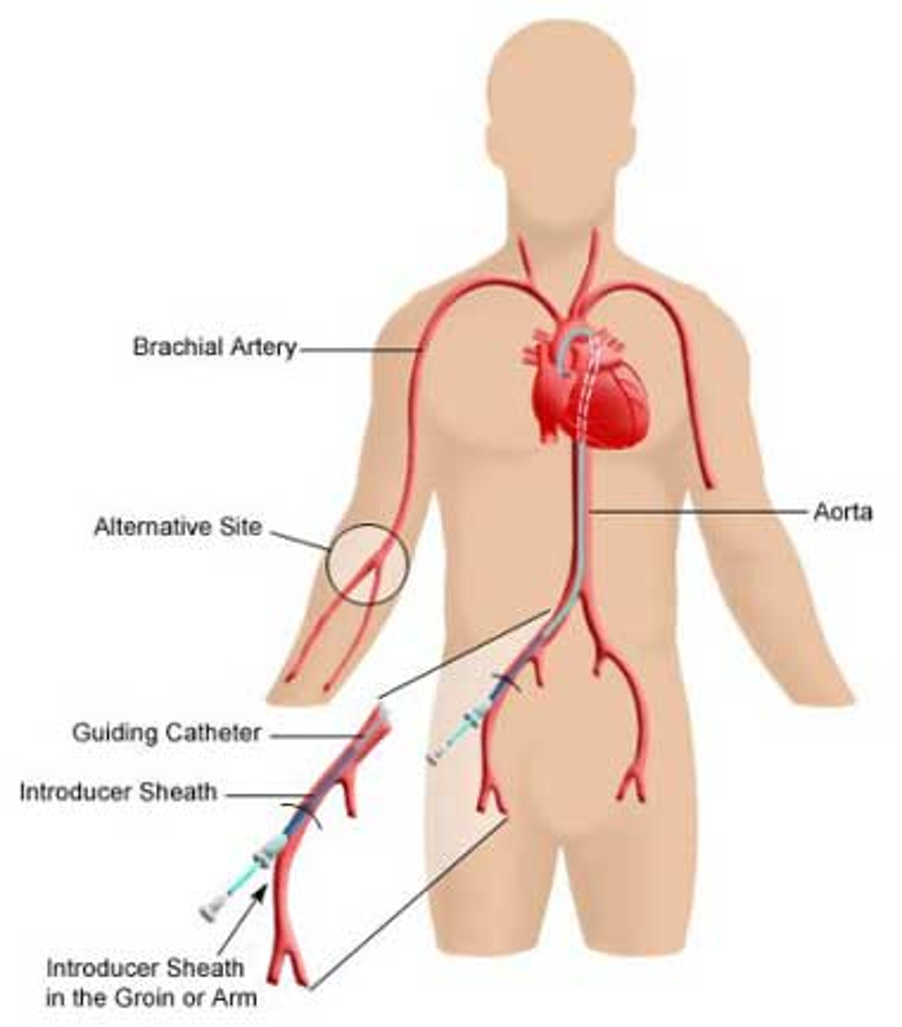
Step Ten: Doctor inserts Pulmonary Artery (PA) Catheter through introducer sheath
Divinefavor Osinloye Blog
Links Cited:
Pain Points:
- It may take the doctor some time to get the PA Catheter all the way through the vein into the correct vessel
- Doctor is concerned about puncturing vessels
Step Eleven: Measure heart rates
Divinefavor Osinloye Blog
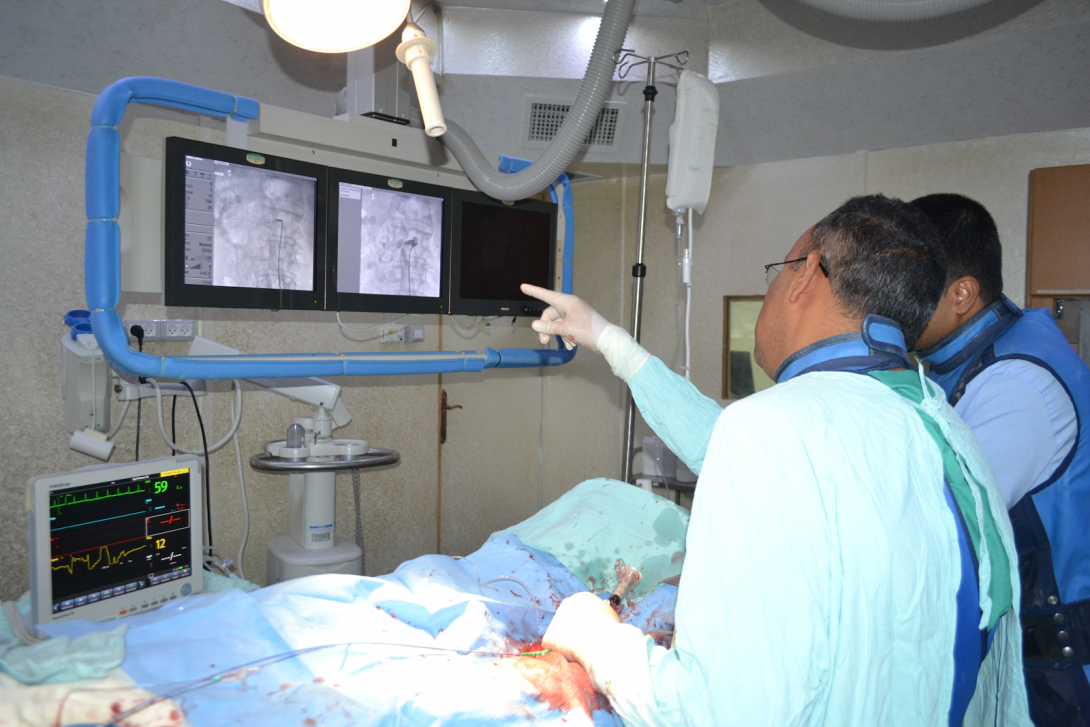
Links Cited: http://safa.ps/uploads//images/b39e45184e8f2112eca99445211bcfb7.jpg
Pain Points:
- Doctor has to get necessary info about heart pressures (increasing or decreasing),which could take an hour or more to do, depending on the severity of the patient’s condition
Step Twelve: All done! Remove catheter and introducer sheath
Divinefavor Osinloye Blog

Links Cited: https://cdn1.iconfinder.com/data/icons/social-messaging-ui-color-shapes/128/thumbs-up-circle-blue-512.png
Pain Points:
- Doctor does not want to puncture the veins while extracting the catheters
Divinefavor’s Week 3 Blog
Divinefavor Osinloye Blog
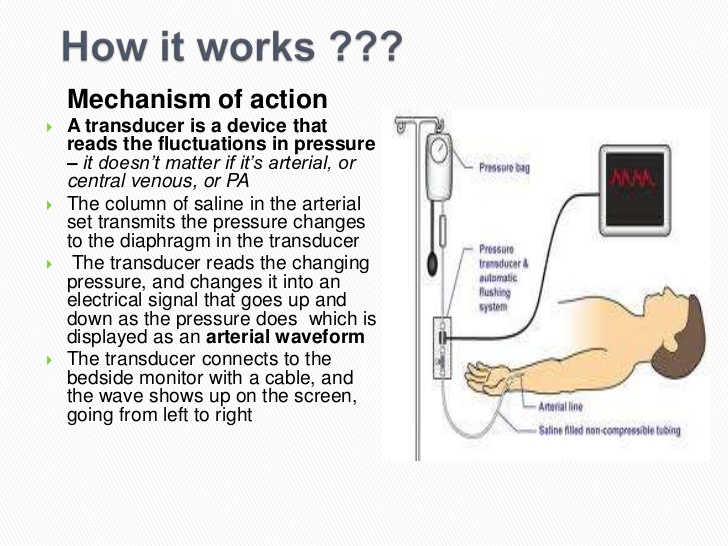
This week, my team and I listened to a nursing fellow in the Catheterization Lab of Cardiology department in order to identify what is truly needed to improve the work flow there. Based on her feedback, we have developed this needs statement:
First Iteration:
“Making it quicker and easier for an assistant nurse to set up a mid-axial transducer to line up to the patient’s mid-bracial.”
Second Iteration:
“Develop a device that will increase a nursing fellow’s efficiency in setting up a mid-axial transducer to be parallel relative to the patient’s mid-bracial.”
Reason for change (from 1 to 2): I changed “an assistant nurse” to a “nursing fellow” to better describe who we are aiming to help. Secondly, I changed “line up” to “parallel relative to” because it is less ambiguous. Also, I changed “quicker and easier” to “increase . . . efficiency” because it describes the purpose of our project more concisely and accurately. Finally, I included “Develop a device” because it better reveals what we intend to do to help improve the nurse’s workflow.
Third Iteration:
“Add an additional component to the mid-axial transducer that will assist the fellow in setting up a mid-axial transducer to be level relative the patient’s mid-bracial in a time-efficient manner.”
Reason for change (from 2 to 3): I realized that the primary complaint of the nurse we interviewed was that the doctor needs the mid-bracial transducer to be set up immediately and even before he starts a procedure, hence the addition of the phrase “time-efficient”. Furthermore, failure to do so may lead to the delay of the procedure, as well as criticism from the doctor. Also, I changed the phrase “parallel relative to” to “level” because “level” more accurately describes the goal of the nurse’s job in the scenario she described to us. Finally, I altered “develop a device” to “add an additional component” because it simplifies our project to something that is less costly but effective.
Clinical Immersion Program (Week 4 Blog)
Divinefavor Osinloye Blog
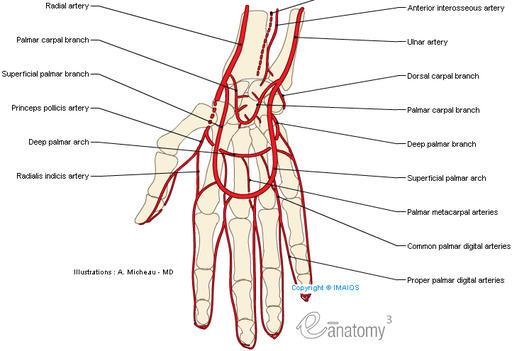
Needs statement
Optimizing accessibility of left radial artery in order to decrease doctors’ radiation intake, expedite patient recovery, and reduce possible dorsal weakening for doctors’ convenience.
Link: http://www.easynotecards.com/uploads/114/21/19a62d5a_15cf0d334be__8000_00000495.jpg
Design specifications
Based on the feedback of one of the doctors of the Cardiology faculty, the design should be made of a “soft” material (ex. Foam), for patients feel the effects of “hard material” during surgical procedures and are therefore agitated and complain afterwards. Furthermore, that soft material must be “spray able” by the nurses so it can be sterile for the next use.
Link: http://www.hospitalpatientbed.com/photo/pl15262068-waterproof_cloth_adult_hospital_bed_foam_mattress_for_bedridden_patients.jpg
Design criteria
According to the feedback from some nurses and doctors in the Cardiology faculty, they (the nurses and doctors of the Cardiology faculty) are looking for a “simple” design that is “cheap” and “easy” to set up. In other words, the design must be intuitive to set up for the patient and be easily detachable from and attachable to the operating table. However, the design also should not be “too expensive” to make or purchase. In addition, it must be comfortable for the patient, as well as be adjustable to the patient’s unique size. Finally, the design should provide optimized accessibility of the left radial artery for the doctor.
Figure 1: Photos of varying forearms sizes.
Link: https://us.toluna.com/dpolls_images/2015/05/24/a3262f34-18fc-4837-9aa0-ac69f13e4bfd_x300.jpg
Link: https://i.dailymail.co.uk/i/pix/2015/09/24/00/2C9A67E300000578-3246720-Sarah_s_elbows_were_lifted_with_PDO_threads_which_form_a_mesh_un-a-70_1443051884038.jpg
Link: https://media.istockphoto.com/photos/man-arm-with-blood-veins-on-white-background-picture-id623928092?k=6&m=623928092&s=612×612&w=0&h=5p3YdwCs7pQ4_mkDrtXDwc2Db_v69i6EbCPNwJcuVMA=
Divinefavor’s Blog Week 5
Divinefavor Osinloye Blog
This past week at clinics has been very productive, yet restful. Personally, I have developed more confidence in asking questions- even to the point that I was able to obtain consent to take more detailed pictures of the catheterization lab with a patient’s arm in it!
Moreover, our team was also able to conduct more interviews with a number of doctors in tge Cardiology department. Moreover, we gained helpful feedback and tips to take into consideration for our project on the left radial access for right-sided catheter procedures.
That being said, our team had a lot of different ideas on what could be done to solve the problem of left radial access for right-sided catheter procedures. The most challenging thing about it was deciding on which idea would be the most effective for our project. Despite this, we were able to finally reach a consensus on which project idea to embark on for our project. Furthermore, we even went to Michaels and Home Depot to look for materials we could work with to model our design; the rest of the modeling will be completed with SolidWorks.
Overall, I am very grateful for the outcome of the Clinical Immersion Program. Not only has it been a greater active learning experience for me than in class room settings, but it has also personally helped me to grow in maturity and social interaction. Kudos to Dr. Wissner and all the other doctors and nurses for welcoming us into their workplaces. Kudos to our supervisors of the Clinical Immersion Program, and a special kudos to Aseel and Erik for not only being the best partners one could ask for, but for also being best buddies with me throughout this program.
Rown Parola
Rown Parola Blog
Rown Parola Blog
Week 1: Good and Bad Design
Rown Parola Blog
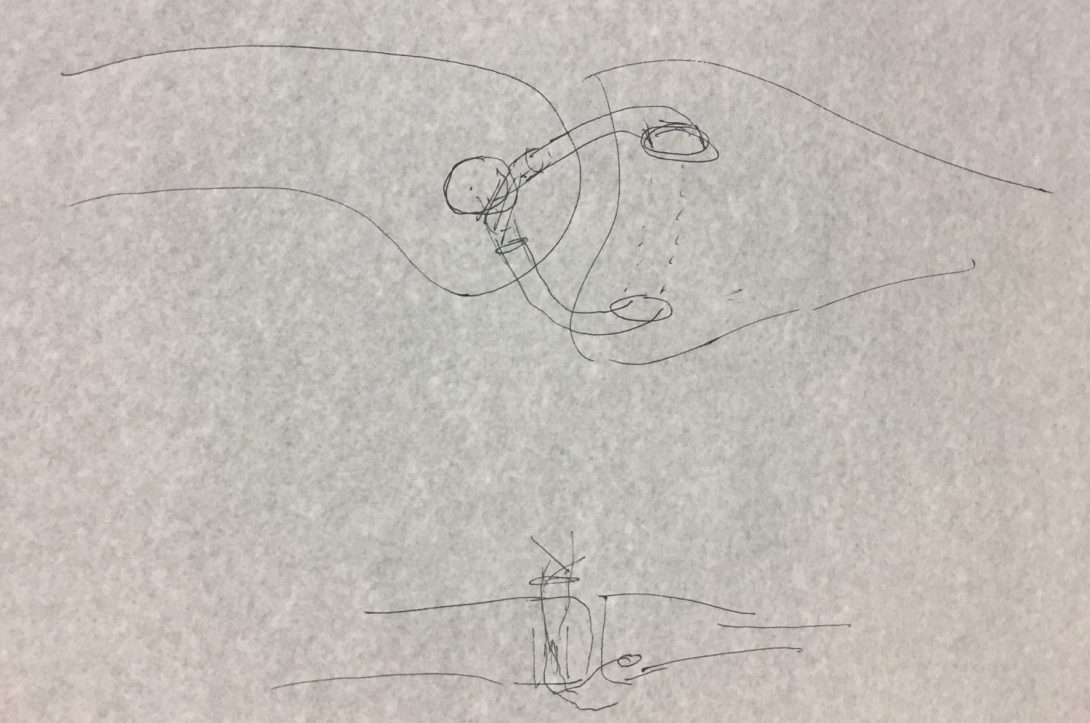
During the first week we observed several instances of good and bad design. I actively tried to broaden the scope of design I was considering beyond the prosthesis that are most often associated with orthopedic surgery.
I started by being on the lookout for work-arounds, barriers, re-purposed objects, and instances of user “torture”. The best example I saw occurred multiple times and with two different orthopods in different clinics when they wanted to explain a procedure, pathology, or anatomy to a patient. They would draw what they were talking about on the paper overlaying the exam bed. This method was very effective in explaining things to patients and allowed the patient to take the drawing home with them too. One example Dr. Gonzalez drew of thumb ulnar collateral ligament repair is pictured in the heading of this post.
Good design observed this week
- Thumb UCL replacement surgery
- Proximity of physical therapy to the orthopedic department
- Gameready braces that pump hot or cold water into the brace and can also do compressions
Bad design observed this week
- Call center scheduling inappropriate patients for specialists
- Each physician had their own method for keeping track of their calendar which was backed up to the eMR
- The computers in every exam room were never used
One last area that might benefit from innovation was encountered during a follow up with a patient who had some winging of his scapula as his muscles would get fatigued. The physician suggested that the patient take a friend to their PT appointment as a workout buddy. The workout buddy would be able to see when the scapula would wing and inform the patient. It seems that a mirror or video system might be an easier solution for this problem.
Week 2: Clinical Inefficiencies
Rown Parola Blog
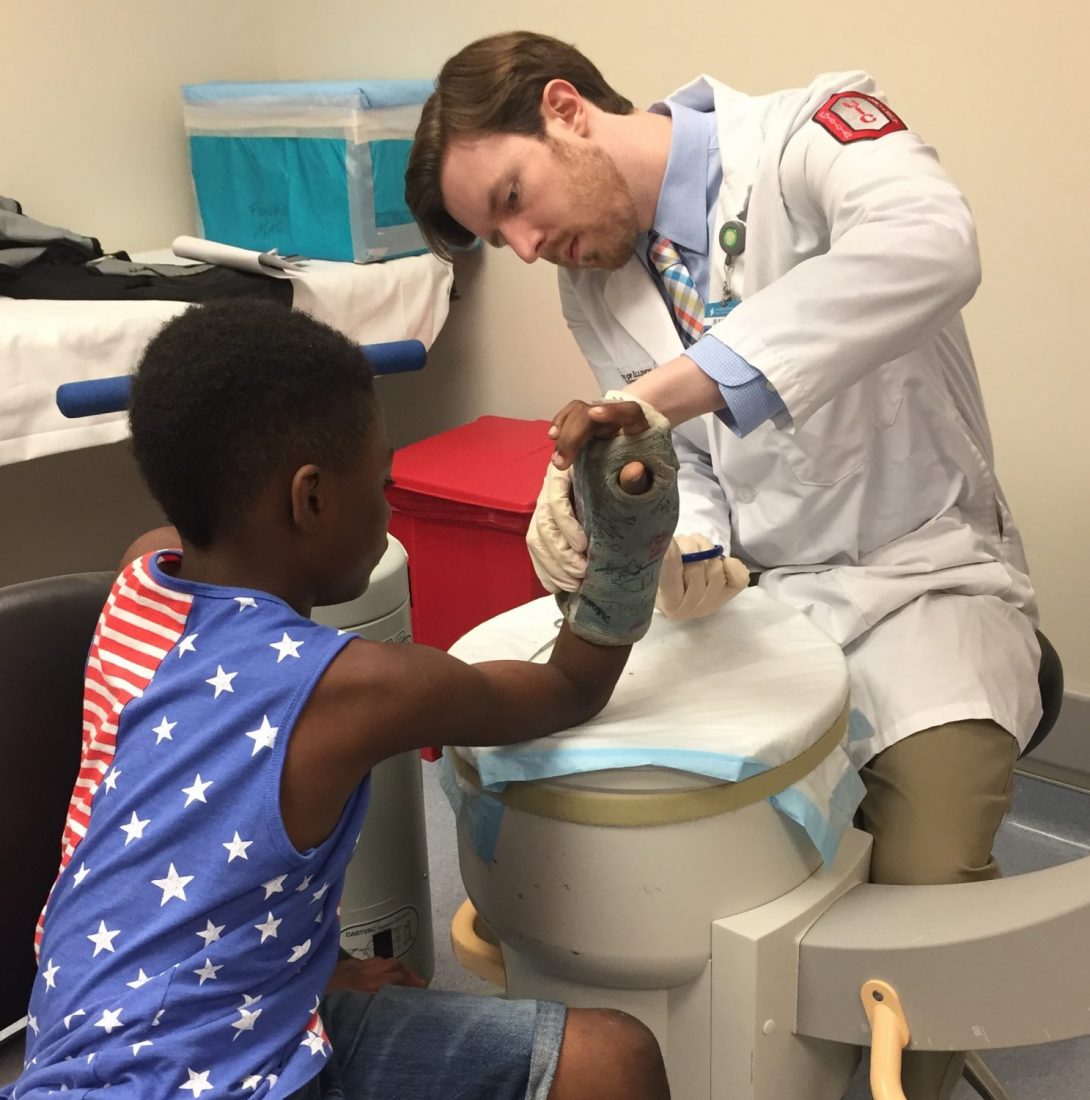
This week we spent time in the clinic identifying clinical inefficiencies. The physicians were aware of a few they were quick to bring to our attention, but we also wanted to follow patients through their experience to see if we might be able to identify inefficiencies they may not have thought about.
Chiefly, the physicians were concerned with the repeated steps, and chances for error that may occur due to multiple people interviewing patients. We noted that when a patient first arrives at the clinic an MA will bring the patient back to the room and complete an intake form which collects information about allergies, chief complaints, and a pain score among other items.
Sounds great, right? The problem is that this information is not made available to the medical care team. Even if it were entered into the eMR, the information is not filed in clinical notes due to the way the software is set up. That’s not even the whole problem though. Since the MAs are so busy they don’t enter the intake forms until the end of the day because filling out the forms requires too much time navigating through different screens.
Over the next week we are going to work to address this issue by reaching out to Cerner to see if the software might be able to streamline the process and file these notes in the correct location.
In following patients through their appointments we were able to identify a few more inefficiencies. One illustrative example relates to the boy pictured above who came to clinic to have his cast removed after a fracture. His visit went as follows:
1:45 Patient called back for cast removal, because cast room is full patient placed in “x-ray room”
1:46 Resident visits patient in room and explains he is going to get cast removal gear
1:48 Resident wheels in cast removal gear and demonstrates how it works
1:55 Cast fully removed (with patient’s arm rested on C-arm)
1:56 Patient sent to radiology to get an x-ray
2:37 Patient back from x-ray waiting in cast room doorway
2:40 Patient moved to exam room
2:50 Patient’s mother in hallway looking for physician and explains that she’s just afraid they may be forgotten as they were in radiology
2:55 Patient seen by attending physician
2:58 Patient leaves
In all it took over an hour from being brought back from the waiting room to get a cast removed, an x-ray, and see the attending physician. While this is definitely not the norm in clinic, it demonstrates several inefficiencies that could be improved.
Week 3: Needs Statments
Rown Parola Blog
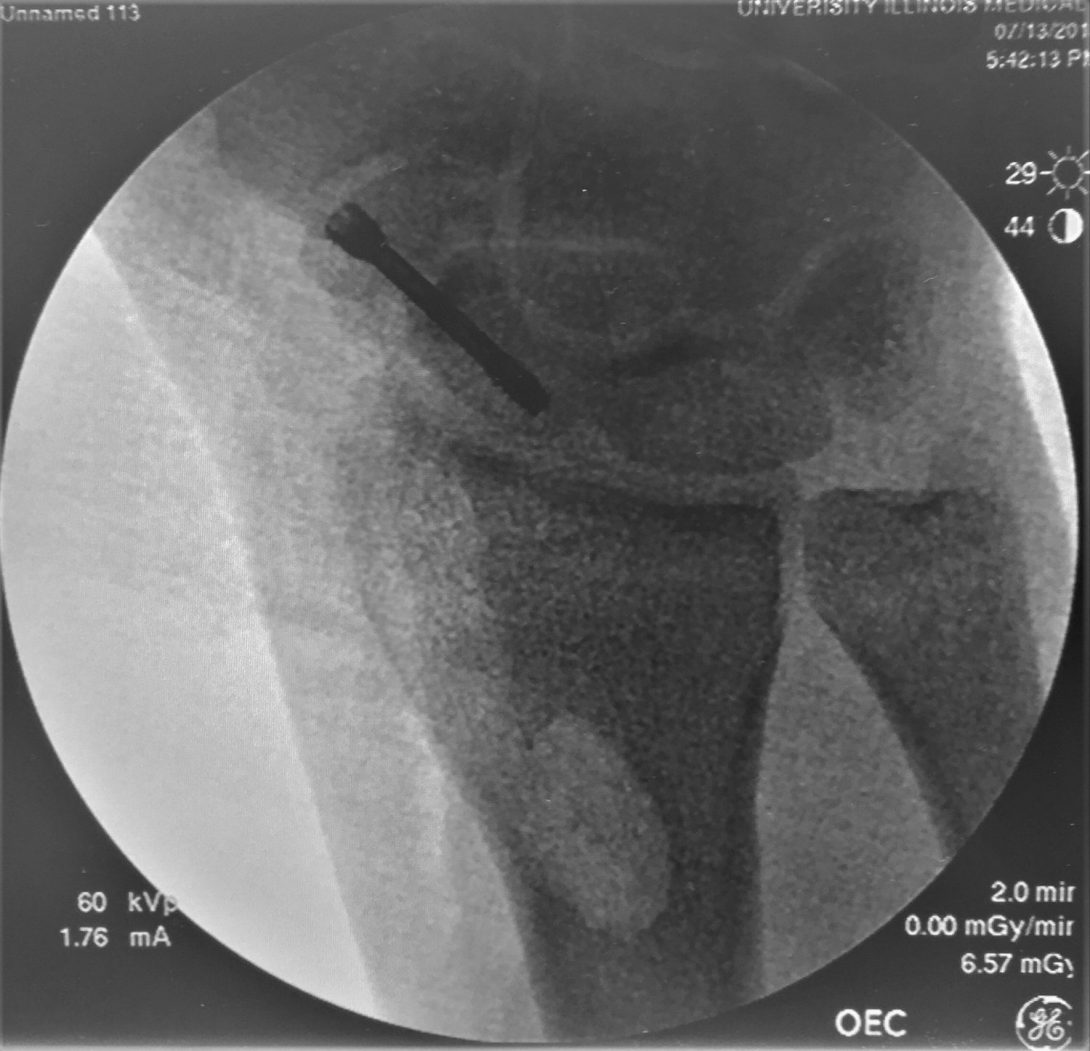
Our focus this week was on constructing needs statements. We undertook this task both in the clinic and in the OR.
We started in the clinic where we noticed some inefficiencies with analyzing and debriefing after problems occurred. The most glaring example was after a scheduled surgery was cancelled the day before. The cancellation frustrated the patient, their family, and the surgical team. Surgery was cancelled because the patient’s sodium level was not rechecked prior to surgery despite a note from the anesthesiologist requesting this be done before surgery proceeds.
In truth, sometimes problems like these are unavoidable. Surgeries get cancelled. Things don’t go as planned.
Where we identified a need, was in the aftermath of the cancellation. There is no system for analyzing failure modes, debriefing those involved, and moving on from the problem. Instead a huge amount of time was spent by one person trying to track down the source of the problem and mending fences between the different parts of the care team. This problem ended up delaying the start of clinic the next day and adding to patient wait times.
Clearly there is a need for a systematic debriefing after problems arise that focuses on preventing future problems and quickly resolving lingering questions.
In the OR we were able to observe some fascinating procedures. In one case a scaphoid fracture was repaired by using an autograft from the distal radius (as pictured above with a screw connecting the proximal and distal fragments of the scaphoid sandwiching the autograft). This technique is pretty new and replaces the old technique of harvesting an autograft from the patients ileus.
During the procedure, the majority of time was spent harvesting the autograft. Harvesting the autograft includes exposing the radius from the volar side and then molding the piece to be excised. The excision is done by using a small size high speed drill and then “connecting the dots” with a small straight osteotome.
The problem here is that the autograft is supposed to be an oval shape to conform to the short axis of the scaphoid and the osteotome is a flat plane. The need here is for a faster method of harvesting autografts from the distal radius to decrease operation time and risk of infection.
Week 4: Specifications
Rown Parola Blog
This week we started narrowing our sites on our final project goals. To get started we were tasked with identifying specifications for the project we hoped to pursue. Before we could even begin with this task, we had to narrow down our project from the many potential projects we identified.
We settled on a project related to the physical and occupational therapy that is frequently prescribed to orthopedic surgery patients before and after surgery. The physicians we followed would often stress the importance of physical therapy to their patients, but also noted that adherence was frequently less than desired or the quality of therapy may be sub-optimal dependent on provider. To address these concerns we hope to deliver a solution with the criteria of improving patient adherence and outcomes in PT/OT.
We then identified four specifications for our design. We required that our design be
(1) Effective – In that implementation of our solution returns prior function
(2) Cost Efficient – So our solution can be widely adopted
(3) Intuitive – So that anyone could figure out how to use our solution quickly
(4) Fun – So that our solution would be used often
By keeping these criteria in mind we hope to deliver a solution that can be effectively used in the rehabilitation of orthopedic surgery patients.
Week 5: Choosing a project
Rown Parola Blog
This week we wanted to focus in on choosing a topic for our final project. Our time in the orthopedic surgery department has exposed us to many interesting applications, but we found that many of them might not be suitable for us to tackle during this clinical immersion program. The two most common reasons a possible project might be disqualified were:
1) We do not have a suitable background to understand the problem and suggest solutions. This was often the case in looking at surgical techniques and equipment. Quite a few surgeons and medical device companies are constantly working to improve surgical techniques and equipment.
2) The complexity of a proposed solution is beyond the scope of our course to be practical. This came up often when looking at workflow solutions that interacted with the electronic medical records system.
To find a project that we could both fully understand and tracks well with the goals of the clinical immersion program we looked at the physical and occupational therapy patients would receive before and after surgery. In therapy there were many creative and simple solutions. We felt that we might be able to best contribute in this space. To that end, we took a particular interest in gyroscopic devices used in occupational therapy to improve wrist strength and flexibility.
Most people agreed that the gyroscopes were cool and wanted to try them but often encountered difficulties in getting them started. The gyroscopes required winding and pulling a string very fast to get started as pictured above. This is a very difficult task for people who have MSK problems in their hands, wrists, or forearms. Over the next two weeks our goal will be to make the devices more intuitive to start and engaging for patients to use.
Week 6: Final Post
Rown Parola Blog

As we finished our final week in the clinical immersion program I took time to reflect on the experience. Over the past six weeks I had the privilege of joining Dr. Gonzalez at UIC and IBJI. During that time I worked hard to identify needs and think of innovative solutions to problems in orthopedics. When I entered this role, I did not have a firm foundation in orthopedic surgery. This made identifying problems difficult, as I did not have a good understanding of the work being done.
Over the course of the past six weeks I feel that I have gained a foothold of knowledge in orthopedic surgery. The generosity shown to me by the attending physicians, orthopedic residents, nurses, MAs, therapists, and medical students rotating through orthopedic surgery was instrumental in establishing this foundation. I am truly thankful for the patience and insight shared with me. Throughout my time I observed a great team culture within the orthopedic department. At the completion of this program I felt included in this team, and was delighted to be trusted with carrying out simple tasks to help.
I am also thankful for the guidance given by the clinical immersion program mentors as they ushered us through the steps of design and innovation. I hope to take what I learned from this experience, and apply it to become the innovative physician and problem solver I seek to be.
Haley Patel

I will be a 4th year in Bioengineering with a neural concentration. Post graduation I hope to work in industry, I am also exploring the field of medical sales. My rotation will be with OB/GYN under Dr. Aparna Ramanathan while working with Michael Zhao and Asra Mubeen! This will be my first clinical exposure and I am eager to learn the medicine behind Women’s Health while implementing my previous knowledge from the BioE curriculum!
Haley Patel Blog
Haley Patel Blog
Good Design & Bad Design
Haley Patel Blog
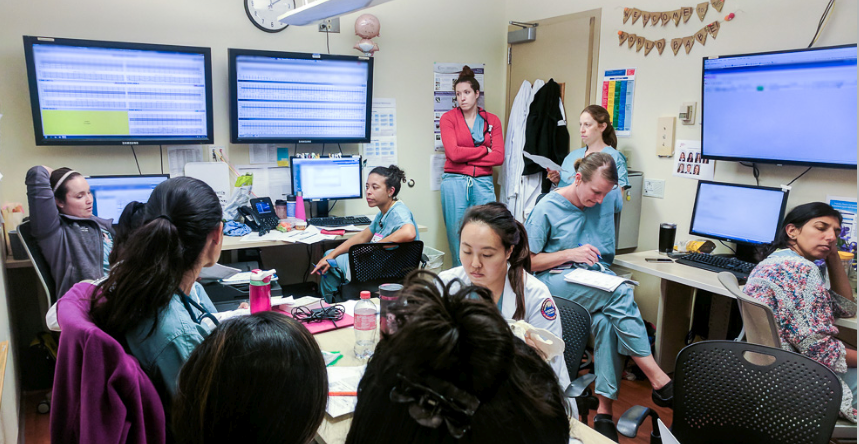
A good design I noticed during our OB/GYN rotation was *TEAM HUDDLES*:
Activity: All (nurses, CNMs, residents, MDs) staff members gather in the physician workroom to discuss all the patients on the floor for the department and discuss their progress.
Environment: Team huddles take place in the physician workroom which also have screens that monitor FHR and HR of patients.
Interaction: Nurses read off labor progress reports and mention any critical changes like name alerts. MDs listen and ask any questions or order any tests needed at that moment. Clarification was made on OB versus CNM patients.
Objects: Progress reports, monitoring screens
Users: Nurses, residents, CNMs, MDs
___________________________________________
A bad design I noticed was *ROOM TEMPERTURE OF OR* (It is the perfect temp for babies but not our surgeons):
Activity: Any surgeries taken place in the OB/GYN department, prepping and clean up for surgery.
Environment: Sterile OR Room (warm)
Interaction: All OR staff is layered in sterile clothing. Surgeons are under big lights while performing surgery in the already warm room. OR staff were applauding them for working in such warm conditions, while commenting on the heat. Before surgery, patient was uncomfortable due to the heat and it became difficult to give them a spinal anesthesia (where one has to be completely still). During the surgery, the nurse had to leave the room twice to grab ice packs for patient. As an observer, I felt the heat but mistook it for nerves.
Objects: Sterile Clothing, thermostat (temp cannot be changed due to room temp for baby)
Users: Surgeons, patient(s), OR staff, patient’s family
Day 1: An Experience of a Lifetime
Haley Patel Blog

I observed a C-Section on my first day in the OR. I remembered to not touch anything blue and not get in the way of anyone. At first the room temperature took me by surprise, it was very warm (I actually had to step out for a few minutes because it was overwhelming). A senior resident explained that it was to account for the temperature needed for the baby, once it was out of the mother’s womb.
The room dynamic may seem like chaos to an outsider (like me) but they seemed to flow well and not impede each other. I noticed there was one nurse with all the surgical tools (she mentioned that ortho was very tedious because she had to count 15 trays and up to 500 tools TWICE), a nurse recording all paperwork and conducting time outs, an attending, senior resident, resident, medical student, 3 people from anesthesiology and many people from pediatrics.
When I was introduced to *TIME OUTS* I was blown away. It would happen once while prepping for surgery and once right before the patient was operated on. They would remind themselves who the patient was, what the end goal was, what needed to be done and any important medical information mentioned. Reminding everyone to slow down and remember why they were here is an amazing approach to reduce any mistakes! No matter how much I write, I will never be able to explain how amazing of an experience this was.
I HEARD A BABY CRY WHEN IT WAS INTRODUCED TO THE WORLD!
Day 2: The Clinic
Haley Patel Blog
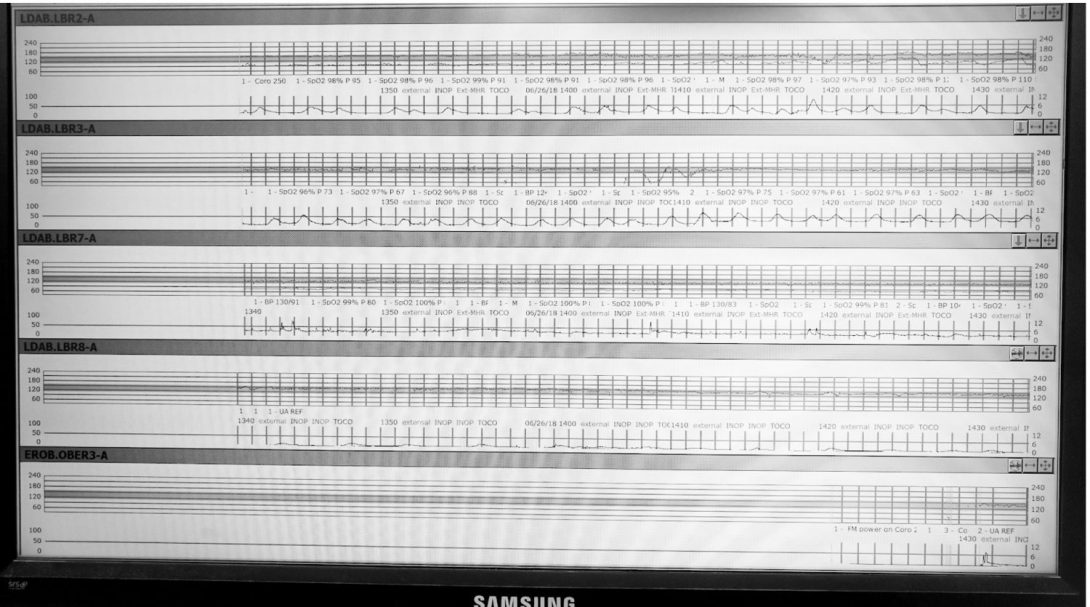
For UI Health there is a high rate of no shows for clinical visits due to our low-income demographic. Therefore, there are a difficulties with scheduling. One of the concerns addressed by doctors was that patients were not being seen by the same physician.
A device I noticed in each of the exam rooms was a doppler. This would allow anyone in the room to hear the baby’s heartbeat (normal FHR should be between 110-160 bpm), while viewing the numbers real time on a small display on the doppler. The doppler is mounted on to the bed behind the patient bed. First a gel is applied, and the physician would need to spend a few minutes looking for the correct position. However, the doppler would be ineffective for obese patients as it would be very difficult to locate the heartbeat. Thus, an ultrasound machine needed to be brought into the room.
Day 3: The Night Shift
Haley Patel Blog
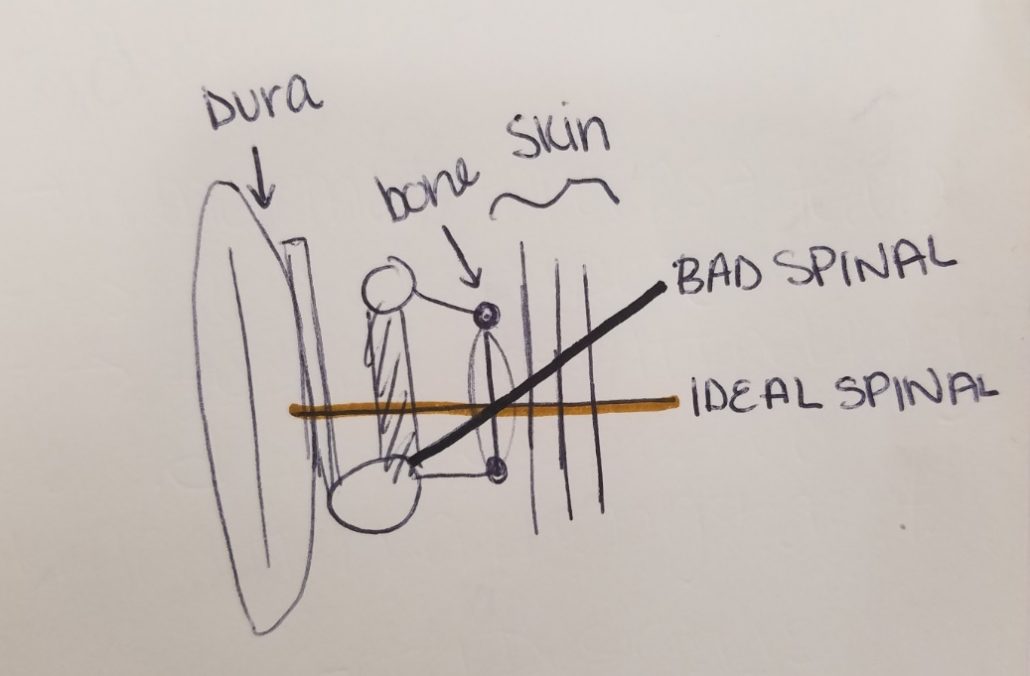
I learned there were two ways to help deliver a baby, one was a small vacuum and the other was a device called forceps. There are complications with both methods. With the vacuum, a hematoma may occur on the head of the baby, while with the forceps the patient is more likely to develop vaginal tears. However, both are great medical devices to progress delivery.
During the night shift, there are many sign offs because the full team is brought down to just a exoskeleton team. Also, during the sign offs, I noticed that there were a few communication issues between the staff members or other departments that occurred throughout the day.
During the c-section or labor, a patient is given the option of anesthesia. The two main forms of anesthesia are spinal (a single dose injected into the spinal area) or an epidural (a catheter that continuously feeds into the spinal area). An anesthesiology resident explained that there are multiple layers of the body that need to be crossed before the dose is delivered. Delivery of the dose is also not straightforward, after narrowing down area, it is a blind injection and may take a few tries for delivery of the anesthesia. This becomes a stressful process for both the anesthesiologist and the patient.
Day 4: Sunday L&D
Haley Patel Blog
Dr. Ramanathan will be taking us to the simulation lab where we can see the current simulations that students have access to. We will also be attending Venture Workshops regarding Business Innovation with Dr. Ramanathan. I was able to read up on alternatives to hysterectomies (removal of the uterus) and placenta accreta which is usually morbid and can lead to hysterectomies. We continued to learn about other medical devices used in the OB/GYN field such as the Bakri Balloon Tamponade. This device is inserted to prevent postpartum hemorrhages. I was invited to a journal discussion regarding a procedure I will be seeing this coming week.
Bonus Session: Journal Discussion
Haley Patel Blog

I met a group of physicians before their clinic to join a discussion of a procedure at Au Bon Pain. I was given one article to read but the discussion covered a few articles regarding the same procedure. The participants summarized the papers and the doctors holding the discussion asked a few questions to stimulate the conversations. They avoided the philosophical aspect and focused on the medical knowledge and what would be best for the patient. I was surprised at how much I understood! Overall, I was able to gain a lot of knowledge and listen to areas of improvement in an informal setting. I thought the café meet up was cute and a good start to my Monday morning!
Day 5: SurgiCenter
Haley Patel Blog
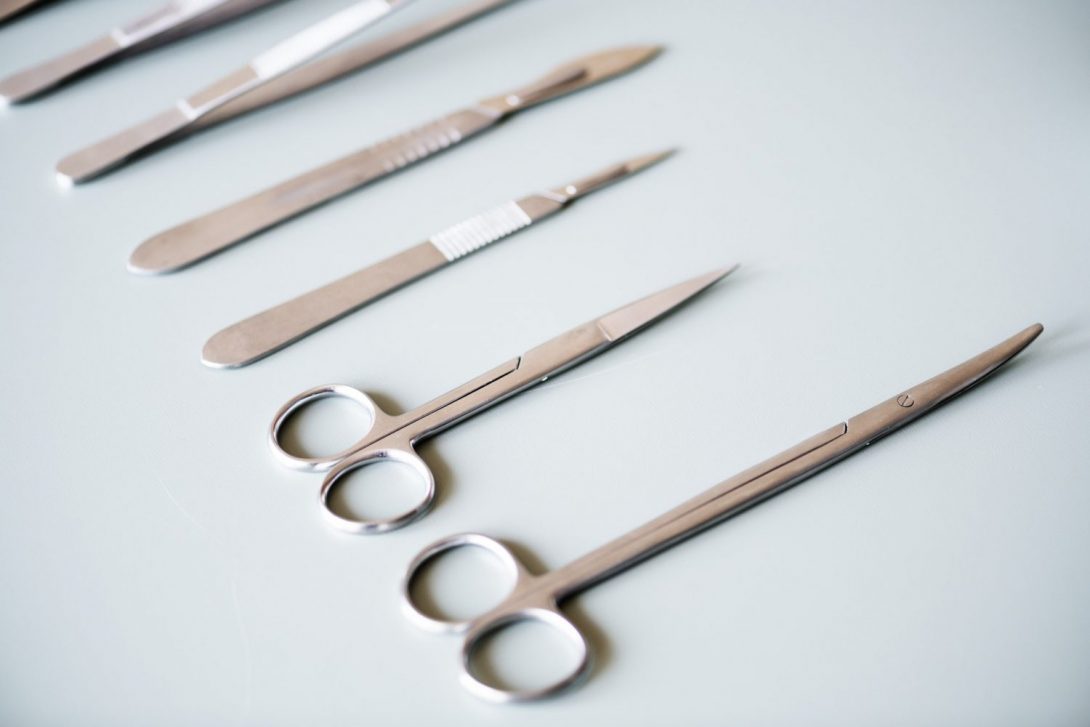
The first two cases were in the SurgiCenter, to an outsider it seemed like chaos. It may have been overwhelming to the patients in the room but the nurses/doctors tried to make them feel comfortable before they headed into the operating room. I noticed there were large “Quiet” signs on the walls but the room was anything but quiet. I was able to notice many work arounds in the SurgiCenter. For example, surgeons placed towels on the floors to keep fluids from dripping on the floor.
An interesting medical tool used was the Laminaria japonica, these are the oldest types of osmotic dilators that are used. It is made from dried, compressed Japanese seaweed. I found this interesting because it was a natural product which seems unusual in a hospital with all the medical advancement. These specific types of dilators work both mechanically by exerting radial pressure and chemically.
In addition, during today’s c-section, I found out that to have a closer estimated blood loss, it is very tedious process. The laps used also have blood on them so the nurses have to account for all of them. They need to weigh the regular lap first and then the plastic that holds the laps. After the surgery, everything is weighed. Then by math that is hand calculated by the nurses, they are able to calculate about how much blood is saturated into the laps. The formula is as follows:
Wtotal – ((Wlaps X #laps) (Wplastic X #plastic)) = Saturated Blood Loss
Day 6: Women of Steel
Haley Patel Blog
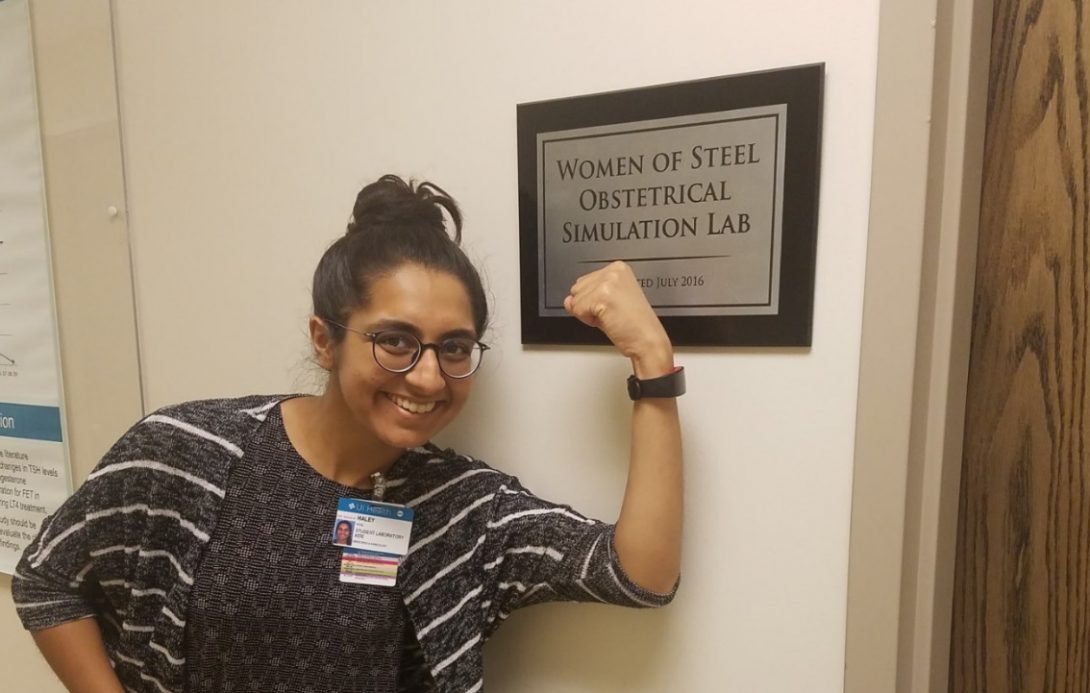
Today we were introduced to the “Women of Steel Obstetrical Simulation Lab” where there are an abundant number of exercises that students can do to work on their technical skill. I tried to transfer small foam pieces onto a peg board with graspers that were portrayed to be inside the body with the help of a camera. There are also mannequins that can be set up for different delivery scenarios. We were told that they can be loaded with a baby, so the students could practice their delivery techniques. For OB/Gyn there are many variables that can be accounted for with different simulations. There are workshops that doctors lead for the Residents so they can be exposed to the simulations.
Storyboard: Dilation & Evacuation
- Patient is anesthetized & strapped in
- Adjust height of bed
- Anesthesiologist has control
- Surgeon has to “tell when to stop”
- Drape patient & place towels on floor
- Surgeon has to reposition during procedure
- Towel crumples up while surgeons moves
- Bag placed under patient’s bottom as easy access for disposal of tools
- The patient area is cleaned with two types of sponges and 2 liquids on a paint like tray
- Sponges are disposed in bag
- Specific way to do it – Nurse was walking Resident through it
- Surgeons scrub in
- Nurse conducts time out
- Sometimes people continue to work while time out is occurring
- Time outs are not the same through all procedures
- Removal of dilators
- Counted as each one is pulled out
- Disposed in bag
- Local anesthesia in cervix
- Curette & vacuum – Repeat
- Use ultrasound to guide – communication has to be very good
- Have to be really careful to avoid perforations
- Person utilizing the vacuum has to stop & keep checking what zone they are in (red,green,yellow)
- Foot pedal has to be located & sometimes hidden in towel laid down
- Manual removal of product requires the attending to hold a bucket near the patient with one hand while curetting with other
- Stop vacuum & step away from patient
- Collect all containers where product is collected
- Drain the blood
- Used the sheet that is placed under patients bottom for accidental bowel movements (workaround)
- Piece the product together to confirm all of the product is removed
- An attending confirms
- Takes a lot of experience
- After confirmation of complete removal, remove vacuum from patient
- Confirm no bleeding
- Wait a few minutes before cleaning up
- Wipe off the patient with towels
- Seal the product in container & hand to nurse
Iteration of a Needs Statement
A means of reducing workarounds conducted by surgeons in the OR to increase safety and cleanliness.
A means of reducing workarounds conducted by surgeons in the OR [regarding preparation of the patient] to increase safety and cleanliness.
– Narrowing workaround type
A means of reducing workarounds conducted by surgeons in the OR regarding preparation of the patient to increase [staff] safety and cleanliness [of OR room.]
– Adding specific details to further narrow problem
Day 7: 5 Hours Later
My team and our mentor attended a Venture workshop about starting your own venture. We received information about having a good business plan and all the resources available to the public to help with your start up. We were introduced to many tools to help organize a business idea.
After the workshop, we had one scheduled hysterectomy. Hysterectomies usually take 2-3 hours to complete by an experienced surgeon. However, since we are a teaching hospital it is typical to have a hysterectomy last longer {in this case it was just about 5 hours}. This was the longest surgery I have observed so far. Just standing there made my back hurt so I started to observe the body positions of the surgeons and the residents. I found a few areas where surgeon comfort had been compromised for the surgery. I noted this down to ask the surgeons if they had noticed this issue as well.
Day 8: Ultrasound
I was observing Dr. Zumah in the Ultrasound clinic with one of my team members. It was less hectic than the usual clinic days, but cases were packed one after another. Dr. Zumah had some interesting ideas and so did the sonographers and nurses we talked to in that clinic.
Dr. Zumah, when reading ultrasounds, would point out the major components in the readings. Such as, fibroids, dermoid cysts and other abnormalities. It was interesting to learn because I have a difficult time visualizing the anatomy on ultrasounds in L&D.
I was also able to observe a SIS procedure in clinic. A catheter is inserted into the uterine cavity that delivers saline to it. Simultaneously, an ultrasound machine is being used to capture the images and construct a 3D visual. The saline solution provides more contrast to help the physicians see abnormalities. One way is wherever the water goes around something like water goes around a pebble, there is an abnormality there. It was mind-blowing something as simple as saline would be the solution. Dr. Zumah was very good at explaining everything to the patient before and during the procedure.
Day 9: FHR
Haley Patel Blog
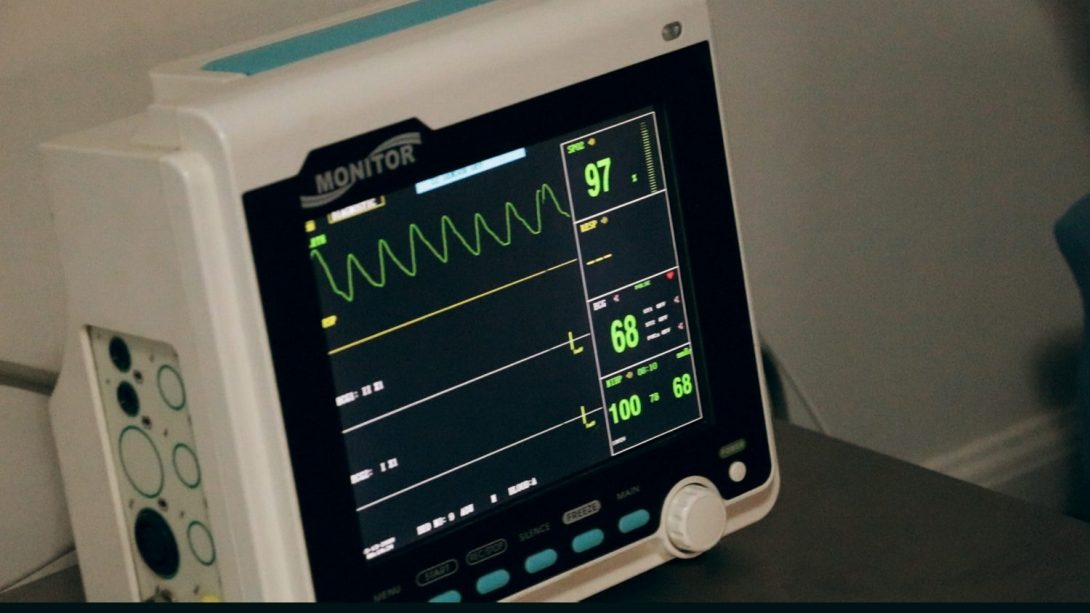
We were on call in L&D during the night. After the regular sign offs, we had some time to discuss with Dr. Ramanathan about our progress so far. She also showed us the Fetal Heat Rate print outs and explained to us how the current system works. It will send an alarm when the high and low numbers are reached but it does not account for any variability. After our discussion we noticed there was an area of improvement on how the physicians were notified. Dr. Ramanathan will be connecting us to the department that handles the FHR records to help us gain more insight on the issue.
Day 10: OR Flow
Haley Patel Blog
Today we were in the OR all day. It was exciting to see all the surgeries. I saw a hysterectomy and a few hysteroscopies. Hysteroscopy is conducting laparoscopically, this was my first time observing a procedure like this. With the monitors in the room, I was able to see the inside of the patient without breaking the sterile barrier, it was amazing how the surgeons were able to navigate through the cavity. It took both skill and communication to successfully guide through the procedure.
There were a few things that delayed the surgeries that the surgeons were not happy about. However, they did there best to not to further delay the procedures especially with back to back procedures. It was nice to see the flow of SurgiCenter.
Many of the issues we noticed today were regarding wait time for extra surgical tools and patient positioning. Everyone agreed, if the patient positioning issue was resolved it would make the process smoother.
Meghna Peesapati

Meghna Peesapati
I’m a rising senior in bioengineering with a concentration in cell and tissue engineering and am interested in applying my engineering knowledge in medical settings to help solve design problems. I’m also very excited to be immediately immersed in clinic and OR settings during this program as I am looking forward to future as a physician.
Meghna Peesapati Blog
Meghna Peesapati Blog
Ophthalmology Week 1: AEIOU Applications
Meghna Peesapati Blog
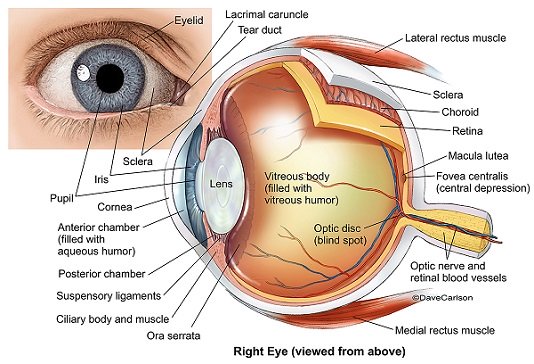
Ophthalmology is a very broad specialty of medicine that is concerned with a very small, but complicated, organ: the eye. This branch has its own sub-specialties: pediatrics, glaucoma, neuro-ophthalmology, oculoplastics, retina, cornea, and uveitis. During the first week, I watched several surgeries across some of these specialties: laser cataract surgery, glaucoma cataract surgery, adult and pediatric glaucoma surgeries, trichiasis repair, orbitotomy with abscess drain, mass resection from nasal-lacrimal duct with a probe, and 2 retinal detachment vitrectomies. Dispersed between OR time, my partner and I also visited 3 clinics: oculoplastics, glaucoma, and uveitis.
While ORs and clinics share several of the same attendings, they have very different environments and by extension, their unique set of innovative (good) and limited (bad) engineering designs. What we found within the first week is that every design has an important concept behind it, but often has competing goals that leads to limited efficacy of the device itself.
Innovative (good) design: Direct & indirect ophthalmoscope
Meghna Peesapati Blog
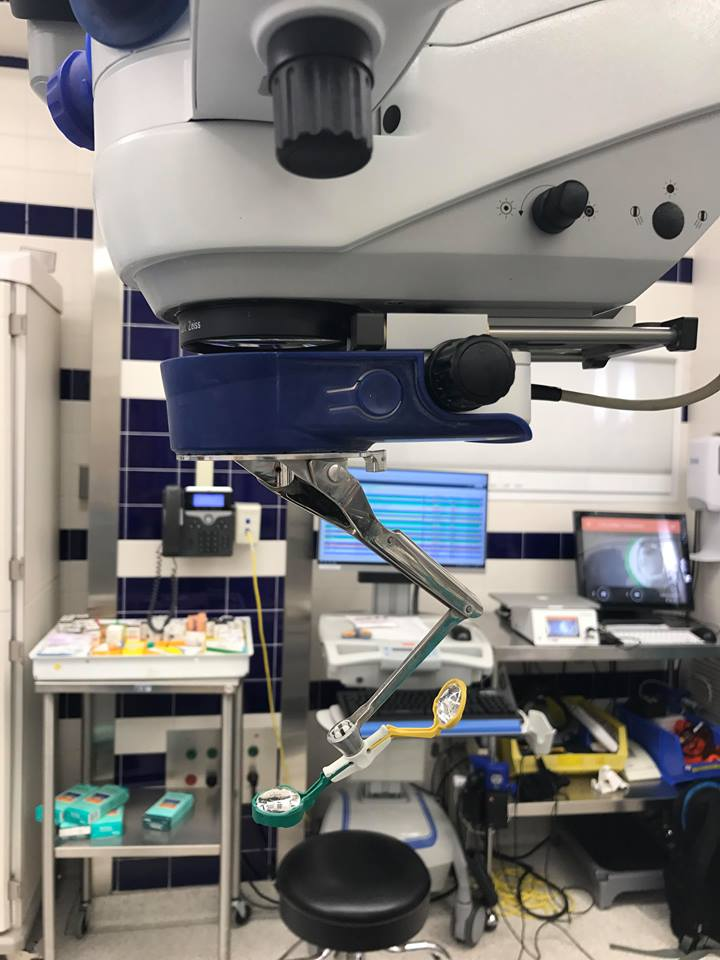
To see the back of the eye (posterior chamber, retina, optic nerve), 2 lenses are used; this becomes important in vitreoretinal surgeries and even routine check ups. This was a great design in surgery because the blue and yellow lenses (left) were attached to the microscope and were easily flipped into position by the surgeon when it was time to view the back of the eye. Attending physicians used them in clinic settings as well, but it was a little trickier to use because the 2nd lens was hand-held and adjusted based on the physician and the patient. This became a bigger problem when M4s and residents were examining patients in clinics as they were relatively new to the practice. Overall, this was a very innovative design that catered to the purpose it was intended for relatively well.
Limited (bad) design: Eyelid crutch for ptosis (droopy eyelid)
Meghna Peesapati Blog
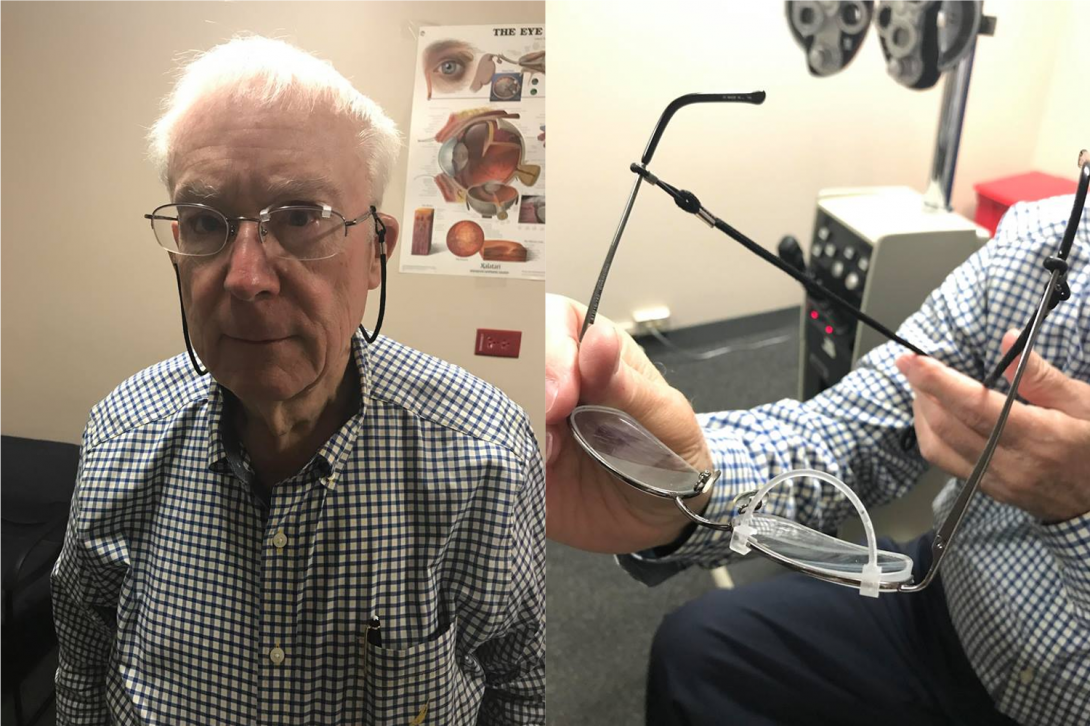
Ptosis is a condition in which the eyelid droops over the visible portion of the eye; in extreme cases, it will even droop over the pupil and prevent light from entering the eye. Normally, patients will undergo oculoplastic surgery to retract the lid into a normal position but not all patients are good candidates for surgery. We met a patient like this, who was using an eyelid crutch: a 3D printed attachment for his glasses which would keep his eyelid propped up when wearing the glasses. Though the concept behind this simple feat of engineering was fascinating, many deliverables remained unmet. When worn for long periods of time, the crutch became uncomfortable as the patient couldn’t blink with his glasses on; he physically had to remove his glasses after a certain amount of time to blink. The crutch would also often pop off the frame of the glasses and sometimes, the patient wouldn’t notice this had happened until hours later.
Ophthalmology Week 2: A Typical Clinic Visit
Meghna Peesapati Blog
Our second week rotating through Ophthalmology was even more immersive than our first as we were able to experience other sub-specialties of the department. We spent more time in clinics than in ORs this week, and were able to ask doctors more questions, which leads us to storyboard a typical clinic visit in this department. Patient visits in the sub-specialties of retina, uveitis, glaucoma, and pediatrics had many similarities while occuloplastics and cornea had many differences.
Step 1: Check in/Waiting room
Pain points:
- In retina and uveitis clinics, there are 3 different waiting rooms; all were cramped and often got crowded.
- Staff, and sometimes doctors when short on nurses and assistants, would have to wander through them all to call a patient.
(Physician’s Step 1): Gather Exam Tools
Pain points:
- Lenses needed for indirect ophthalmoscope test (step 7) were not readily available in every exam room.
- Every physician organized and gathered them differently; some had a lens case per room, and some carried a single case around for the duration of clinic.
- Tools needed for vision test were put in a different drawer in each exam room, and were sometimes missing; doctor had to pause the visit with the patient present to look for them.
Step 2: Patient Chart Review
Pain points: none
Step 3: Vision Check
Pain points:
- Patients could memorize the letters between testing each eye as the patterns don’t change
Step 4: Eye Dilation
Pain points:
- The time when the patient was dilated was not always clear.
- Dilation effects take 15-20 min; doctor must wait or see other patients during this time.
Step 5: Slit Lamp Exam
Pain points:
- Doctor needed to position in the lamp and roll over to the light switch to dim the lights in the room; sometimes the doctor wouldn’t do this because rolling around multiple times was a hassle.
- Pediatric patients couldn’t sit still for the manual slit lamp (left), so the portable one had to be used (difficult to align light).
Step 6: Pressure Check
Pain points: none
Step 7: Indirect Ophthalmoscope
Pain points:
- Patients (especially kids) become uncomfortable quickly due to the brightness of the light. Medical students and residents needed a while to align the lenses, which increased patient discomfort.
- Aligning the 2 lenses proved to be a difficult task when patients were moving (this was the case for kids), as there were then 3 moving pieces for a difficult test.
Step 8: Test Results (OCT, Ultrasound, etc.)
Pain points:
- Some test results did not have split screen feature, which made viewing differences between present clinic visit test against previous tests difficult.
Identifying pain points in a clinic visit showed us many problems that can slow down and impede patient care. Some problems (like dimming the lights in the exam room) could be easily fixed. Others, like making the indirect ophthalmoscope test more comfortable and efficient, will prove to be more difficult.
Ophthalmology Week 1: Addressing Needs
Meghna Peesapati Blog
During week 3 of Ophthalmology, we focused on overarching needs “clusters” from affinity diagramming week 1 and 2 observations. In continuing observations in clinic exam rooms, we realized there is a lot unsaid between physicians and patients during each stage of the exam. In talking to patients and physicians, we learned that the indirect ophthalmoscope isn’t as good a design as we had previously thought in week 1. The scope, while useful in concept (allows users to view the back of the eye in high detail without expensive imaging techniques), requires years of experience and dexterity to master. In observing M4s, residents, and fellows, we realized that this tool was a huge drain on time as it prolonged visits that students practiced during. Prolonged exposure to the bright light of the scope made patients, especially children, extremely uncomfortable. Therefore, our first needs statement is as follows:
- A method to allow physicians for more detailed visualization of the back of the eye.
- A method to allow physicians for easy and detailed visualization of the back of the eye in high-risk patients.
- A method to allow residents, fellows, and physicians for easy and detailed visualization of the back of the eye in pediatric, emergency care, and post-operative patients.
Another important step in the exam process is going over treatment and prescribing medications. In ophthalmological treatments, eye drops in various forms are the most common treatment; each drop has a different purpose, is labeled with different colored caps, and stored in various bottle sizes. In glaucoma, retina, and cornea sub-specialties, any given treatment could be up to 7 drops at once. Further, each type has different directions for use. This becomes confusing for patients, especially with children and the elderly. Patients with blinding vision problems (who are common in ophtho) have trouble reading directions off forms, if they are even given during the visit. Patients with chronic eye diseases like glaucoma or fungal infections (12 years duration) have extreme difficulty in complying with medications as prescribed. This is the biggest complaint with most physicians following routine check up appointments. Therefore, our second needs statement is as follows:
- A method for increasing medication compliance in ophthalmology patients.
- A method for increasing compliance with and understanding about medications in ophthalmology patients.
- A method for increasing compliance with and understanding about medications in chronically diagnosed ophthalmology patients.
The following weeks should shed some light on how these needs statements can be reworked to cater to clear and tangible solutions to improve the overall experiences of both the patients and the physicians.
Ophthalmology Week 4: Specs and Concept Generation
Meghna Peesapati Blog
Our goal for week 4 in ophthalmology was to substantiate the unmet needs we had perceived in previous weeks. From our perspective, the 2 most pressing needs to be addressed were as follows:
Needs statement 1: A method to allow residents, fellows, and physicians for easy and detailed visualization of the back of the eye in pediatric, emergency care, and post-operative patients.
Needs statement 2: A method for increasing compliance with and understanding about medications in chronically diagnosed ophthalmology patients.
After speaking to several ophthalmologists, we decided to focus our remaining time on the second needs statement, and after our observations in week 4, it has been modified as follows:
Updated needs statement 2: A method to enhance education and increase compliance with medications in chronically diagnosed ophthalmology patients.
We came up with a few tools that could address the need, and they are discussed in the featured image above. From this exercise, it was clear that the ideal way to address this need is through a mobile app with a patient and physician-friendly interface design. The most important features of this app will be: an audio recorder (for visually impaired/post-op patients who cannot easily read medication checklists); an alarm clock/reminder that can be made medication-specific; a compliance log that generates graphs, which are useful for patients (to increase motivation to be medication compliant) and physicians (to get a better grasp of actual compliance). There are currently several pill/medication reminder apps on the market, but none are ophthalmology patient-specific. For visually impaired patients, it is difficult to match names of drops from the checklists that are given post-op or during routine exams to the names on the drop bottles as they are often too small to read easily. Some patients have difficulty identifying colors of tops, too. Ideally, this app would have little text in large fonts and have bright colors to cater to these patients.
Considering time restraints, we are aiming to deliver a few interface designs of a PC-based app at the end of the program. In the following weeks, we will continue to substantiate these needs and iterate on the main features of the app.
Ophthalmology Week 5: Prototyping and Feedback
Meghna Peesapati Blog
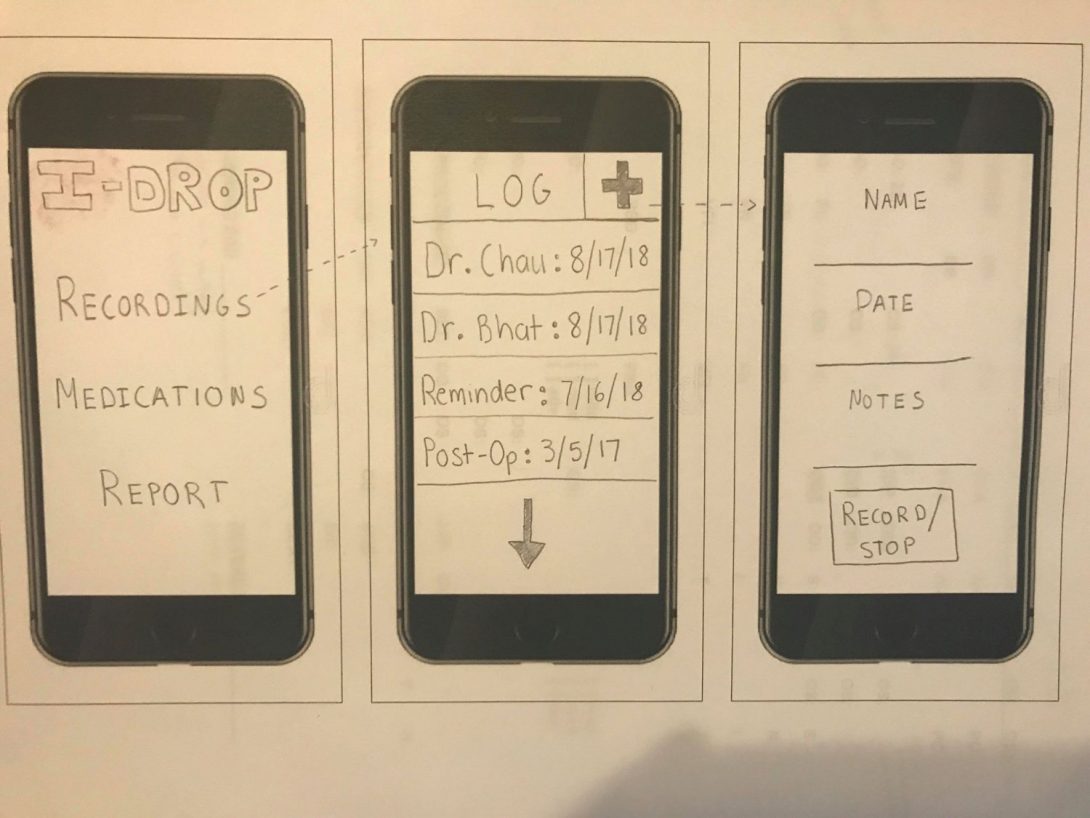
In our 5th week of ophthalmology rotations, our goal was to get feedback on the needs we had observed during past weeks, as well as on the concepts we generated last week. Overall, the resounding feedback from most ophthalmologists we interacted with agreed with our main needs statement concerning medication compliance in patient populations. To review, the needs statement is as follows: A method to enhance education and increase compliance with medications in chronically diagnosed ophthalmology patients. However, we encountered a substantial problem in interviewing patients about their intent on being compliant with their medications using out proposed solution from last week (a mobile app). Many older patients did not have or did not feel comfortable using a smartphone, essentially rendering this app useless. However, we were unable to identify another way to integrate an automatic compliance tracker and an audio recorder. A simpler idea, and one that is possibly more difficult to enforce, is a behavior change: encourage patients with vision problems to use their own audio recorders, whether on their phones or otherwise, to record the physician’s proposed treatment plan and medication pattern. Simultaneously, the patient could also be given a more comprehensive checklist of their drops, which the physician could review at each visit. This becomes increasingly more complicated with chronically diagnosed patients who are on a multitude of drops at once.
While focusing on this need, we are also interested in making the new medical student/resident/fellow life easier. Learning how to use the indirect ophthalmoscope is difficult and time consuming, and can cause undue stress for the patient. To make this process easier, we are designing an attachment for the portable slit lamp that will function as a lens holder (see featured image above). We hope to have a rough working prototype by the end of the program.
Erik Romano
Erik Romano Blog
Erik Romano Blog
Cardiology Week 1: Good vs. Bad Design
Erik Romano Blog
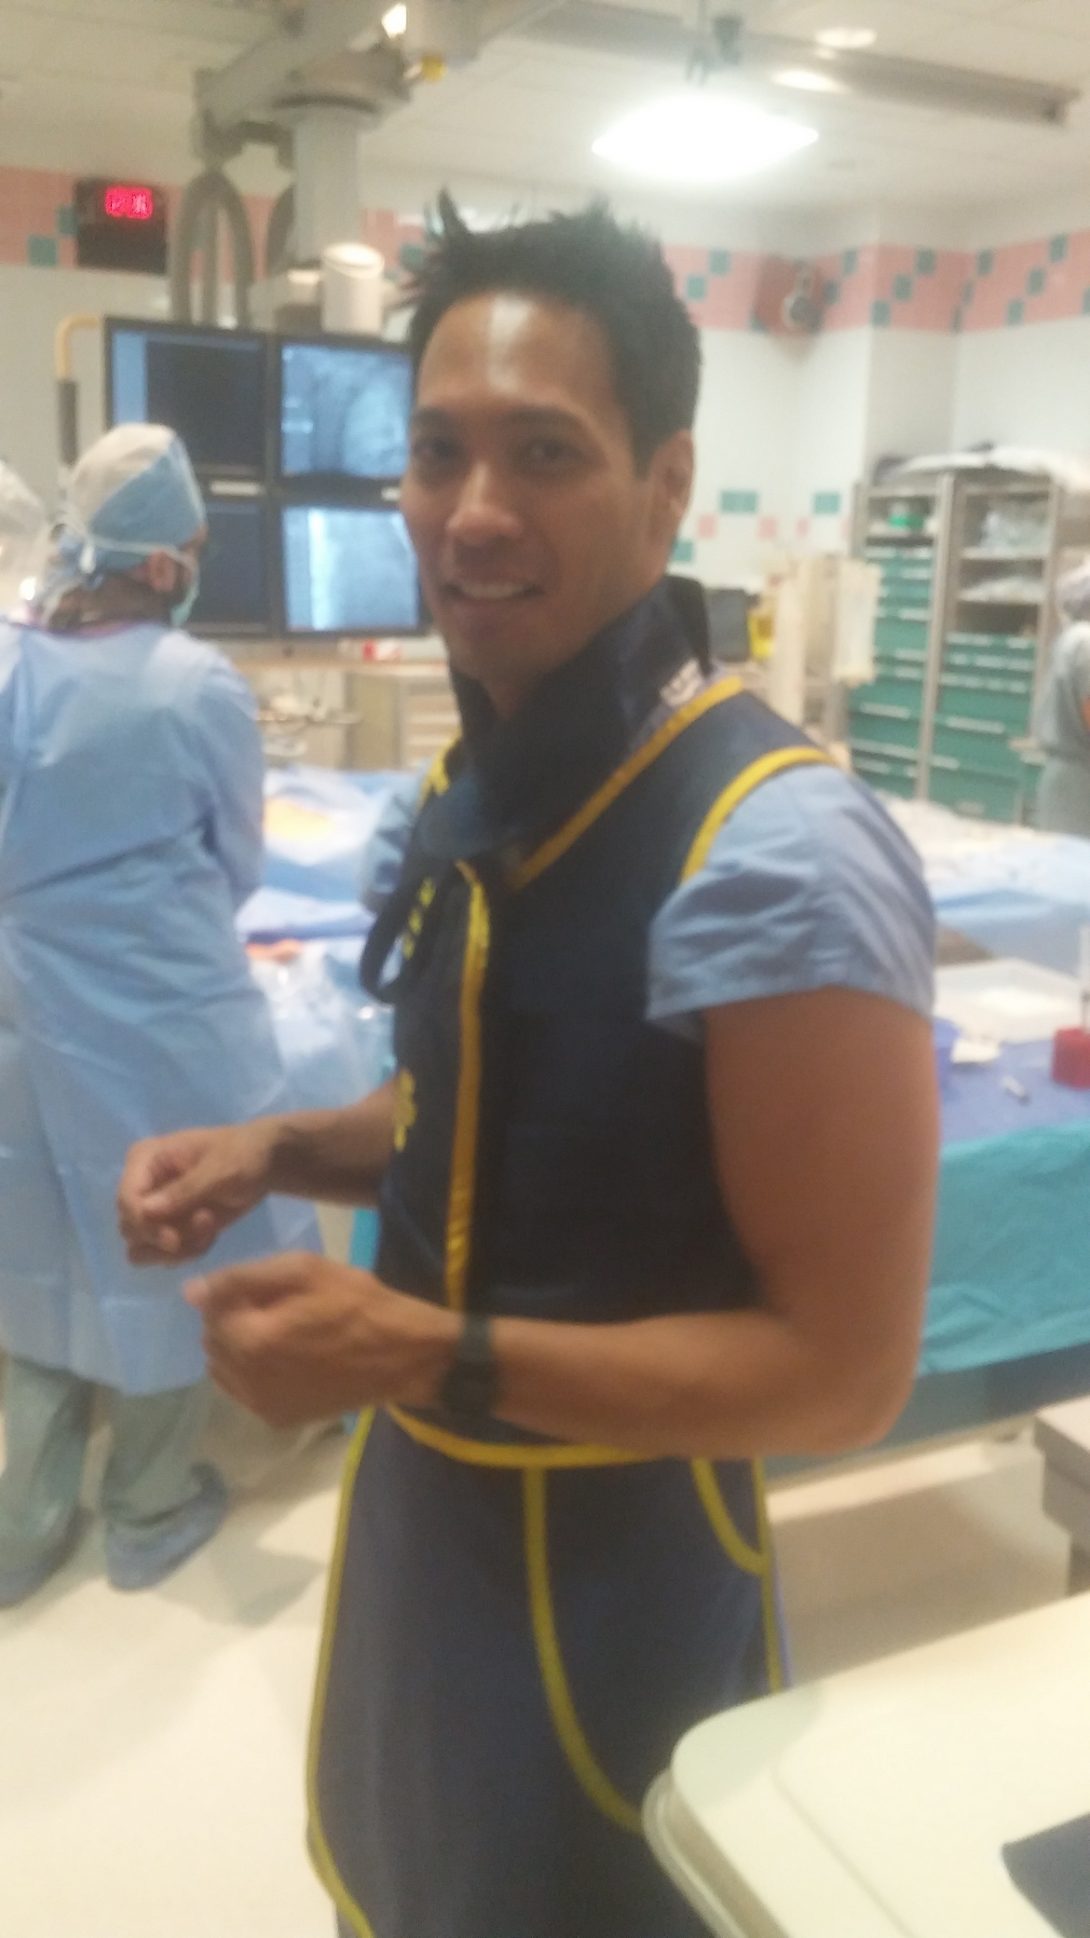
AEIOU framework key
A = Activities
E = Environment
I = Interactions
O = Objects
U = Users
Intro
The first week in the Clinical Immersion Program was our entrance into cardiology. Although we spent a little bit of time getting oriented to the physicians, staff, labs, procedures, and equipment we pretty much jumped right in.
Echo readings (bad design/process)
In the echo reading room, attending physicians review incoming echo readings and record their findings for each patient. The amount of time it takes to read each patient’s case was variable, but one attending commented on how she generally reads about 6 cases per hour. Echo readings seem to be done throughout the day when the doctor can squeeze in the time. One day, the attending doing the readings was able to keep up with the incoming cases throughout the day and was able to juggle her other responsibilities fairly easily. However, we found that on another day a different attending was already pushing a 12-hour shift and had trouble keeping up with the number of cases to review and still had other duties to perform before she could go home. We didn’t get a chance to dive too much into why things were different for the two doctors, but it seems reasonable that these kinds of bottlenecks can occur based on how variable the workload is for a physician on any given day. Also, one of the doctors said that when she gets interrupted in the middle of a case, she has to start that case over again. Although I don’t have enough information to think of a solution for this, this could be an area for improvment that would be extremely beneficial. Once a person falls behind, it can cause a cascading effect which can spiral into bad outcomes for the physician, the team, and possibly patients. Although this isn’t a “bad device” per se, this is a pain point which should be addressed.
A = Evaluating echo reports
E = Echo reading room
I = Doing echo reading in between other activities may not be efficient
O = An artifact is putting in more time which isn’t always the most efficient
U = Physicians
EP lab (bad design/process)
The electrophysiology lab is a space where physicians and their staff can evaluate and repair defects in cardiac function as a result of abnormal electrical activity in the heart. We asked a nurse if she had any pain points and she mentioned that sometimes in between cases it is hard for different equipment to be set up because not all staff is trained properly. Different procedures require different equipment to be hooked up before each case. If only a few people know how to set up the equipment, then this can delay the procedures if those people are busy on other tasks. This can become a circular problem because as schedules get pushed back and the staff become rushed, then this doesn’t allow time for other people to be trained.
A = Setting up the EP lab equipment between cases
E = EP lab
I = Only particular staff know how to set up the equipment; training doesn’t occur because of time issues
O = When only a few people are properly trained, this creates a bottleneck in the process
U = EP nurses
Cardiology outpatient clinic (good design/process)
The cardiology outpatient clinic is a place where practitioners can examine patients who are in need of cardiac assist devices. We spoke to a nurse who specializes in cardiac rhythm devices. This includes pace makers, implantable defibrillators, and others. We were allowed to observe her interactions with one patient who recently had an implantable cardioverter defibrillator (ICD) surgically installed. The patient was prone to having arrhythmias (bad heart rhythms) and this device would monitor for those rhythms and shock the heart into a normal rhythm if necessary. Although the device in and of itself is a technical marvel, the way the practitioners can gather the device’s recorded information is equally facinating. First, because the device is implanted under the skin, the ICD must be able to communicate with other equipment wirelessly. When the patient was in the office, the nurse booted up a computer which paired with the patient’s ICD. Information stored on the ICD, such as the number of arrhythmias detected or shocks administered, were sent to the computer. This technology gives thorough and objective data which can be used to analyze the patient’s health. Without this type of monitoring, a patient at home may feel chest pain and tell the doctor about it in a subsequent visit, but there would be no way of telling if an actual arrhythmia and shock actually occured. Another good aspect of this device is its ability to pair with a smaller, more portable device which is kept at the patient’s home. It connects to the user’s home internet connection or it can connect to the internet through a cellular signal. Every night while the patient is asleep, the home device pairs with the patient’s ICD and downloads and transmits the recorded activity. Because this information is sent on a nightly basis, the nurse or doctor can monitor this information in the morning and can proactively contact the patient if they see an event has occurred.
A = Using implantable cardiac devices for monitoring and resolutions of arrhythmias
E = Outpatient clinic
I = Nurse and patient interactions
O = ICD, clinic equipment, home equipment
U = Nurses, doctors, patients
Cardiology Week 2: Transesophageal echocardiogram storyboard
Erik Romano Blog
AEIOU framework key
A = Activities
E = Environment
I = Interactions
O = Objects
U = Users
Transesophageal echo storyboard
A = Transesophageal echo procedure
E = Outpatient procedure in the cath lab
I = Patient scheduling and visits; doctor and staff performing the procedure
O = TEE equipment, monitoring equipment
U = Patients, doctors, staff
In our storyboard we outline quite a few steps and pain points of a TEE procedure. We’ve seen the procedure done four different times, by four different sets of physicians, and in three different settings. The settings were in a cath lab, an EP lab, and at the bedside in the ICU. Although each case had some differences, we saw one common theme — there’s a significant amount of difficulty when inserting the TEE probe into the patient’s esophagus.
The very first patient procedure we saw was to be a TEE and a cardioversion in the cath lab. The probe was to be used to look for thrombi in the left atrial appendage of the heart. This is a common finding in patients with atrial fibrillation (AFib). If a clot is not found, then it would be safe to cardiovert the patient using electrical defibrillation of the heart. If this would be attempted in the presense of a clot, then there is a good chance the thrombus would embolize, oftentimes to the brain and cause a stroke. However, in this instance, the probe was never able to be passed down into the patient’s esophagus. At first the fellow had tried under as the attending gave general directions, but when she started having trouble the attending started giving more and more specific suggestions. After about 15 minutes, the fellow could not pass the probe and the attending tried. Over the course of several more minutes, they tried different options. They tried the scope at different angles, they flexed the patient’s head forward, and they removed the bite guard and held the tongue out. None of these options worked. They were about to use a GlideScope which would help visualize the opening, but in the end they decided that the patient was a difficult case and did not want to risk harm by trying further.
Over the next two weeks, we saw three more TEEs. In each case the fellow tried to insert the probe under the attending’s guidance. After some time the fellow was unsuccessful and the attending took over. In two of those cases the attending had a little bit of issue, but one time the attending was able to perform the TEE without any struggle. After speaking a bit with the fellows and attendings we found out that a doctor’s experience plays a large role in how easy it is to insert the probe. This is understandable since this is a mechanical procedure which requires a good amount of practice and skill. However, we see a great opportunity for improvement here. There must be ways to improve this procedure because if it takes years and many, many tries for doctors to hone their skills, then there is a large amount of risk to patient complications. We think by reducing this time by perhaps changing the size or design of the probe, or perhaps finding a way of training physicians by way of simulation, then maybe we could greatly reduce the amount of difficulty, quicken the time, and reduce the overall patient’s risk of complications during a TEE.
Cardiology Week 3: Needs statement
Erik Romano Blog
Problem
Transesophageal echo (TEE) probe insertion
Population
Any clinician having problems inserting a TEE probe; usually fellows, possibly attendings
Outcome
Efficiency
- Time
- Accuracy
- Less patient risk (i.e. safer)
1: “A way to address inserting an adult probe into a patient for less experienced docs.”
2: “An easier way to address inserting a TEE probe into a patient for less experienced physicians.”
- “easier” is more specific
- specific to TEE probes
- more professional language
3: “A way to insert a TEE probe on the first attempt by first-year fellows”
- “easier” was too general; quantified
- identify the problem group more specifically
4: “Improve the current design of the TEE probe to make it more time-efficient and less risky for doctors of less experience.”
- “improve” is more descriptive
- truly represents the problem
- “first-year fellows” is too specific
Below are my thoughts about the problem we’re trying to solve through our needs statement.
This week my group’s needs statement focused around the difficulties associated with inserting a transesophageal echo (TEE) probe down a patient’s throat, especially for inexperienced doctors. This was a problem that we’ve seen repeatedly througout our three weeks in cardiology. This gave us the opportunity to speak to a number of physicians about their opinions and experiences. We asked if they’ve ever tried smaller probes. One doc said that that was never considered as an option — when she learned how to do the procedure, she said that “everyone always just used the same size probe.” Two different doctors, one a fellow and another an attending, said that they rarely encounter problems. While still other doctors say that it’s always hard or that it takes a lot of experience before it gets easier. Although there’s a range of opinions on the matter, there seems to be enough information anecdotally and through online research that inserting TEE probes can be difficult; any complications associated with the procedure can, in the end, increase costs, waste time, and ultimately reduce patient safety and care. Primum non nocere.
Cardiology Week 4: Design specifications and criteria
Erik Romano Blog

Our needs statement has changed quite a bit since last week. Our first needs statement focused on the difficulty associated with inserting a transesophageal echo probe into patients. After many interviews and observations, we have changed our focus. We started to see that fixing the problem with TEE probe insertion was not straightforward. First, we’ve learned that the main factor which affects easy insertion is experience. It takes time for doctors to become competent and even more to become adept. Through our research, it became obvious that fixing this problem isn’t as easy as using a smaller probe. Small probes have been implicated in higher patient risk of esophageal rupture. Esophageal cameras have already been used as needed. Over the course one week, a new fellow said that she already started to understand how much pressure to use in order to successfully insert the probe.
While solving the TEE insertion problem would certainly be helpful, we decided to look into our other ideas instead. The need that we ultimately decided on was one which has a greater impact on doctors and patients.
Our new needs statement deals with helping doctors perform routine cardiac catheterization (cath) procedures more easily. During certain cath procedures, it can be common for the doctor to gain access to a patient’s arterial system either through the right femoral artery in the groin or through the left radial artery in the arm. There are pros and cons to deciding which site of access to use, but for simplicity’s sake, one can argue that catheterization through the femoral artery is “easier” (easier to reach for the doctors since they stand on the patient’s right side; the femoral artery is also the more traditional route of access). Cathertization through the left radial artery is better for the patient (quicker and less painful recovery) but many doctors opt not to go through the left arm because it is hard to reach over a patient to perform the procedure. This can be especially true with large, obese patients.
Our solution is in its beginning stages, but we envision a solution which allows doctors to more easily perform procedures through the left radial artery. Anecdotally we’ve heard first-hand that some doctors actively avoid the left arm catheterization unless absolutely necessary. While patient health may produce the same outcome either way, extensive research has shown that a patient’s recovery is significantly shorter and less painful when cath procedures are done through the radial artery.
The design specifications we identified are:
- Comfort (patient immobile for long periods of time)
- Safety (cannot cause infection or impede procedures)
- Intuitive
- Mobile
- Feasible (cost effective, economic/health benefits)
- Adaptable (can fit various beds)
- Adjustable (different patient sizes)
The design criteria we identified are:
- Must:
- Allow the cardiologist to gain easy catheter access via the left radial artery
- Adjustable for different sized patients
- Adjustable for different arm and hand positions based on the cardiologist’s needs
- Allow for sterile procedures
- Made out of radiotranslucent materials for x-ray
- Be easy to control and set up
- Be attachable to various hospital beds
- Not get in the way of other equipment
Cardiology Week 5: Beginning our project design
Erik Romano Blog
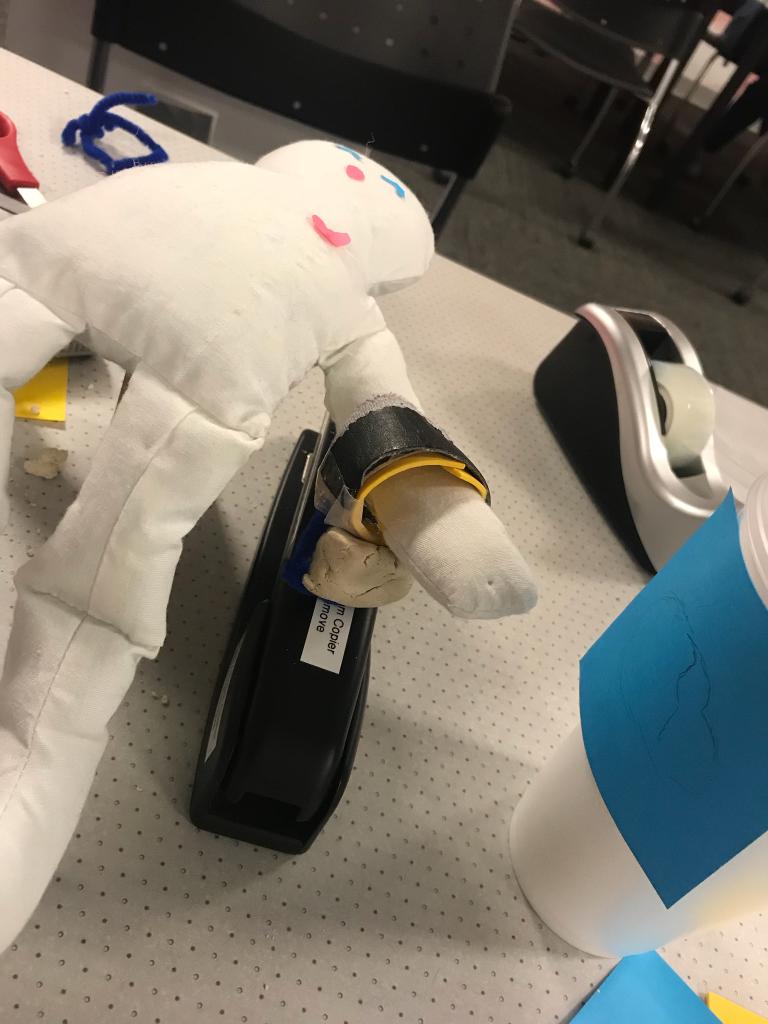
Last week we iterated and finalized our needs statement. We wanted a device which would hold the left forearm in place to help the cardiologist gain radial access for a catheter procedure. We listed some high-level specifications, such as comfort, safety, and adaptability. This week we began thinking of valid designs. The first step was to take the problem and translate that into a number of features that we wanted our solution to provide. You can think of this as “how can we make the specifications more tangible?” For example, we wanted the solution to be comfortable so we were thinking of using a soft, cushiony material upon which the arm would be rested. We also thought about safety. We needed our device to be easy to clean and provide a sterile area where the doctor can perform the procedure to prevent infection. We came up with this rough list of features of an arm rest which would hold the left :
- A band which holds the palm and extends the wrist
- Can be elevated enough for when the patient cannot lie flat, e.g. congestive heart failure patients who must sit up to some degree to be able to breathe
- Use a ball and socket joint to allow freedom of movement in multiple planes
- All moving parts must be easily lockable so that the surface is stable during the procedure but can be easily moved out of the way when necessary
- The arm rest must be able to be easily positioned to accommodate a large range of patient sizes
- The arm rest must be cushy
- The arm rest must be cleanable and allow a sterile work area
- The upper arm can be stabilized by a foam cushion or something similar (we won’t solve this problem directly; we can use existing low tech solutions to accommodate this to keep costs down and to provide simplicity)
- Must be radiolucent to not interfere with fluoroscopy
- Allow pronation of forearm
- U-shape adjustable arm rest
- Allow the patient to move the forearm closer to the doctor for easier access
Once we came up with this list, we began to brainstorm about possible designs. We looked into technologies which existed which would prove that our designs had a basis in reality. We looked into various rotating and sliding hinges, surfaces, and materials. We also experimented with various patient positions by using our own bodies as a reference while also imagining extremely large and small body sizes. We began to whittle away some of our designs as we found out what could and couldn’t work.
We also spent time interviewing doctors. We needed to validate that we were working on a problem that truly existed and that finding a solution would be meaningful and beneficial to both patients, doctors, and the healthcare system (i.e. ultimate reduces healthcare costs overall).
Clayton Rosinski
Clayton Rosinski
Clayton Rosinski Blog
Clayton Rosinski Blog
Week 1
Clayton Rosinski Blog
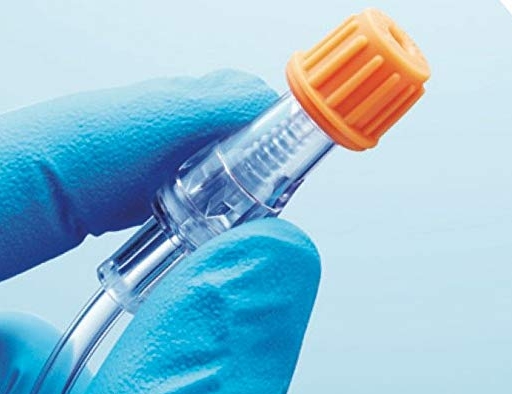
Much of my time was spent in the neurosurgical intensive care unit (NSICU). This unit is reserved for the very sickest patients under the care of neurosurgeons and neurologists. Patients have varying degrees of neurological impairment and consciousness. An issue which stems from these neurological deficits can be an inability to protect one’s airway. In essence, patients with severe neurological impairment lack the proper swallow and cough reflexes to prevent liquids (mainly saliva) from entering their trachea and reaching the lungs. This can lead to complications such as aspiration pneumonia. In order to prevent this, physicians use tracheal intubation and tracheostomy. Both techniques ultimately result in a tube within the trachea, which has an inflatable cuff on it that expands to the walls of the trachea creating a physical barrier to saliva. While these methods do prevent saliva from reaching the lungs, they are associated with very impactful drawbacks and complications. The process of intubating patients is one of the more dangerous procedures that occur within the NSICU, while a tracheostomy confers all of the common dangerous associated with surgery. Intubation and some tracheostomies prevent patients from being able to cough because air can no longer move freely through the trachea, requiring constant suction from the lungs to remove secretions. Additionally, both products have increased rate of infection, and often lead to pneumonia, which is what they are supposed to prevent in the first place. There are many more drawbacks and potential complications associated with intubation and tracheostomy, and, ultimately, they often are used just to prevent oral secretions from reaching the lungs.
The Swabcap represents a very good product which I encountered in the NSICU. It is a very simple solution to the potential of microbes colonizing the ports for a patient’s IV lines. The plastic cap is alcohol filled and fits onto the IV port providing 7 days of sterilization. IV ports could also be sterilized by alcohol swabs, however the Swabcap seems to be the preferred method. Part of this is the simplicity, IV ports don’t need to be swabbed each time before use, which could require the person using the IV line to quickly sterilize the port in an emergent situation. These caps provide visual confirmation of IV port sterilization, erasing confusion as to whether the IV port is sterile. This simple product helps reduce hospital associated infection, particularly bacteremia, which can be life threatening.
Week 2
Clayton Rosinski Blog
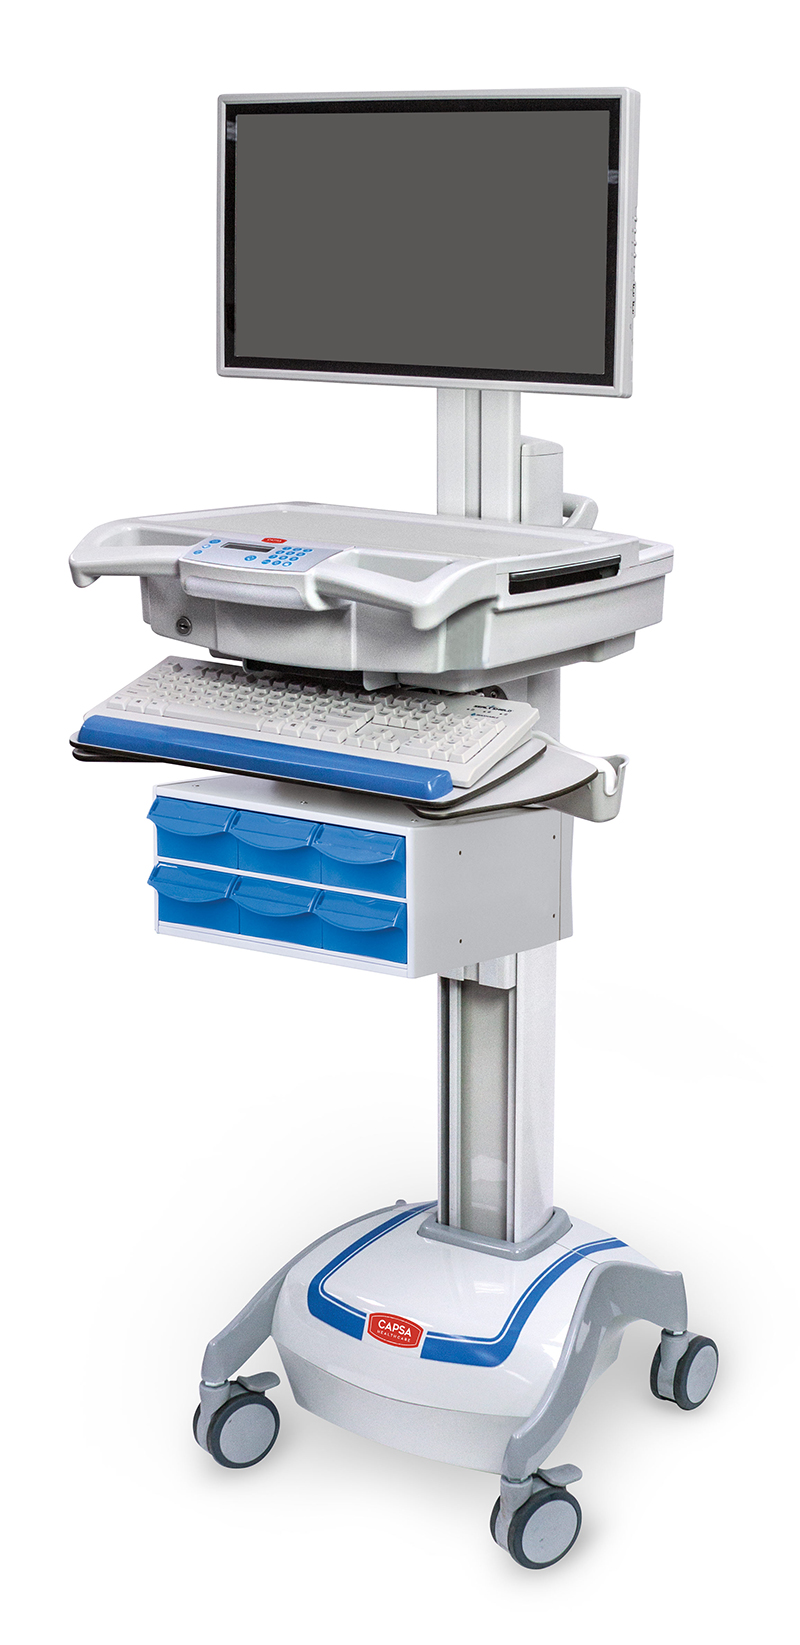
We again spent a fair amount of our week rounding in the neurosurgical intensive care unit (NSICU) with the neurology team on consult. This process is cyclical in nature, moving from patient to patient. The team is composed of a neurology attending, neurosurgery resident, neurology resident, anesthesia resident, pharm D., and the occasional medical students. Rounds begin by reviewing imaging (XR, CT, MR, etc) obtained the day prior for each patient. Then, the team gathers outside of the first patients room, using rolling computer stands so the electronic medical record can be accessed, and moved from room to room. Here, any events which have occurred since the most previous rounds (last evening) are discussed. The team enters the patient’s room and performs the relevant physical exam maneuvers (mostly neurological). They also talk with the patient about how they are doing, and with the family if they are present. Outside of the room again, the team updates the plan of care for the patient by discussing their status, diagnostic tests and imaging needed, and current medications. The team rolls their carts to the next room, and the cycle begins again.
One of the obvious pain points of this method is the use of the computer carts. With 3-4 members of the team having these computer carts in already crowded hospital hallways, a maze of carts forms that makes any movement through the hall difficult. People are continually trying to squeeze between the carts, requiring the people using them to move them out of the way. This results in constant interruption and makes it difficult for people to move in and out of the unit. This is especially evident when a patient in their bed is being moved in or out of the unit, requiring all people with carts to squeeze into other spaces near the hallway to allow the bed to pass through. We surveyed the individuals using the cart, and contrary to our expectations, found that they all enjoyed using the carts, and would much prefer them to something more portable such as a tablet.
Needs Statements
Clayton Rosinski Blog
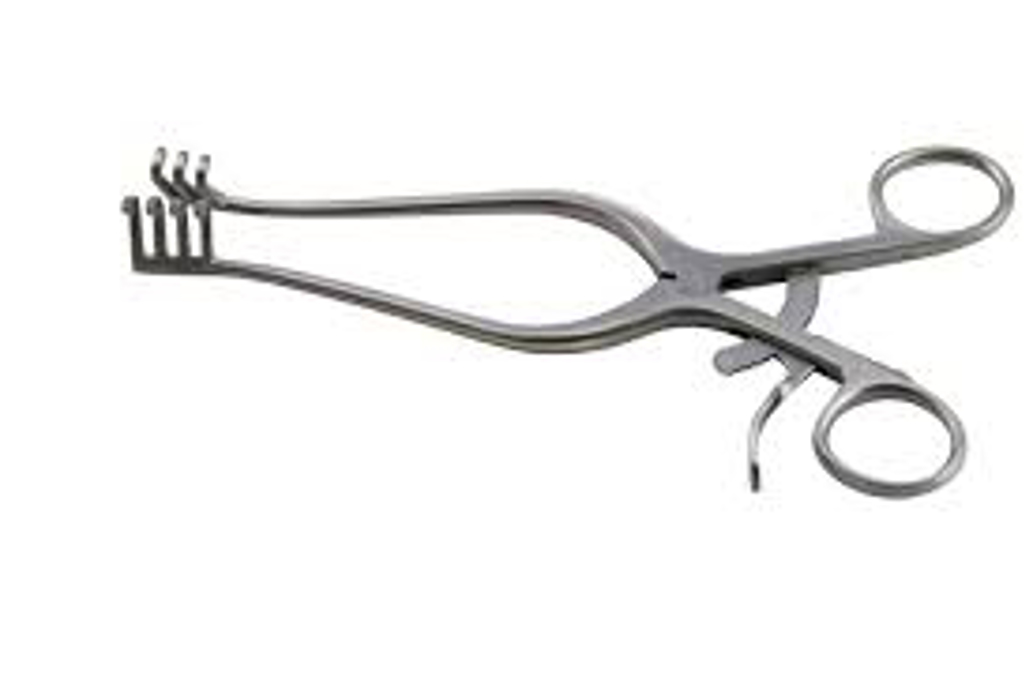
Need to better retract tissue during surgery.
Need tools which retract more tissue during surgery that don’t interfere with the surgeon’s work.
Need a way to retract tissue during surgery to create better exposure while being easy to use and unobstructive.
Iterations of the original need statement reflect the importance of a surgical retractor to not only increase surgeon visibility but the tool must be easy to implement as it will likely be repositioned multiple times in surgery. Additionally, the tool must create proper exposure while taking up as little working space as possible to not be a hindrance to the surgeon.
Week 4
Clayton Rosinski Blog
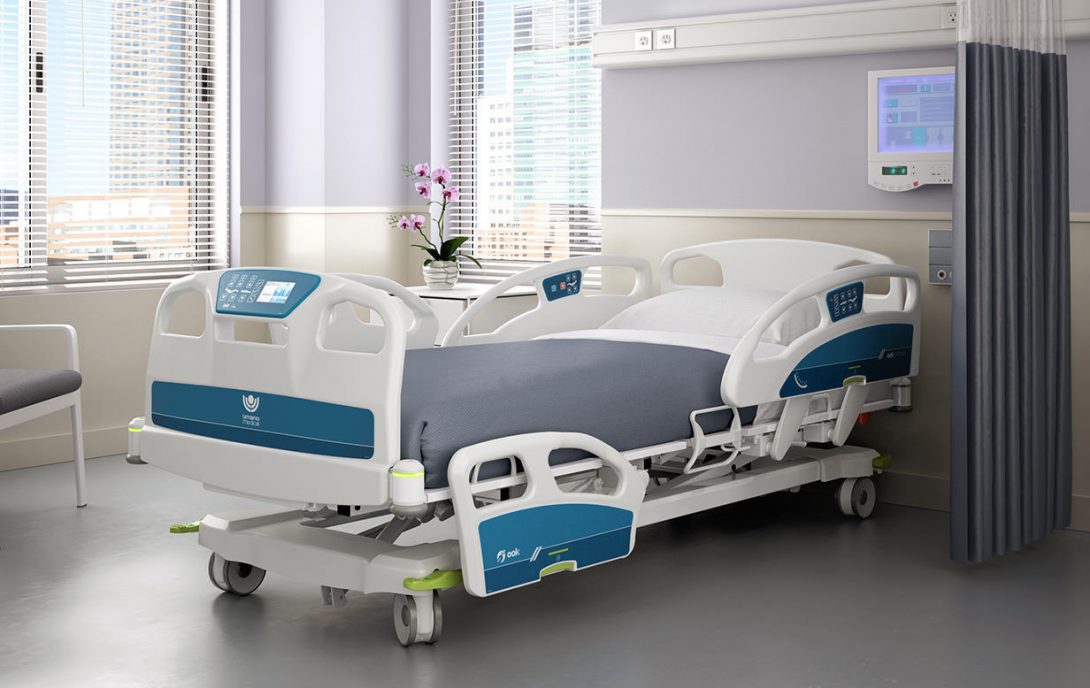
John and I have decided to focus on the issue of pressure sores in bedridden patients. When patients spend many hours in a day, the constant pressure on their skin can cause the integument to begin to breakdown leading to many complications including bloodstream infections. The current measures to prevent pressure sores from developing are rather limited, ineffective, time consuming, and expensive. We theorized some potential solutions, many of which are way out there in terms of feasibility. We then ranked these ideas based on how they scored in terms of safety, efficacy, comfortability, and ease of use. Ultimately, looking at our different ideas through those four lenses helped us internally rank our proposed solutions.
Week 5
Clayton Rosinski Blog
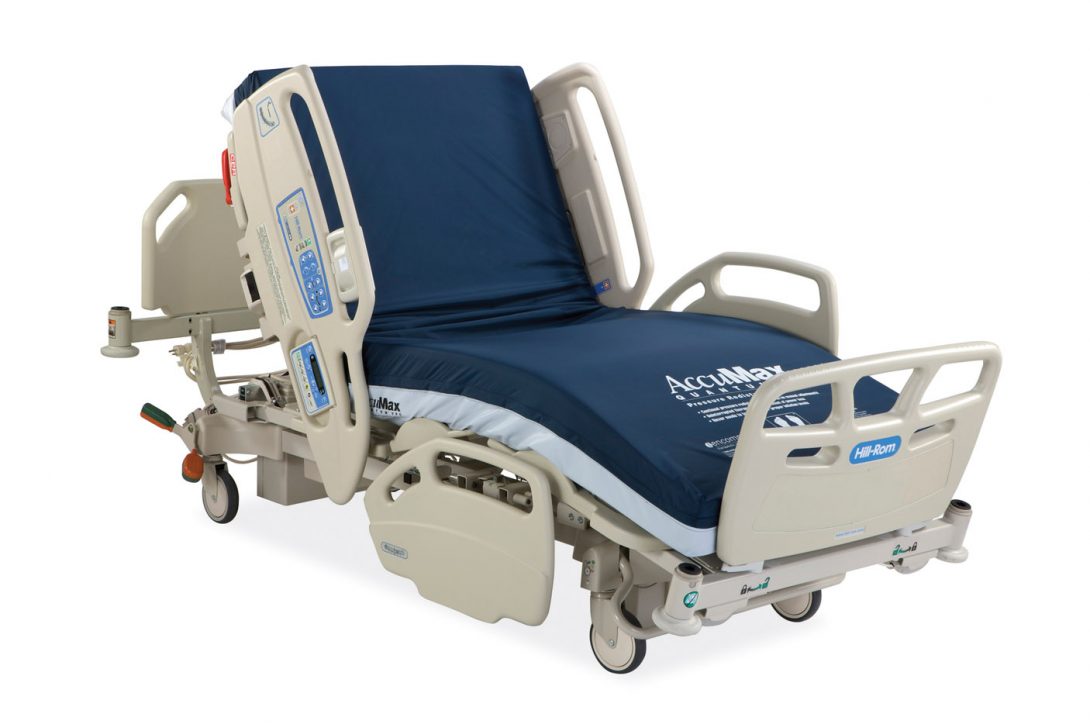
This was my final week in the program, and I spent it primarily talking with my mentor and other hospital staff about the concept John and I have come up with to address the development of bedsores. I found that each person we spoke to had unique suggestions and critiques which really helped us refine our idea. We spent this week tweaking our solution based on the specifications, needs, and performance criteria that we deemed important after talking with our mentor and other staff.
Manpreet Tiwana
Manpreet grew up in Cupertino, California. He graduated from the University of California Berkeley with a degree in Integrative Biology. While in school Manpreet worked on research in biomechanics and physiology. He used computer simulation, animal tracking techniques, and physical modeling to observe how different species have evolved different ways to tackle the problem of locomotion. The goal of the lab was to develop more precise search and rescue robots and artificial limbs. Manpreet looks forward to combining his interest in medicine and innovation through the IMED program. In his downtime, Manpreet enjoys playing a bunch of different sports, dancing, and hanging out with friends.
Manpreet Tiwana Blog
Manpreet Tiwana Blog
Week 1
Manpreet Tiwana Blog
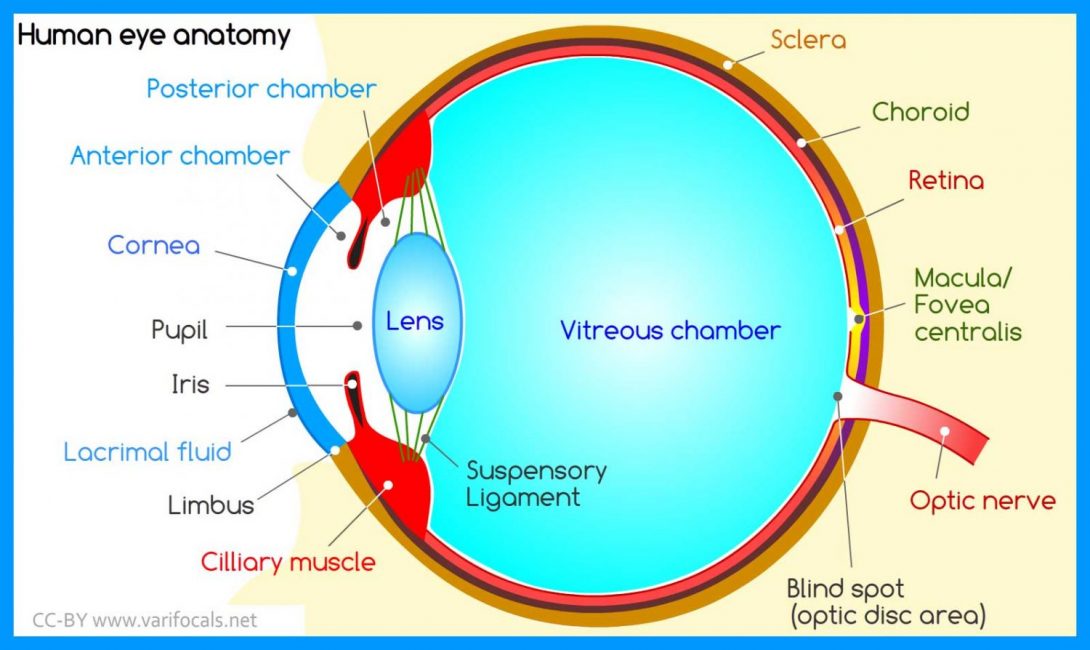
Ophthalmology is the field of medicine that relates to the eye. There are so many subspecialties within ophthalmology even though the eye is such a small organ. Oculoplastics deals with the orbit, eyelid, tear ducts, and face. Cornea relates to the outside layer of the eye. Glaucoma is a subspecialty that relates to degeneration of the optic nerve, normally caused by fluid buildup. Neuro-ophthalmology combines neurology and ophthalmology and treats complex systemic diseases that involve the eye. Retina deals with the innermost layer of the eye, and uveitis is a specialty that deals with the middle vascular layer (uvea).
In the first week of the immersion program, we were able to rotate through surgeries and clinics of a bunch of these subspecialties and I think that experience was invaluable. It has helped me gain a better understanding of the eye as a whole and has helped me connect the treatments and diagnoses together and see the eye as a whole instead of just one small part of it.
Being a field that prides itself on technology, we found a lot of innovations, some which had good designs and others which had not so great designs.
Good Design: The double lens microscope used in surgeries.
Manpreet Tiwana Blog
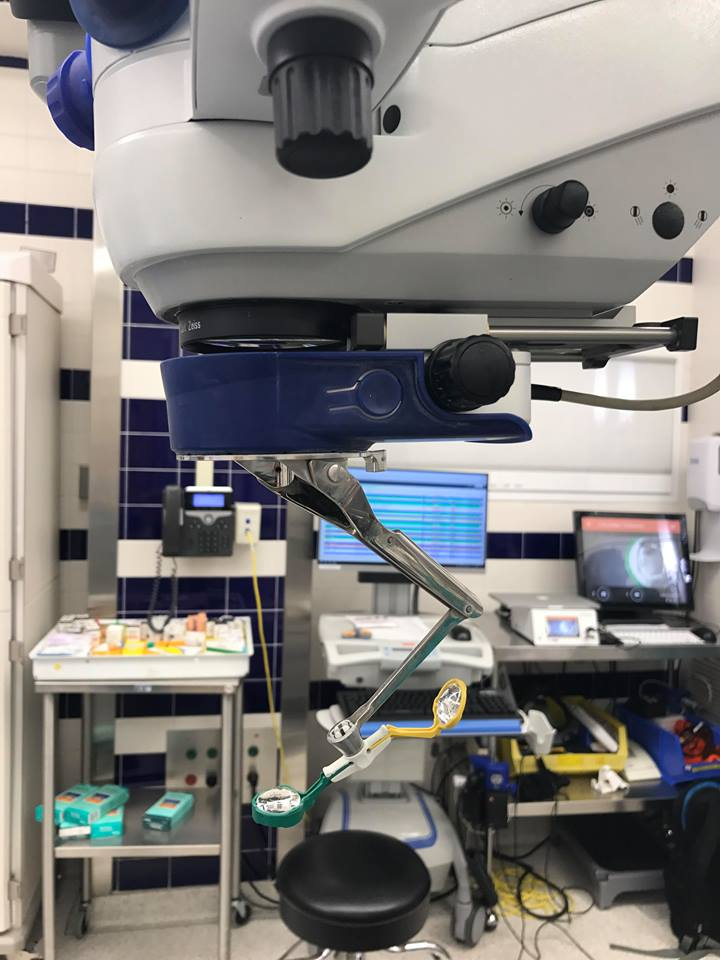
Almost all surgeries in ophthalmology are done with the microscope, because of the size of the eye and the pathology associated with it. However keeping in mind that the eye is a 3-D structure, we needed a way to be able to see in the back of the eye, especially for surgeries that involve the retina, such as vitrectomies. Vitrectomies are used to treat retinal detachments. They take out some of the fluid in the eye and replace it with a gas bubble. That gas bubble can then push the retina back against the eye and prevent it from completely detaching. This lens is easily accessible during surgery as you just pull it out from under the microscope. Surgeons pull out the second lens and can put it back with ease to take quick looks at different parts of the eyes.
Bad Design: Eyelid Crutch for Ptosis
Manpreet Tiwana Blog
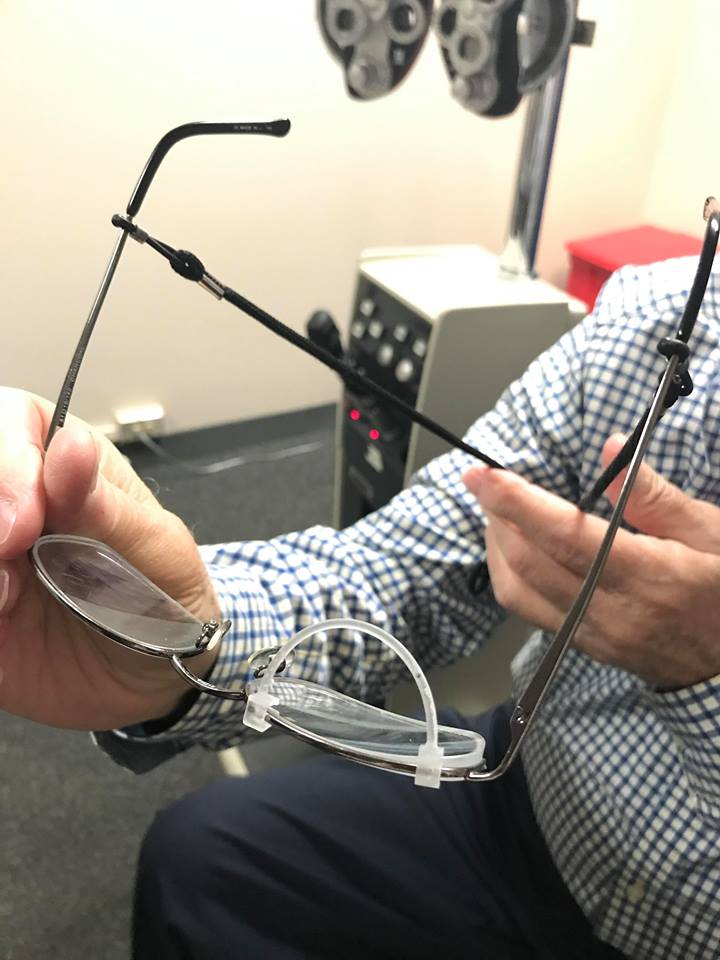
When my partner and I first saw this design we were fascinated at how simple and easy the design was. Ptosis is a condition where the upper eyelid droops over the eye. With severe ptosis, the eyelid can droop so low that it covers the pupil and can limit the amount of light going in, ultimately blocking vision. Usually, this condition can be treated with surgery, however, if you are not a good candidate for surgery then what would you do? They have created this eyelid crutch that one can put on their glasses, which allows the patients to physically raise up their eyelid. This would make sure the eyelid doesn’t cover any part of the eye, so their vision would not be blocked. After reading more, and talking to the patient about this design, however, my partner and I realized this wasn’t the best design. It was uncomfortable, often came off the glasses, and the patient had to keep taking it off to adjust it. So although the idea is great, the design is one that can be improved greatly not only for the patient’s comfor, but for the functionality of the product as well.
Week 2
Manpreet Tiwana Blog
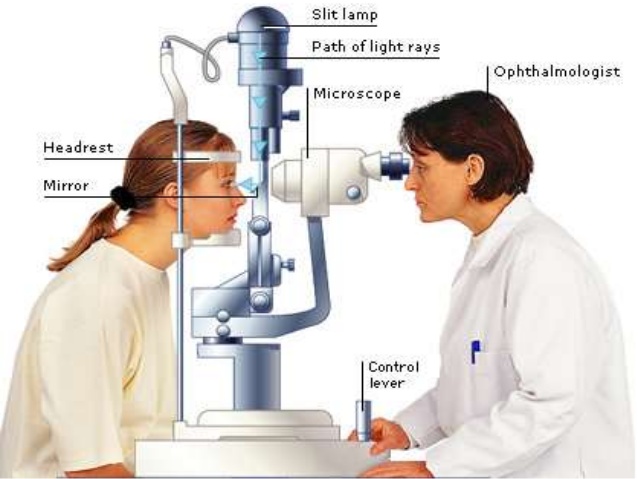
This week’s blog post is going to be on a storyboard of something that we observed. Since a typical Ophthalmology clinic day is quite different than any other specialty we decided to just storyboard a typical day in the clinic and observe the pain points in each step of the way. Most of the subspecialties in Ophthalmology have the same steps but Oculoplastics and Cornea have a few different steps which I won’t be talking about.
Step 1: Gather all the Tools
In ophthalmology, there are a lot of tools that the physician needs for the physical exam. And it takes time to gather all of those tools together as some of them are not in every room.
Step 2: HPI, PMX, PSX, Allergies, Immunizations, ROS
We found no pain points in this step. It is usually the resident who will go over this part. We had an idea of possibly making this more electronic but all of the physicians we talked to preferred the paper as they could draw the eye as they saw it on the note.
Step 3: Vision Check
Manpreet Tiwana Blog
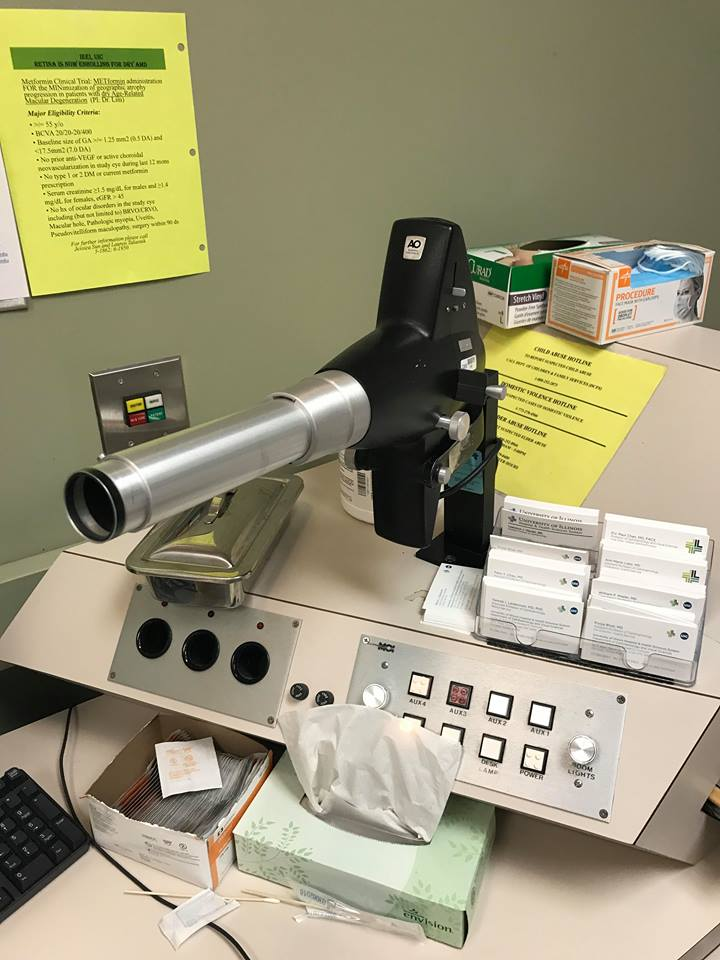
In the Retina/Uveitis clinic, the vision check was done with an older looking machine. The problem with this machine was it only had one set of letters for each of the eye distances. That way the patient could easily remember the letters as they switched from one eye to the other.
Step 4: Eye Dilation
After the vision is checked and the history is taken, the patient then gets their eyes dilated. This is so when the doctor comes in and checks the patient with the slit lamp and the ophthalmoscope, they are able to see in the eye. However, it takes about 20 minutes after dilation before the patient is ready to be seen and there was no easy way to tell when the patient was dilated.
Step 5: Slit Lamp Exam
The slit lamp is a very sophisticated tool and the doctor will use this device pretty much every time to see the patients eye. However, one flaw we saw was that there was no way to turn off the light of the room on the slit lamp. To get the best view of the eye, you need the lights to be turned off but sometimes if a physician was in a rush they would just leave the light on because it would be a hassle to drag their chair over and turn off the light.
Step 6: Pressure Check
The physician uses a tool on the slit lamp to check the pressure of the eye to screen for glaucoma. We did not find any pain points in this part of the exam
Step 7: Indirect Ophthalmoscope
This is another useful tool used to look in the back of the eye. The one problem we saw, especially in pediatric patients, is that a lot of them were not able to sit still because the light was too bright. That affected the physician being able to get a good look at the whole eye. If there was a way to still see the back of the eye without shining such a bright light in the eye, that would be a very valuable contribution.
Step 8: Test Results
Manpreet Tiwana Blog
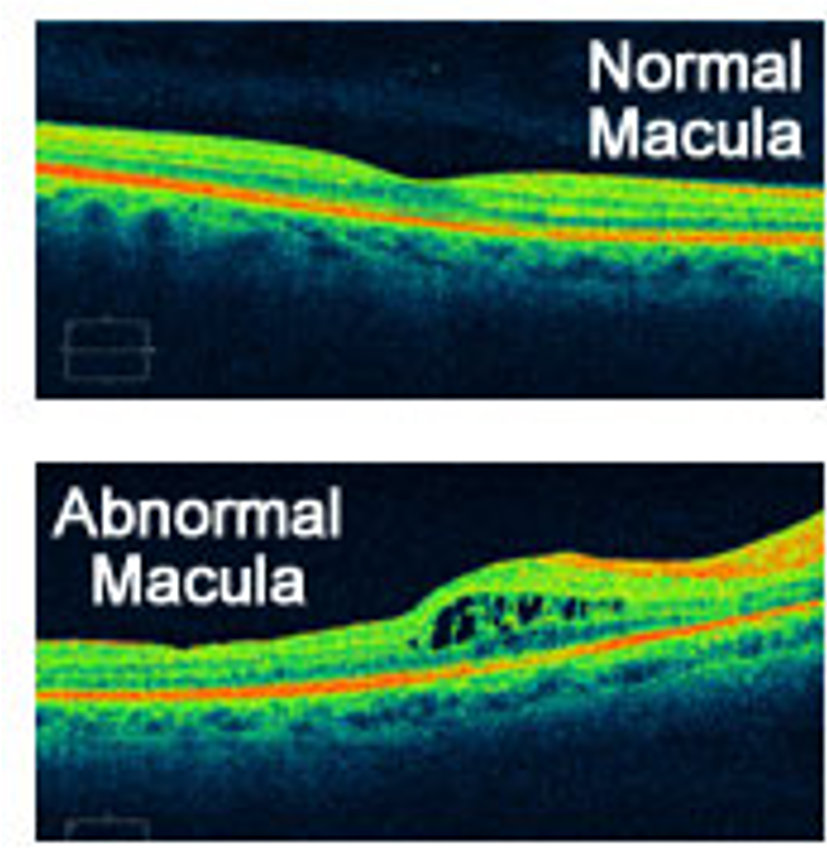
One problem for test results we saw was that some of the pictures were not able to be compared side to side with a split screen which is a very necessary feature to be able to tell the differences over time.
Needs Statement
Manpreet Tiwana Blog
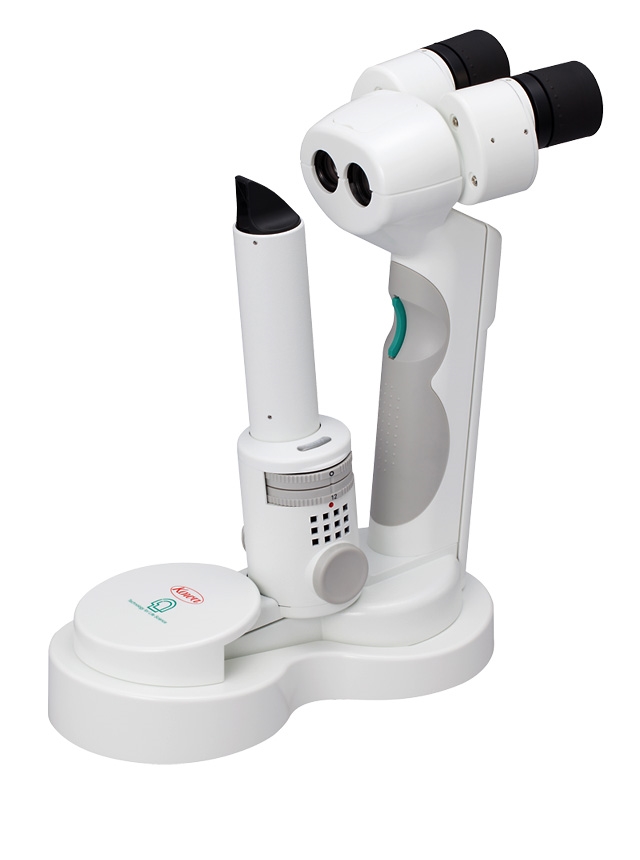
This week we focused on developing a needs statement through all the observations we have had over the last 3 weeks. In the beginning, my partner and I found it hard to develop just one needs statement for all of the problems, so we decided to split it up into two different needs statements. One focuses more on the physicians and the other focuses more on the patients. However, both of them affect the patient-physician interaction.
The first thing we realized is that the techniques used in ophthalmology for the visualization of the eye were fascinating. However, it took years of practice to master these techniques so often residents, or even fellows were not able to see what the attending physicians could. So we developed our first needs statement based on that. Here are the 3 iterations of it.
1. A method to allow physicians for more detailed visualization of the back of the eye.
2. A method to allow physicians for easyand detailed visualization of the back of the eye in high-risk patients.
3. A method to allow residents, fellows,and physicians for easy and detailed visualization of the back of the eye inpediatric, emergency care, and post-operative patients.
The second need we identified had to do with patient compliance of medication. Often in ophthalmology patients are on strict regimes of eye drops. These eye drops have different color caps to identify them but the problem we noticed was that the patients sometimes would not be able to keep track of what medication they had to take and when they had to take it. There was a form that physicians gave out but many people who come into the clinic have visual problems and cannot read the print on the paper. So we developed our second needs statement based on that. Here are the 3 iterations of it.
1. A method for increasing medication compliance in ophthalmology patients.
2. A method for increasing compliance with and understandingabout medicationsin ophthalmology patients.
3. A method for increasing compliance with and understanding about medications in chronically diagnosedophthalmology patients.
Week 4 – Specifications
Manpreet Tiwana Blog
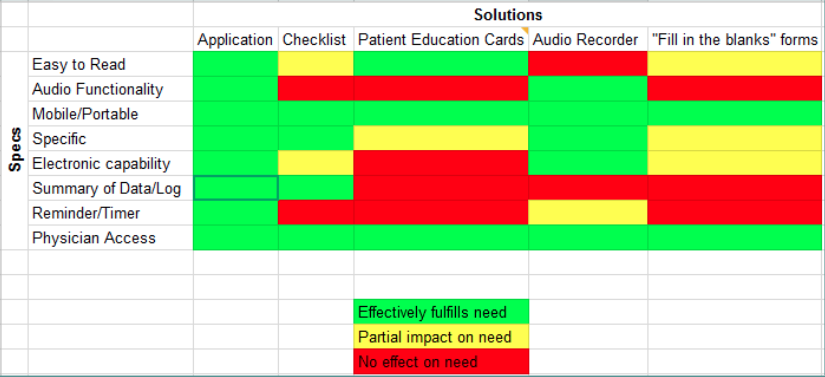
In this week, we tried to transition from more observations to focusing on our final project. We had 2 needs statements last week and are now focusing on the one related to medication compliance. Our updated needs statement is: A method to enhance education and increase compliance with medications in chronically diagnosed ophthalmology patients. Throughout the course of the week, we tried to define which criteria would be the most important our project and came up with a list
1. Easy to Read – many ophthalmology patients have visual impairments and have low vision so one of our main specifications would be that whatever we design be easy to read.
2. Audio Functionality – Piggybacking off of number 1. If there is an audio functionality they will not have to even read anything.
3. Mobile/Portable – Taking many medications for one day can be a hassle so having a portable design will allow the patient to keep track more accurately.
4. Specific – Each patient is different and has their medications tailored to their specific needs so having a design that allows for that specificity would be ideal
5. Electronic Capability – In the modern era of cell phones and laptops, people have these items everywhere they go. Having a design that is electronically capable would make it that much easier for the patient.
6. Compliance Tracker – A tracker that allows the patient to see how many times they have missed their medication in a graphical and easy to read format. This will not only give them information about their compliance but also motivate them to be better in that regard.
7. Reminder/Timer – With so many medications and so many different times it is important to have a reminder/alarm clock so that the patient does not have to think of when to take which medication.
8. Physician Access – This way the physician can also look at the compliance and adjust the medications or change the regime as needed.
Week 5
Manpreet Tiwana Blog
This week was our second to last week in the program for the summer. We identified a project as well as our high-level specifications and were just fine tuning those specifications as well as working on the project.
Our main project (an app for medication compliance) was one that we thought of based on the difficult medication regimes we saw in the clinic. Sometimes my partner and I had a hard time remembering what drop to take at what time. So basically we hoped to give a tool for patients to better track their medications as well as give physicians a tool to check the patient’s compliance with their medications.
We talked a lot with the attendings and the residents this week about our project as well as another project we were working on on the side and got some great feedback. We realized some flaws in our designs and some things to think about that we never did. I believe now we have a better understanding of exactly what we need in the projects and can continue to work on and refine them.
Jude Vazhappilly
I’m Jude, a Bioengineering student at UIC in the cell and tissue concentration, with interest in pharmaceutical and biotechnology industry.
Jude Vazhappilly Blog
Jude Vazhappilly Blog
Week 1: The Extra Mile [square]
Jude Vazhappilly Blog

With the first week in the books, I can say that this week has been very interesting. From some very interesting cases in the operating room to the extraordinary doctors that work in the clinic. One of the biggest barriers that I observed was language. Most the patients visiting the clinic at Miles Square were minorities and needed translators, which the clinic accommodated with offsite translators that can be pages upon patient request.. Some of the doctors spoke many languages, which made an obvious difference between patient and physician interaction. The patients were more open about their situations and looked more comfortable. For example, there were instances where the physician used two sign language translators to convey the importance of a surgery to the patient. While the conversation took longer to complete, the patient looked very satisfied in the effort made to explain the goals and potential risks. This patient centered design allows for patients to be fully involved in the treatment and as well as feel in control of their health.
Unlike the clinics, at the operating room, the importance is to coordinate with different departments participating in the surgery (anesthesiology/pathology/urology) to make sure everyone was on the same page. One way that this was done was using a “time out” system. During the “time out,” the patient name, DOB, surgery is confirmed with the patient (during patient prep) and with the surgeons (after patient is anesthetized). This is a good design to prevent any confusion during the surgery. In addition, any allergies and post operative procedures are discussed to achieve a smooth transition for the patient.
In conclusion, communication is very important in the clinic and operating room. In order to have everyone on the same page and provide the most efficient care, the designs currently in place are very important. However, there are still some very old school methods used in the clinics that need to be innovated.
Week 1 tip:Stay away from the sterile fields in the operating room!!
Photo credit: Jude Vazhappilly
Week 2: Be there or Be Square
Jude Vazhappilly Blog
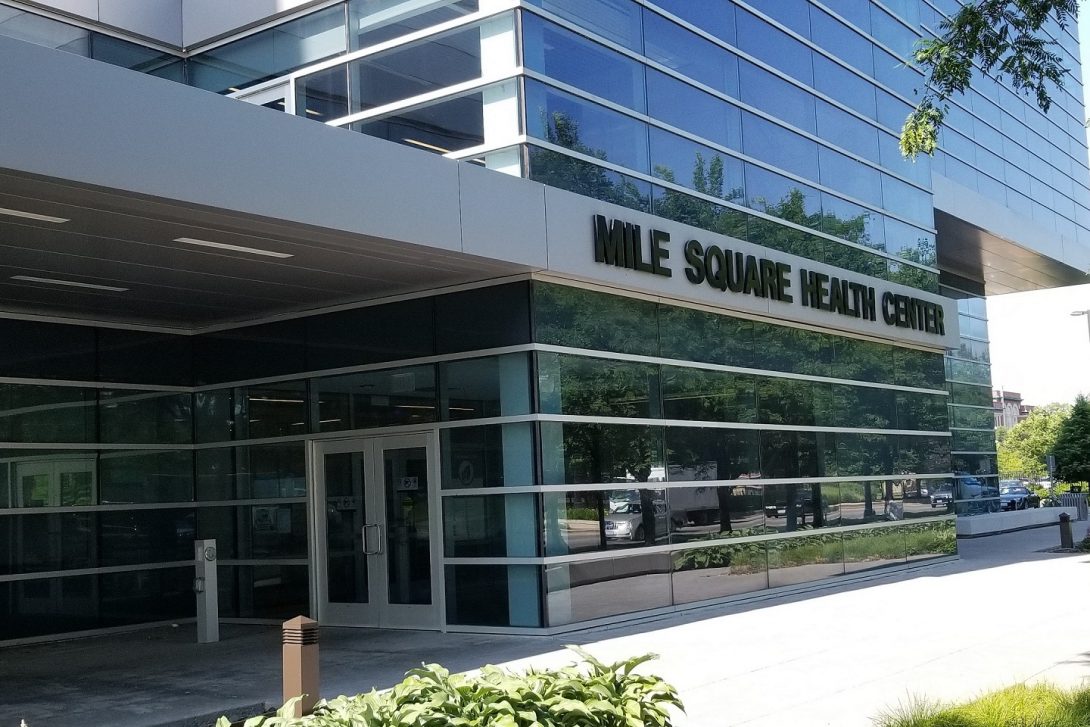
With the second week behind us, we used the observation techniques learned to identify potential problems. By following a typical patient’s process through the clinic, we were able to identify where some of the issues take place. Since the Miles Square clinic is located in the city, many of the patients take public transportation, which can be unreliable at times. If the patients are ever running late, they can call the clinic call center to notify the clinic; however, the call center never notifies the clinic of the delay. Once the patient arrives at the clinic, they are seated in the waiting area to be checked in. The check ins/outs are completed by a single receptionist. The wait times can sometimes get lengthy depending on the patient traffic.
Then, the medical assistant (MA) at the nurses stations calls the patients and seats them in the exam room. The names are often mispronounced and patients ignore the call. The MA also marks the system to update that the patient has been seated in an exam room. The assigned doctor reviews the patient files and consults the patient. The exam rooms are arranged in an awkward manner, the bed is extremely close to the door and can hit the patient if the patient if seated on the exam bed.
The patient is consulted on the potential risks of surgery/state of their recovery/ and or the test results. The patients are also given informational material regarding their procedures (if needed). The doctor then marks the system to complete the visit. The patient is directed to go check out, where future appointments are made. Again, this is conducted by a single receptionist and the patient can endure wait times up to 30 mins.
Week 3: The Needs Statements
Jude Vazhappilly Blog
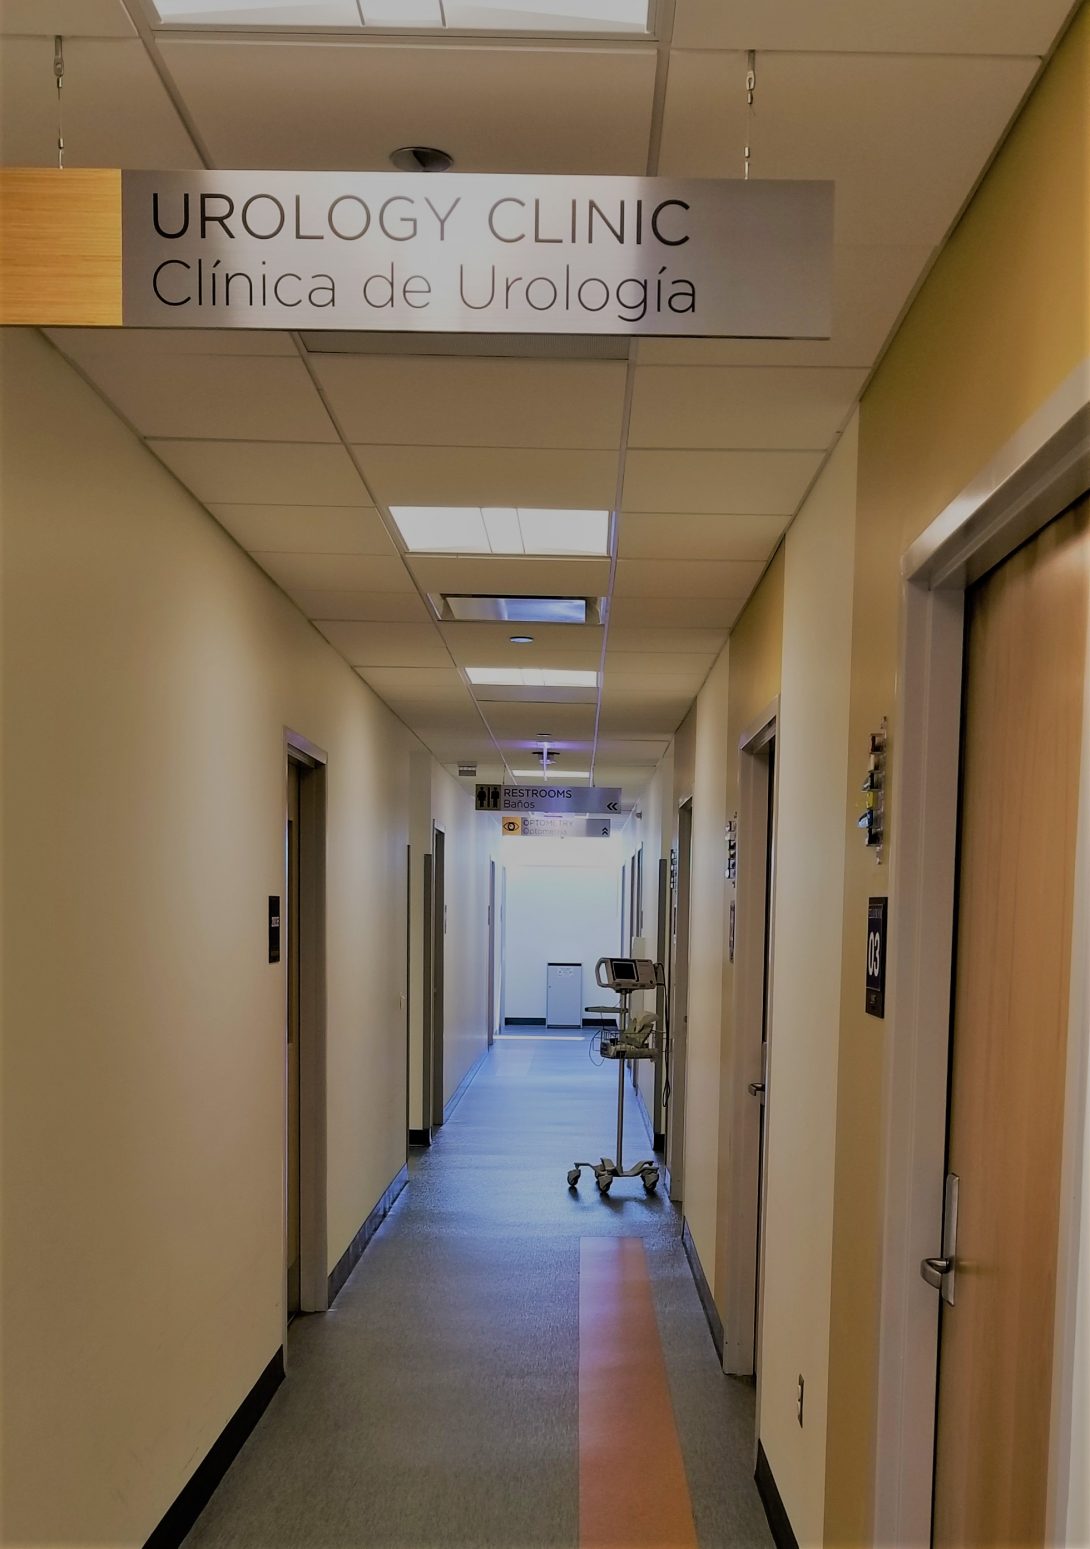
This week was spent organizing all our observations into needs. Needs statements are problems identified from observations that state the outcome. From the 3 weeks of observations in the clinic and operating rooms, we were keen to listen for when patients/doctors were frustrated. When it came to patients, we noticed that there was a varying difficulty depending on the patients. However, we observed that most patients were often confused about their course of treatment and more often than not, it arose from a disconnect caused by language. Most patients at the clinics were Spanish speakers and the clinic relied on translators to ensure the patients understood everything. We arrived at the needs statement:
A better way to communicate between patients, translators and providers in the clinics as measured by patient satisfaction scores
As we discussed and observed the clinic more, we realized that the clinics had some exceptionally novel tools to address the issue. The face to face translation service was available but rarely used. We adjusted the needs statement to:
A better way to enable face to face communication between patients, translators and providers as measured by patient satisfaction scores
With further consults of clinics, and interviews of patients on the difficulties that had on their visit, we learned that even with the Spanish translators, the patients still were confused. Presenting the information to the patient is one step, but having the patient understand their treatment is another.
A better way to improve understanding of between clinicians and patients as measured by patient satisfactions scores, appointment time with translator and need for repeated appointments
Week 4: The Process
Jude Vazhappilly Blog
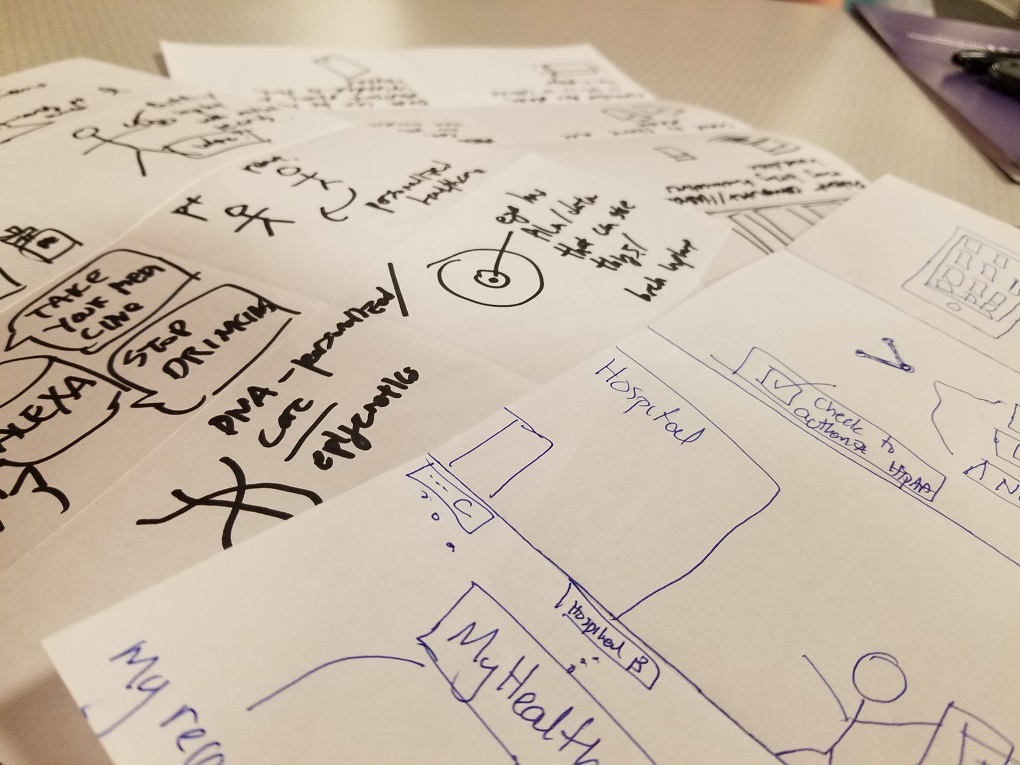
From the needs statements we created last week, we decided to get the clinic staff opinion. The medical assistants told me a story about how there was a patient that showed up at the clinic because he/she was referred from another hospital ER. He/she didn’t know why she was referred and didn’t know who their primary care physician was. The medical assistant had to call over to the hospital ER and obtain information on what procedures were done to the patient and had to search to find their primary care physician to get their full medical history. This made us narrow down our needs statement to focus on the an easier way to get medical records between providers. The current methods are with fax and are often unreliable. Then, we did researched current technology that aimed to solve the issue. We graded the solutions based on high level specs. Then we brainstormed with a word association process and thought about the different aspects of data collections that we could approach to solve the issue.
The Concepts
Jude Vazhappilly Blog
With just a week remaining, we spent the week validating our concepts. Taking our ideas and presenting them to the clinic doctors and medical assistants enabled us to obtain valuable insight. Some concepts were immediately discarded for reasons we would not have thought of. We engaged in many brainstorming exercises to come up with new ideas that would address the problem. One method that i really liked was mapping out the different steps in the problem process/event and then writing down words that came to mind when thinking of the event.
Michael Zhao
MD student at UIC, BS in computer science from UChicago. I’m excited to work with future world-changers Asra Mubeen and Haley Patel, and current world-changer Dr. Aparna Ramanathan, during the Clinical Immersion Program. I’m interested in working with pioneers in clinical informatics, EHR interoperability, and digital health; UX (user experience), design thinking, and human-computer interaction in healthcare; technology leadership by physicians; borrowing from other fields to solve healthcare problems; high-quality medicine in low-resource settings; the Quadruple Aim, particularly physician joy-in-work and well-being; and promoting compassion within healthcare enterprises.
Michael Zhao Blog
Michael Zhao Blog
Learning to see anew
Michael Zhao Blog
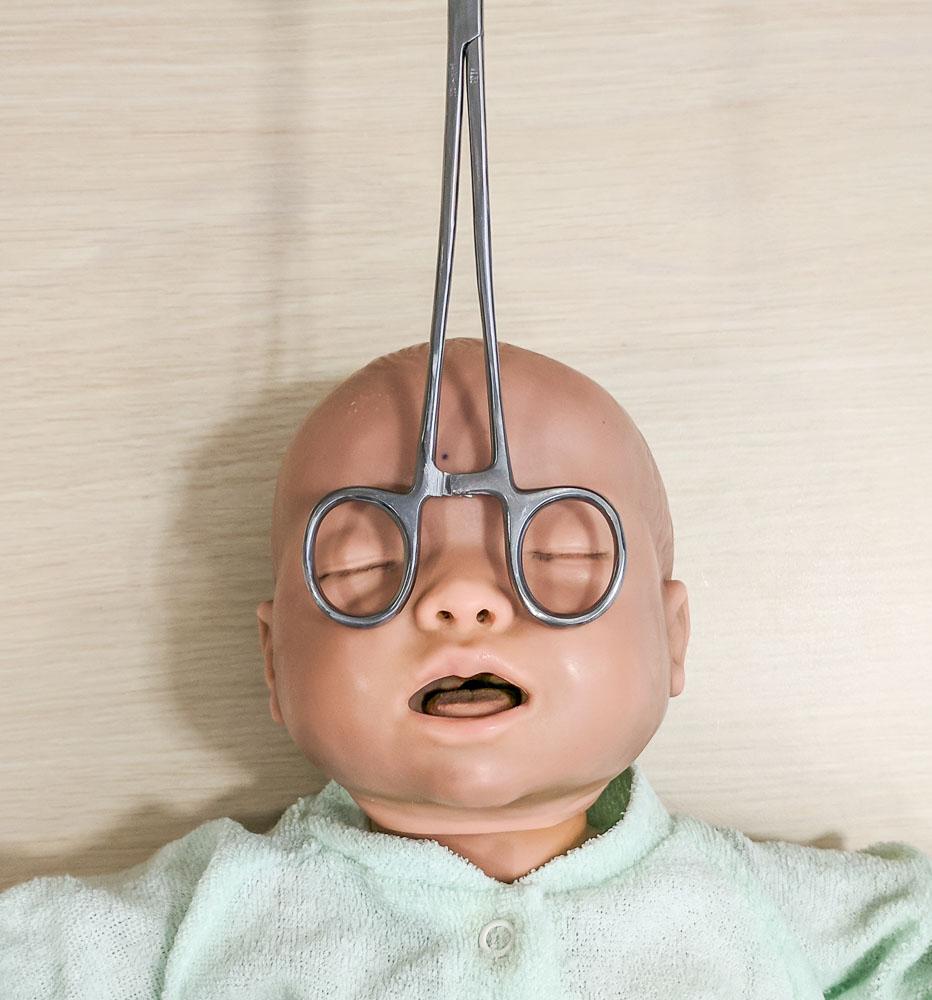
I have both good news and bad news.
The good news is that I am working in the company of friendly and intelligent people and have the opportunity to solve problems in various clinical settings, ranging from the outpatient clinic to the operating room. Our team focused strictly on needs identification this week, and we have had excellent luck finding examples of both good and bad designs.
I think of “bad” design as the flawed implementation of a valuable idea. Sometimes, the flaws are known but are impossible to fix, too expensive to fix, or fixed too late to prevent a disaster. Other times, a product or system is deemed good enough when it is first introduced but falls short after it is kept in service beyond its intended lifespan. Software developers are all too familiar with slapdash programs written on impossible deadlines with insufficient high-level guidance. That is not inherently problematic if no problems occur in real-world use, but on the other hand, the consequences of overlooking significant design problems can be dangerous or deadly. Poor implementation practices magnify the risk of introducing these “bad designs” into a product or system.
Further reading: https://en.wikipedia.org/wiki/Therac-25
Bad design causes nurses to trip over tangles of fetal-monitoring wires, but the underlying idea, to track the general state of the fetus, is a good one. (As an aside, I was surprised to learn that continuousfetal monitoring is itself a controversial topic in obstetrics and midwifery, with evidence linking it to higher rates of procedures such as Cesarean delivery or instrumental vaginal delivery, which bear their own risks. We can collect all the data we desire these days, but we have yet to discover the best ways to use the data to prevent harm and improve outcomes.)
Further reading: http://www.cochrane.org/CD006066/PREG_continuous-cardiotocography-ctg-form-electronic-fetal-monitoring-efm-fetal-assessment-during-labour
Bad design causes physicians to keep folders full of hard copies of paper forms while waiting a month for the scanned versions to appear in the electronic health record (EHR). Some of these slow-scanning forms include consents for sterilization, maternal depression screenings, and even new-patient intake forms, all of which contain information that caregivers might want to access quickly. Delays in access to or loss of the hard copies in the meantime could not only impair clinical work but also expose the hospital to liability.
Bad design causes patients to see an unfamiliar physician rather than a doctor that knows them well and might be working in the same clinic, on the same day, because the hospital’s appointment schedulers are centralized and therefore unfamiliar with individual physicians’ patient panels; the scheduling software interface probably lends no favors, either. The centralization-versus-decentralization debate is an enduring problem in business, with firms often vacillating between the two over the years (and expending enormous amounts of resources to switch between the paradigms), and I am told this hospital is currently employing a consulting firm to improve its scheduling services.
Further reading: https://hbr.org/2017/12/when-to-decentralize-decision-making-and-when-not-to
If “bad” design involves poor implementation, what then is “good” design? In healthcare, we speak of the Quadruple Aim (formerly Triple Aim), a set of core goals developed by the Institute for Healthcare Improvement (IHI): improving population health, improving patient experience of care, reducing per-capita cost, and variously, physician joy-in-work or well-being. A “good” design might improve upon any of these dimensions in a particular care delivery process. Additionally, since many clinical challenges involve presenting information to influence clinical decision-making, a good design might fulfill some of BJ Fogg’s criteria for persuasive technology, which Rory Sutherland summarized thus: location-specific, contextual, timely, and immediate. While pondering the characteristics of good and bad designs, I have found that it is harder to define the former by example, since the mind immediately tries to find the flaws in any given example–hence the saying, “the perfect is the enemy of the good.” Pondering the nature of “good” design tends to raise more questions than answers.
Further reading: http://www.ihi.org/Engage/Initiatives/TripleAim/Pages/default.aspx
http://www.annfammed.org/content/12/6/573.full
Does a dashboard constitute good design? Perhaps, if it is used consistently, is easy to interpret, and provides useful information. However, if it is ignored by staff, undecipherable, or irrelevant, it may not be a good design.
Is a particular machine well designed? It depends on the experience and opinion of the machine’s users and on what user testing shows about the machine’s usability and safety.
Do name alerts fall under good design? When staff pay careful attention to them, when they are propagated to and conveyed in all contexts where patient information is viewed or discussed, and when there are processes describing how to deal with an error that results from confusing one patient with another, then the answer is yes. However, it is not only the presence of these alerts but also their proper implementation that matters, and a large part of implementation success depends on organizational culture.
Further reading: https://www.ncbi.nlm.nih.gov/pubmed/26199428
So far, I’ve provided several examples of “good” and “bad” designs but no concrete improvements; this is deliberate. Every physician we met this first week immediately asked us whether we had come up with any solutions–that is, medical devices or system-level changes. They peppered us with their suggestions and invention ideas, and we look forward to following up with more structured interviews in the near future. But the goal of this early stage is not, and should not be, to jump immediately into prototyping a miracle device. We first need to ensure that our problem is well defined and that any solution will fulfill the three tenets of innovation under the design thinking framework, which IDEO calls desirability, feasibility, and viability. Therefore, we set aside our thirst to build and instead filled our first week with patient, curious, dispassionate observation, learning to “see” the hospital anew, much as a photographer might look methodically at a landscape: first the light, then the colors, then the shapes, then the textures, then the meaning.
Further reading: https://designthinking.ideo.com/?page_id=1542
I’m grateful to everyone in the hospital for welcoming us into their world, even though our task is essentially to uncover flaws in the healthcare system. This demonstrates incredible vision on behalf of everyone that has had a part in designing, approving, and facilitating the program. I’m especially grateful for Dr. Ramanathan, Haley, and Asra for choosing to participate in the Clinical Immersion Program this year; I could not imagine a better, more motivated group of people with whom to complete this program. I’ve enjoyed learning about their engineer’s perspective, learning to shed my medical-student identity and see healthcare from a fresh perspective, and I look forward to much more in the coming weeks.
The dream team consists of two of the university’s most astute and affable bioengineering students, a physician-engineer, and yours truly. Don’t let the white coat fool you; I am eagerly casting off the role of medical student for the duration of this program. As a Clinical Immersion team member, I am focusing on improving existing systems, processes, and procedures rather than learning to mimic them, which medical students must do in order to pass.
Oh, and the bad news? Despite our best efforts, we had no access to the scrub machines for the entire week.
Gone fishing
Michael Zhao Blog
“Something’s happening with the patient.”
No one wants to hear these words during surgery. In a field where precision matters, the word “something” is unnerving, even ominous. Because everyone in the operating room is focused on the patient’s well-being, these words can bring the proceedings to a sudden halt as the room rushes to figure out what that “something” is. Suppose a patient starts to slip down the operating table, moving slowly enough that only one person notices. That person alerts the others, everyone agrees on the problem at hand, and soon the room buzzes like a beehive with activity. Blue-gowned individuals break scrub to scramble underneath the drapes, towels fly in an effort to maintain the sterile field, the clanging of metal parts fills the air…and after some 10 minutes of furious scrambling, the surgery proceeds right where it left off. The patient did not fall; the room breathes a sigh of relief.
An organization must introspect in order to improve. This requires a certain level of commitment among the participants—it is natural to bristle when one’s weak areas are prodded—and a culture of blamelessness so that the analysis can give rise to improvements rather than lead to attacks on the individuals working under the constraints of a system. After all, as the IHI puts it, “every system is perfectly designed to get the results it gets.” When an error happens, whether it is a patient falling or a device breaking or a worker forgetting, it pays to use structured thinking to identify the reasons it happened and the ways it could be prevented in the future.
Further reading: http://www.ihi.org/communities/blogs/origin-of-every-system-is-perfectly-designed-quote
Many tools have been invented to help find the root causes of errors; they are applicable to industries ranging from manufacturing to medicine to marketing. Consider the example of a patient that slips on the operating table. An ideal tool for analyzing this event is the Ishikawa, or “fishbone,” diagram. The fishbone diagram displays a categorized set of causes that led to the problem, and optionally it includes higher-order causes. The design of the diagram emphasizes the multifactorial nature of these incidents:
As an aside, this type of debugging is a distant relative of another common innovation tool, called storyboarding. In a near inverse of root-cause analysis, during storyboarding we first outline a process step-by-step, then attempt to name pain points that could complicate each step. Storyboarding is useful in preempting hazardous situations or brainstorming improvements to existing solutions, whereas the fishbone diagram is useful in post-hoc analysis.
As is customary in discussions of healthcare design and quality improvement, I will invoke an oft-cited analogy between medicine and aviation. At present, we believe that most disasters in aviation and other safety-conscious industries occur not because of a single, large oversight but because of a series of small faults that line up together to create the unfortunate circumstance. By then, disasters are practically waiting to happen; the design of the system has effected the perfect conditions, and all it takes is a little activation energy.
Further reading: https://ntrs.nasa.gov/archive/nasa/casi.ntrs.nasa.gov/20040085800.pdf
And although some half of airplane crashes are primarily attributed to human error, it is a folly to believe that we can fully address this by somehow “fixing” people—that by pursing one’s lips ever tighter, one could dictatequality into existence. On the other hand, leadership does play a crucial role in responding toand preventingincidents: leaders can maintain a culture and an infrastructure that encourages the discussion of safety-related events, accepts feedback from those involved, responds with changes to prevent future (or first-time) occurrences, and assigns specific roles to ensure that each important step is done faithfully. All people are prone to a predictable set of behaviors and responses; instead of working against human nature, it may be better to harness human nature, finding clever ways to utilize its idiosyncrasies in order to achieve better outcomes.
Though rare, falls can result in injury, paralysis, and even death. Team members, including anesthesiology and nursing, must exercise constant vigilance; several reported incidents have involved staff being distracted “for just a moment,” not using safety straps or wheel locks, and other preventable circumstances. With any luck, the lessons we learn from working to prevent falls will also be applicable to other types of medical error, and the result will be a safer environment for all patients.
Further reading: https://www.ingentaconnect.com/content/wk/ane/2017/00000125/00000003/art00022
Chasing the setting sun
Michael Zhao Blog

After observing and interviewing people in the clinical setting, we set about synthesizing our observations into insights and creating needs statements in response to those insights. This is where the broad experience afforded by rotating through obstetrics and gynecology comes into play.
The Auvard weighted speculum in its natural habitat—fallen onto the operating room floor, having just missed a surgeon’s foot.
Using what we saw in the outpatient clinic, operating room, and OB ER, we generated a board’s worth of needs statements, selected a couple of the most promising candidates, and refined them.
This process requires enormous restraint. We are builders; we like to dive right in and make changes on the fly. But complex projects require some degree of adherence to methodical problem-solving frameworks. In particular, needs statements play a crucial role in innovation because they remind everyone of the end goal; it is easy to forget it in the frenzy of activity that characterizes iterative design, and equally easy to forget after several rounds of meetings, or after team turnover, or after a merger or acquisition.
One of our finalist needs statements, created in response to a number of incidents where an outpatient procedure had to be terminated due to the intolerable discomfort the patient experienced. (Ultimately, we chose a different needs statement.)
Iterating on ideas is like chasing the setting sun. We set our eyes on the prize, sprint after it while dodging umpteen hazards, feel both a triumphant burst and a nervous pang with every step taken, and sometimes find ourselves right back where we started.
Down to business
Michael Zhao Blog
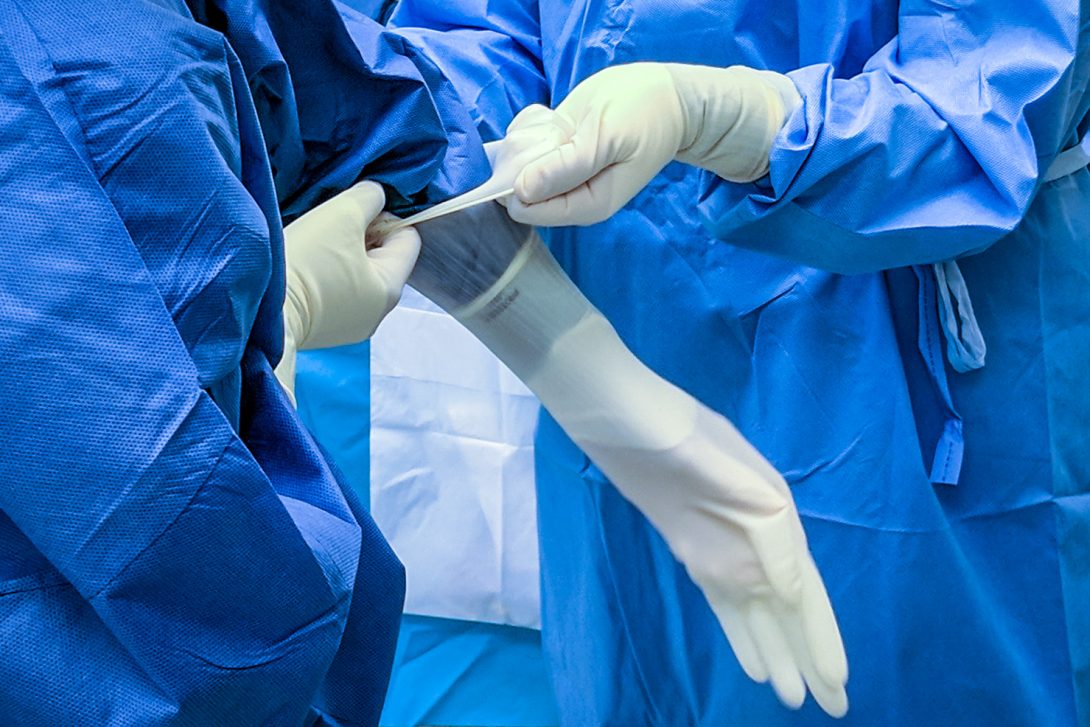
Previously, I discussed some examples of “structured” thinking and gave root-cause analysis as an example of a task that benefits from it. As we synthesize our clinical observations into insights and needs, generate design specifications, and begin to brainstorm solutions, structured thinking again becomes important.
The challenge of innovation is, more or less, to harness the creative power of divergent thinking while also embracing the logical flow of convergent thinking. Teams that contain both personality types can thrive when tackling these types of assignments. Fortunately, we are one such team; our members are adept at both types of thinking when faced with problems that require either one.
Further reading: https://opencommons.uconn.edu/cgi/viewcontent.cgi?article=6966&context=dissertations
Because we had witnessed the frustration of the operating room staff and the delays associated with the present solution, which has no fewer than five separate components, the operative verb during every stage of our design process was “simplify.” We continually asked whether we could reduce the number of parts in our concept by integrating separate pieces or discarding them altogether. If we could not explain exactly why a part was necessary, or if we found the explanation lacking, we removed it from the design and, more often than not, found that its removal prevented, rather than introduced, problems.
Photo: Haley Patel
We took into account the pain points we observed in practice while planning each feature of our solution, and our final prototype neatly addresses each one. Although our prototype is rough, hewn from shipping tubes, foamcore, and hot glue, we are proud of it. As every tinkerer-at-heart will know, it feels extremely satisfying to realize our grand design after weeks of preparation. The design process required a few bright insights, a willingness to expose our ideas to critique without taking it personally, and a sharp focus on meeting the design specifications we had created. Like whoever designed the locking mechanism for the bathrooms of the Hotel Louis XIV, we eschewed the notion that our design needed to resemble existing ones. The result was a remarkably simple-looking, yet sophisticated, apparatus.
Further reading: https://nevalalee.wordpress.com/2015/11/27/the-hotel-bathroom-puzzle/
In the near future, we hope to test our concept and refine it to withstand the rigors of real-world use. Should we choose to commercialize the product, we will need to conduct market research to determine the size of the market, characteristics of buyers working for hospitals and ASCs, and whether the potential time and cost savings would be attractive enough to convince a customer to switch. We would need to take care of technical support, sales, manufacturing and quality control (including potentially modifying the design for ease of manufacture), maintenance, regulatory approvals, and intellectual-property agreements.
Wrapping up
Michael Zhao Blog

I would like to take this opportunity to reflect on the past few weeks and to express my appreciation for my teammates as we enter the concluding moments of this program and of this summer. I have enjoyed moonlighting as an engineer and innovator, casting aside all of the pressure and roleplaying associated with medical school for a while, pausing the all-consuming task of learning the status quo of medicine in order to try my hand at improving that status quo.
I have learned much from and shared many fun moments with my teammates; they will be world-changers. Asra has the combination of humility and perspective required to succeed (and so sorely needed)in medicine; she will make any program proud. Haley is bright and motivated, always on top of any situation; she will have her pick of the very best companies and advanced degrees should she choose them. Dr. Ramanathan, and the entire OB/Gyn department, displayed strong mentorship, showing us every aspect of clinical practice, responding to our evolving priorities as we progressed through the program, and building team spirit; I hope she continues her participation in innovation programs here so that others will have an example to emulate.
As I dust off my medical-student shoes in preparation for the fast-approaching academic year, I feel I will greatly miss this role. This experience was a reminder of how thrilling it is to apply oneself, create, and fiddle. Engineering is the act of bending the world to solve a problem; it is at once a very ancient and a very futuristic endeavor, and it is immensely satisfying in any iteration. This experience was a reminder, among many, that a vast world exists outside medical school, and it remains my goal to make a dent or two in it.
Because we only had a handful of days to create our prototype, our minds continue to swim with potential modifications and continue to contemplate the project’s potential. It seems a shame to leave my experience, my small but useful amount of newfound domain knowledge, and my team, at a time when the inspiration and the urge to create are so strong. It feels as though we are trying to land an airplane mere moments after it took off—perhaps instead we should consider a touch-and-go, that we may soar once again.