Amna Hoda
Amna Hoda

Basic Information about Student (Small Background introduction)
Year: Senior
Area of Research: OBGYN/GYN
Contact Information: ahoda2@uic.edu
Blog
First Day on the Job
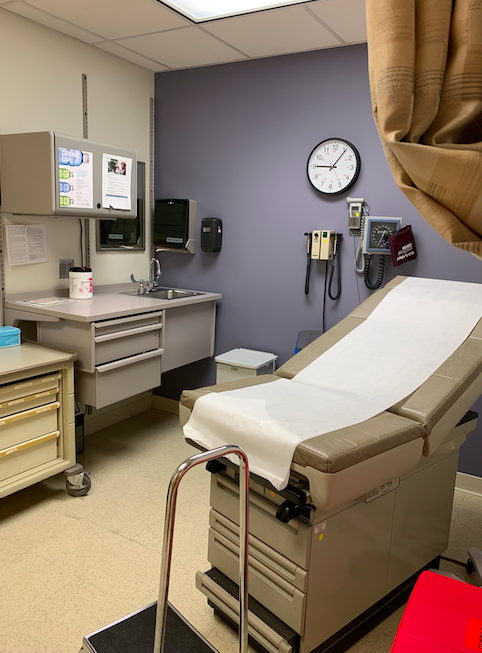
On June 25, we started our first day in the High-Risk Clinic of the hospital. Throughout the first day, our team saw a total of 8 patients. We saw an IUD insertion, biopsy, follow-ups, and colposcopy.
Somethings that we noticed right away in terms of bad designs is how small the rooms are. Often times, for procedures like biopsy and colposcopy, it often includes the patient, doctor, and a medical assistant. The room also has a tray that has all the tools needed for procedures being performed and takes up a large amount of space. Another thing noticed was how the discomfort for patients to be laying down for the procedures. Especially when pregnant patients came in, they struggled in laying down for examination and getting back up. It often required the help of the doctor while also causing discomfort for the patients.
Hysteroscopy & Hysterectomy
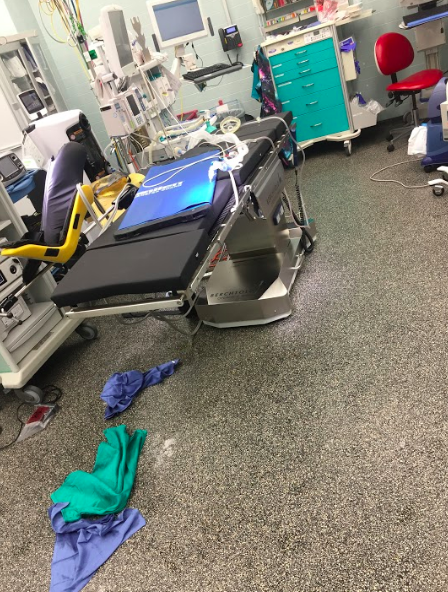
On June 27, we saw a hysteroscopy and a hysterectomy. The hysteroscopy removed two polyps and took approximately one hour to complete. The hysterectomy removed the uterus, fallopian tubes, and one ovary and took approximately three hours.
The good designs practice seen in the OR included and organization of surgical tools laid out prior to the surgery with an inventory check. The lights were placed high up in the OR room with electrical sockets high up on the wall for easy access. For these procedures as well, the operating bed was easily removable to allow for easy access to the patients.
The bad designs practice seen in the operating room were things like surgical tools and needles falling to the ground during certain procedures. One of the attendees mentioned that devices like the retractors could be designed with more ergonomics. Another bad design seen was that SDC cords were all tangled up at the bottom and could easily be seen as a tripping hazard.
These observations in our first week helped us brainstorm ideas of what we can change in the OR to help doctors and further improve surgery performances.
Leep Procedure
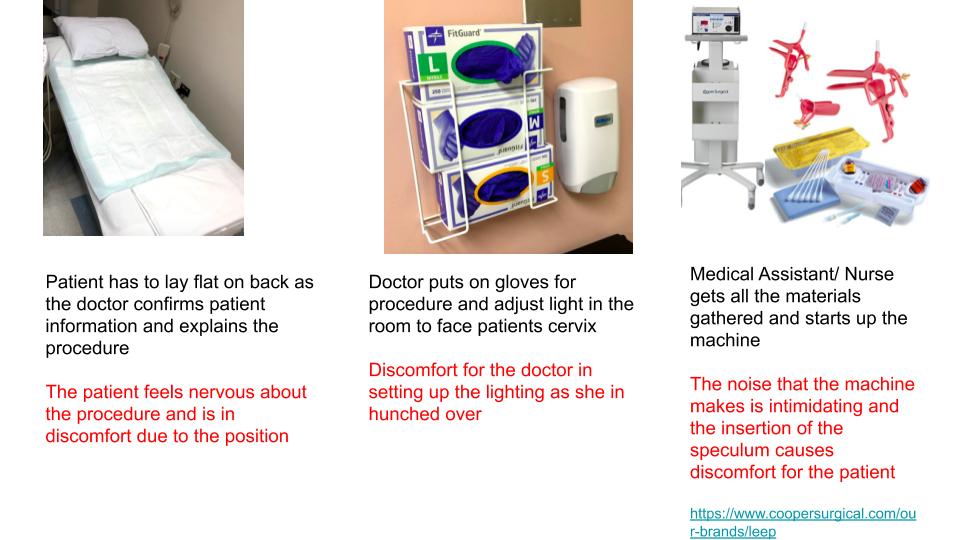
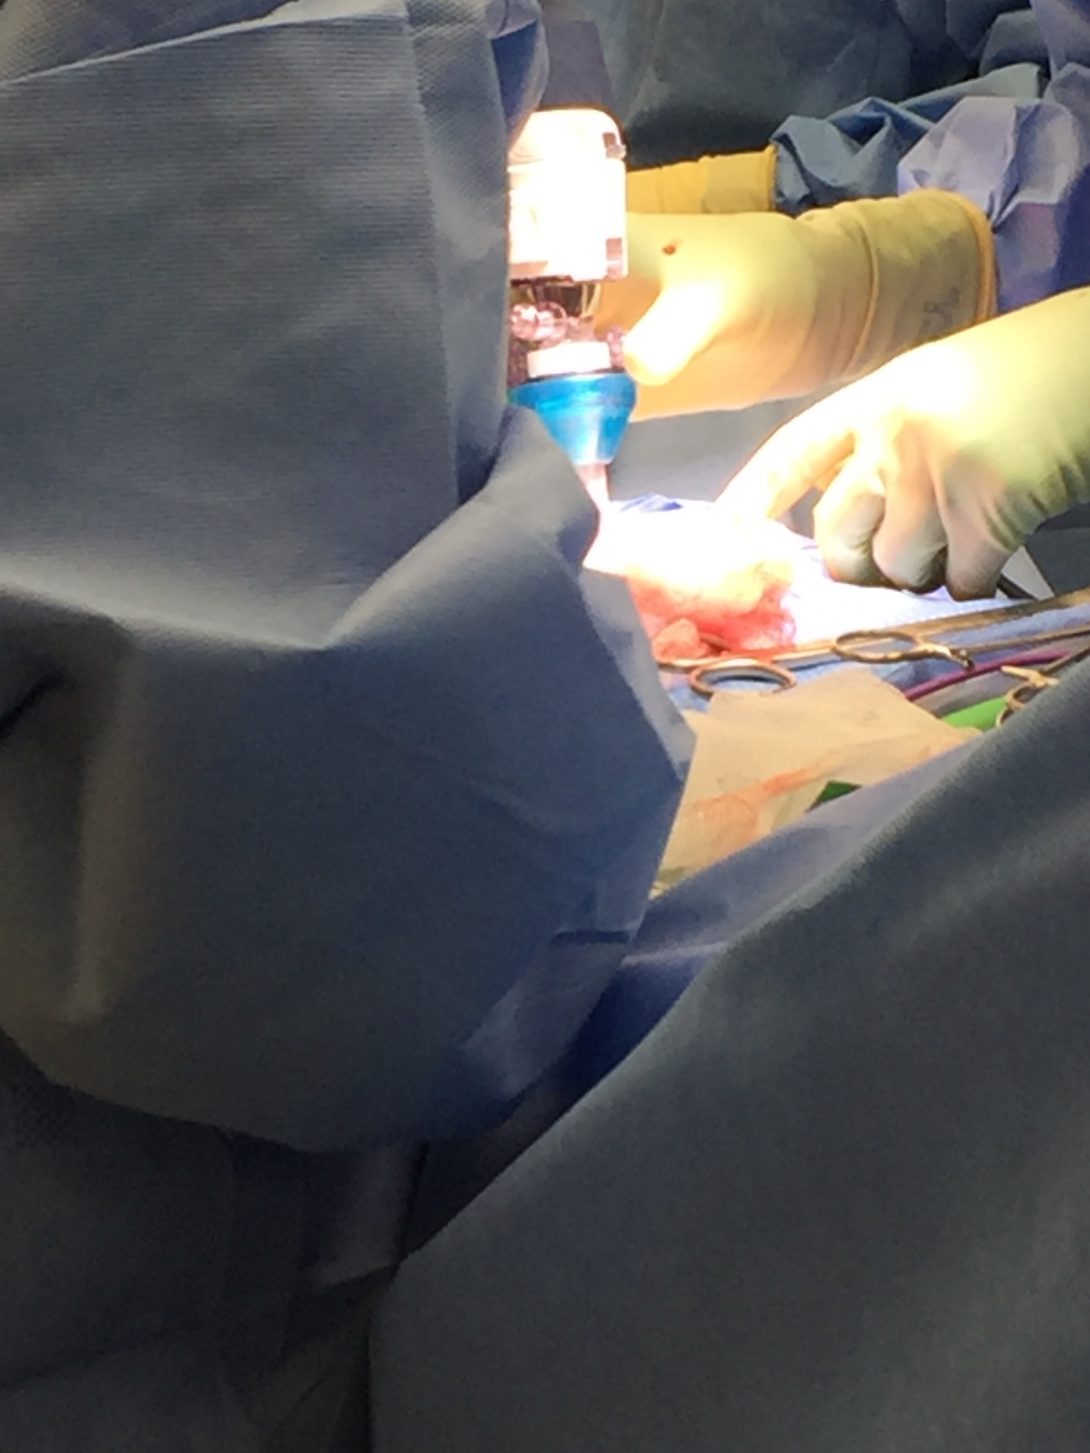
This week our team was tasked with breaking down a procedure we have observed during the week. The “break-down” of a process is known as a storyboard which allows us to identify pain points during certain procedures. This week I had the opportunity to see a LEEP which stands for Loop Electrosurgical Excision Procedure. The procedure is often done after an abnormal finding in a biopsy. The process involved many steps but I have created a simplified storyboard.
continue...
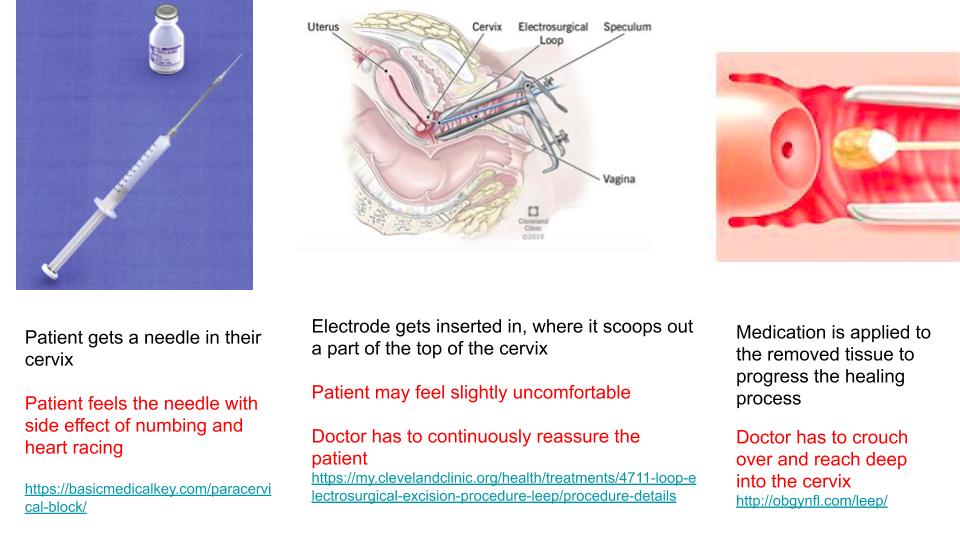
The doctor prior to using the tools also has to measure it to the patient’s cervix size.
continue..
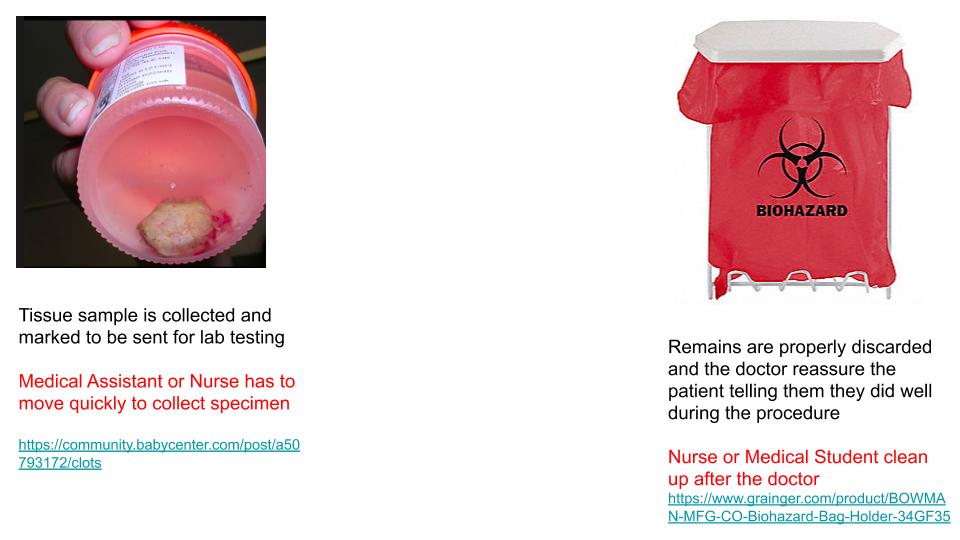
The Medical Assistant or Nurse is multi-tasking at this point as they are prepping the next collection of tissue sample while also labeling the current sample that is collected. At least three tissue samples were collected.
Week 3 - Need Statement
This week we learned about developing a need statement and what goes into creating them. A good need statement addresses a population and foreshadows an outcome. We also learned that the first need statement will not be perfect, rather as you do more research, the scope of your need statement should narrow to address a very specific case.
In our weeks at the hospital, an issue that I have seen is blood loss. Blood loss can be seen in both Gynecological Operation, Labor and Delivery, and Clinic Settings. I talked in more detail with a third-year medical student and a midwife about the importance of blood loss. Both mentioned and agreed that it is important because the quantity of blood loss determines the care a patient receives, such as a blood transfusion. The medical student mentioned that during vaginal birth if a woman loses more than 500 mL of blood it is a concern. During a C-section, a woman can lose 1,000 mL.
The midwife mentioned that there is no proper way to calculate blood loss. They either estimate how much gauzes they use or weigh the dry gauzes and then subtract from the weight of the wet gauze.
The first very broad need statement regarding this can be:
A way to address the estimation of blood loss in a pregnant patient
An improvement:
A way to better estimate blood loss in surgical and non-surgical procedures.
third times the charm:
How to better the quantification of blood loss during operative and non-operative procedure to better tailor post-operative care.
Week 4 - Product Requirement Definition and Design Criteria
This week we learned about Product Requirement Definition (PRD) and Design Criteria. The main difference between the two is one focuses on the qualitative aspects of designing while the other in quantitative.
Our need statement changed over the weeks to a topic we are more passionate about and our new focus is:
“A method to improve the interaction between the fetus and deaf pregnant individuals that increases maternal involvement in the prenatal experience.”
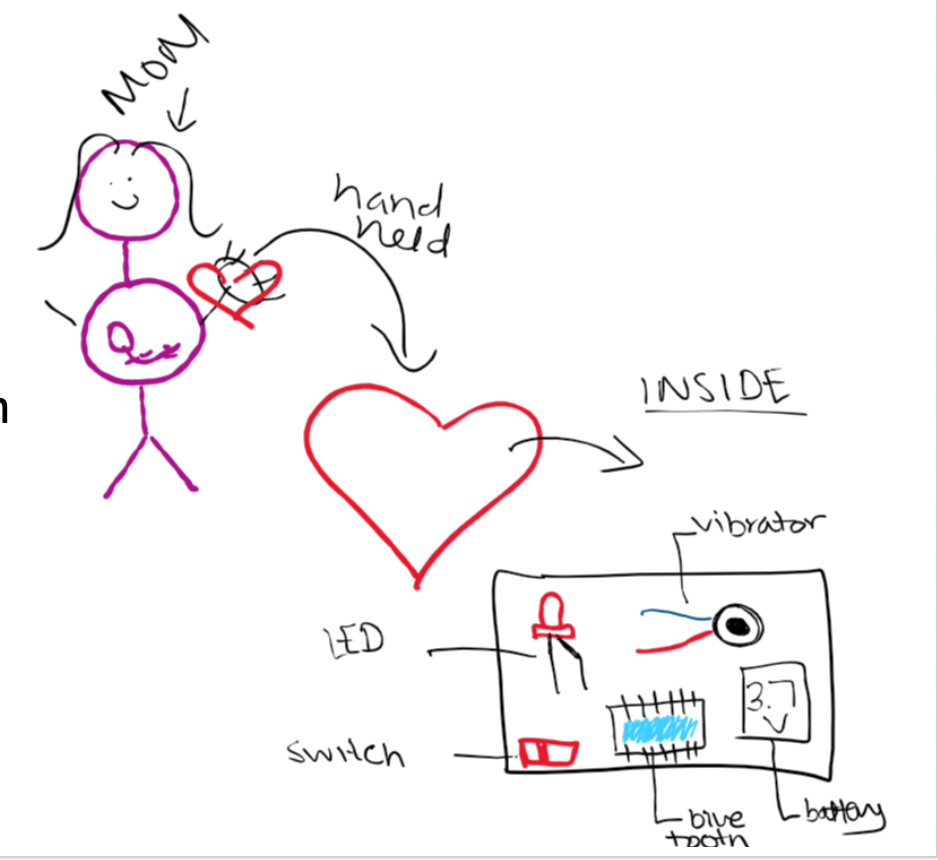
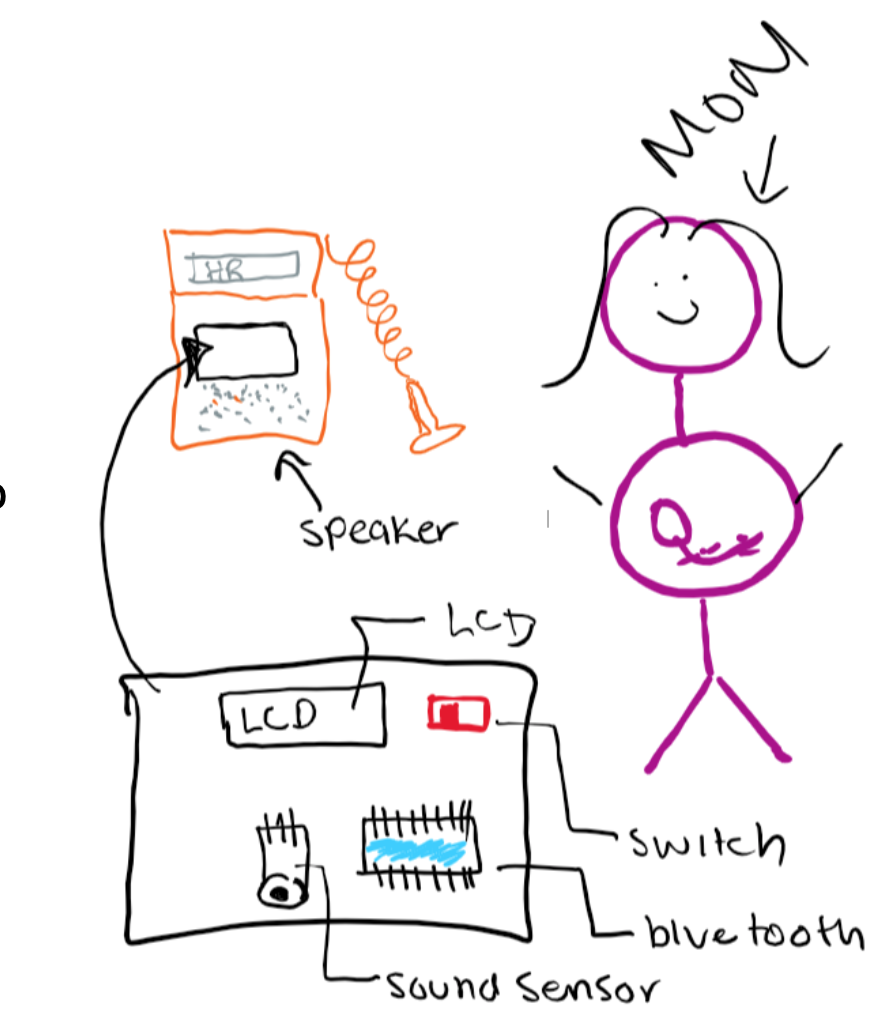
Keeping this in mind we are going to build a two-part device. One that is attached to the doppler with the purpose of listening to sound from the doppler. The second part will be held in the mother’s hand that will vibrate and light up to the sound coming out of the doppler.
The Design Criteria for the device is as follows:
Part 1: Microcontroller & Sound Sensor
- A hand-held device that the user holds
- A clip-on device to doppler that captures sound
- Uses Bluetooth technology to link the two devices
- Cost-effective
- Intuitive -easy on/off switch
- Easy-storage
- Easily Replaceable Battery – Battery Operated
- Visual Heart Rate (depending on the device)
Part 2: Led & Vibration
- A hand-held device that the user holds
- Uses Bluetooth technology to link the two devices
- Friendly appearance
- Cost-effective
- Intuitive -easy on/off switch
- Easy-storage
- Easily Replaceable Battery – Battery Operated
- The output is interactive via vibration and LED
- Visual Heart Rate (depending on device)
continue
The PRDs for the device is:
Part 1: Microcontroller & Sound Sensor
- External volume shall be 2.5”x3”x3”
- Housing shall be constructed of PLA and insulating Styrofoam that encompasses all parts besides the sound sensor
- Weight shall be under 2lb
- PLA housing shall attach to doppler around speaker via 2”x1” stick-on plastic velcro
- Bluetooth transmitter within circuitry shall transmit information to Part 2 receiver, which shall remain less than 10’ away
- Part 1 shall cost less than $75
- On/off switch shall be located on the external portion of the housing, shall be 0.5”x0.25”, binary, colored red, labeled, and associated with an LED to signal switch status.
- Can fit in a 5”x5”x5” storage container
- Device shall be operated by a rechargeable 5V battery pack
- Heart rate shall be displayed on a 3”x1.5” LCD display mounted on the external side of the housing.
Part 2: Led & Vibration
- Device shall be housed in a 4” width heart-shaped (non-anatomical) PLA box
- Device shall contain Bluetooth receiver that shall receive information from the transmitter in the Part 1 circuitry.
- Friendly appearance- red with a smiley face
- Device shall be under $15
- On/off switch shall be located on the external portion of the housing, shall be 0.5”x0.25”, binary, colored red, labeled, and associated with an LED to signal switch status.
- Can fit in a 5”x5”x5” storage container
- Device shall be operated by a rechargeable 3.7V battery pack
- The output is interactive via vibration(3V) and LED (1.6V)
Week 5 - Concept Cards
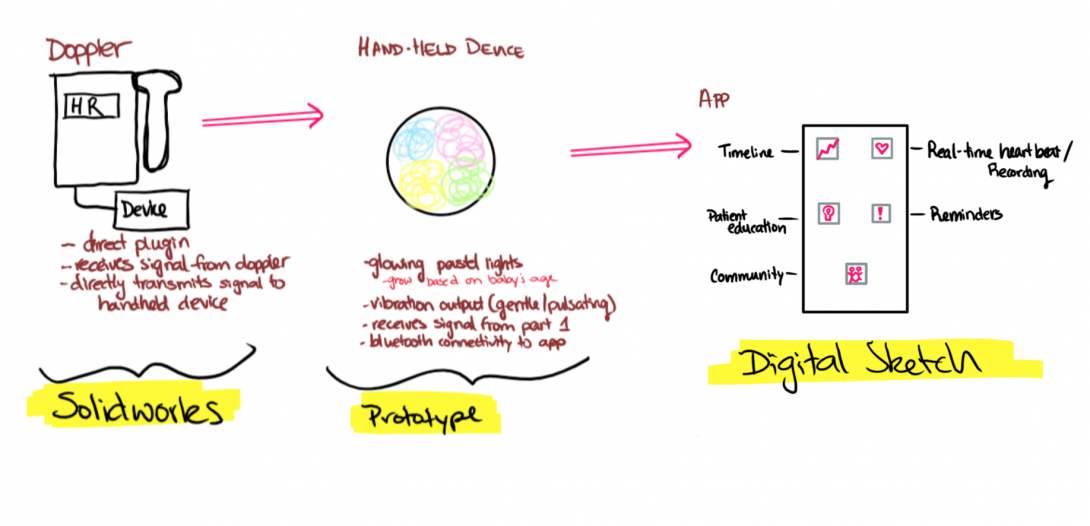
This week, we learned about concepts cards and the important role they play in visualizing an idea. This week our team created concepts cards based on the feature of our device we wished to incorporate into our final device. We started off by revisiting our needs statement:
A method to improve the interaction between the fetus and deaf pregnant individuals that increases maternal involvement in the prenatal experience.
By creating concept cards we learned that there were a lot of things we could do to improve the first-app created that only showed a visual display of the heart rate. One new idea that came to light this week was developing an app that will allow mothers to track the fetus heart rate and provide a community for other deaf patients with an open forum. The app will also feature many other components to allow easy access to the mothers to access information about the fetus during the different stages.
This week was also beneficial because our team conducted an interview with Danielle Miller, the Assistant Director for the Office of Access & Equity. By talking to her, we learned about the problems deaf patients face in hospital settings and what are the accommodations they receive. The feedback also made us realize what things to consider in finalizing the features of our device and how to plan for the future.