Raj Patel
Raj Patel

Basic Information about Student (Small Background introduction)
Year: Senior (BioE)
Area of Research: Gastroenterology
Contact Information: rpate293@uic.edu
July 7
First Day on the Job
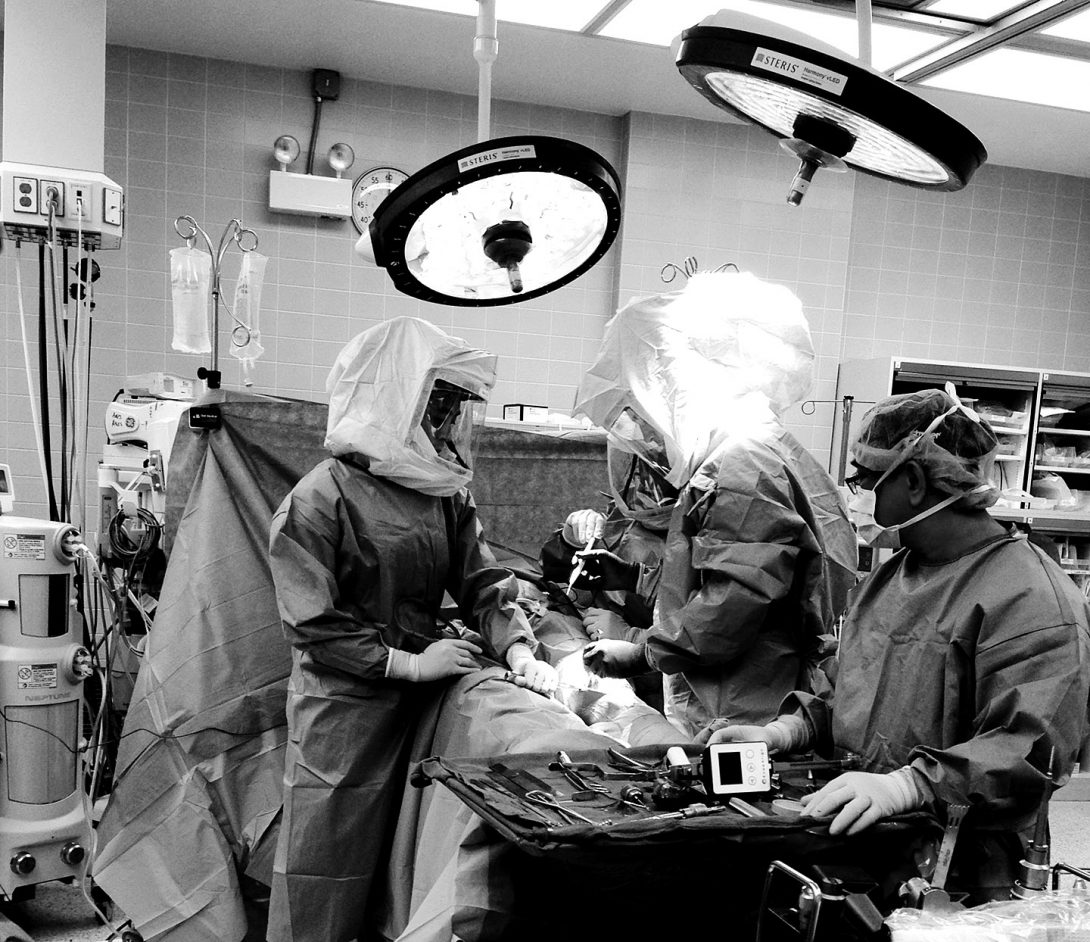
Today was the first day on site. We tested…………
picture
picture

blog
And the story continues as such…
First Week
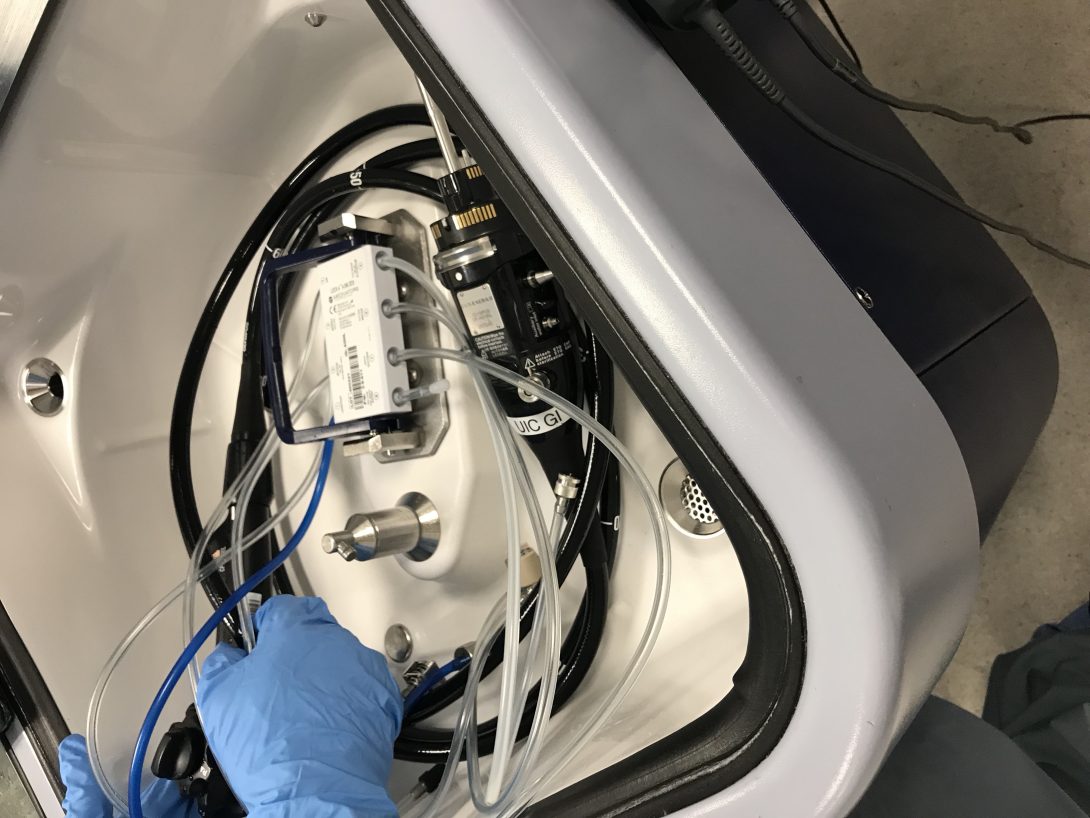
On our first week of observations in the GI clinic, we observed various procedures that were completed by many different physicians. Two of the main procedures were either a colonoscopy or a endoscopy using the device shown in the picture above. The procedure is used to take biopsies of various tissues/organs, remove polyps, or even apply heating treatment to lesions formed in the GI track that can cause bleeding.
One interesting procedure we saw was a polyp removal using an endoscope. The polyp was detached from the GI track using a heating treatment. After it was detached, a roth net was used to pull out the polyp, but since the polyp was as big as a human eye, the physical used a suction system to pull out the polyp.
As procedures happened, we started to wonder if the scopes were disposable or if they were being reused. We were told that each scope is worth about $65,000, so they had to be reused since physicians used about 30-50 scopes per day. Then we thought it would be really nasty to reuse a scope from a colonoscopy to an endoscopy, so we decided to head over to the sanitation room to see how the scopes were being cleaned. Upon watching the technician clean each scope, we were able to say they are clean after all. It takes about 60 minus to clean one scope, and these scopes cannot be cleaned all at once. The technician has to clean them individually, and in between the cleaning, he has to document every step he does such as completing the leak test, whether the scope is leaking or not, recording what scope he is cleaning and at what time… and other tests along with this.
Storyboard
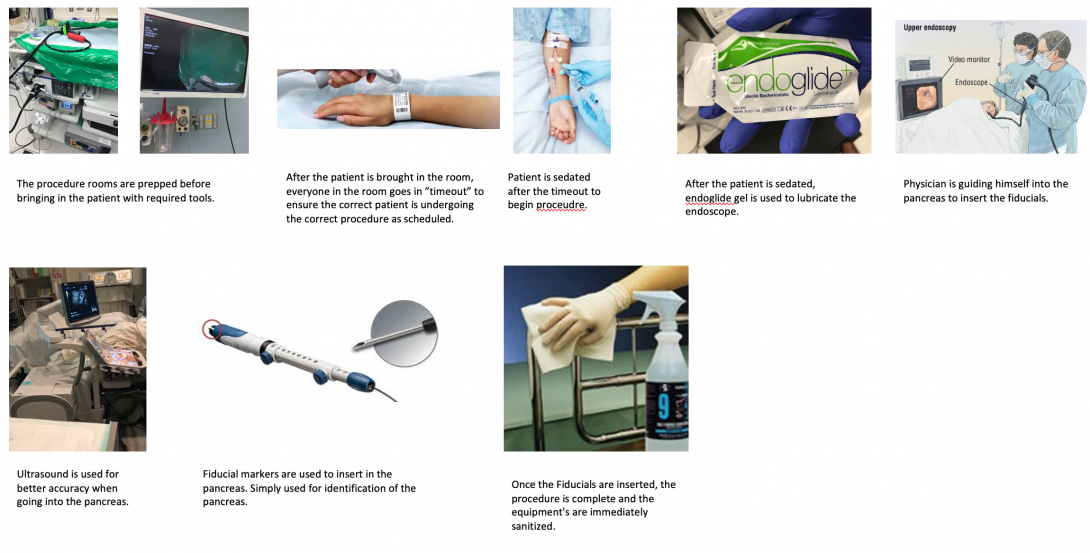
This week in lab we observed a fiducial implantation in the pancreas. This was done because the patient had pancreas cancer, and the radiologist wanted to apply radiation on the pancreas directly. With the imaging techniques, the radiologist cannot find the pancreas, so a specialist in the gastroenterology department has to insert these tiny markers in the pancreas called fiducial. These are inserted in the pancreas to make the life of a radiologist easier to kill cancer cells.
At first the patient is brought in the room, and correct patient identification techniques are used to ensure the doctor is treating the right patient for the right procedure. Afterwards, the patient was sedated with fentanyl, and versed. The physician then inserts the endoscope into the esophagus after lubricating the tip of the scope to avoid discomfort in the patient. Pancreas is located using the endoscope, and the ultrasound machine is introduced into the procedure now. The ultrasound device is used to determine where the fiducials should be positioned in the pancreas. Beforehand, the tip of the fiducial device is lubricated with PAM cooking spray for a smooth delivery into the pancreas. This procedure only required the insertion of 3 fiducials, so afterwards, the endoscope is drawn out carefully, and the procedure was over. The endoscope, and other equipments are then immediately sanitized, and a follow up with a radiologist is scheduled for the patient.
Possible problems within the procedure:
- Transferring the patient from an ICU bed to an inpatient bed causes discomfort in the patient with IV’s attached
- Sedating the patient with the right amount if difficult. Many patients wake up in the middle of the procedure if not medication is given which causes discomfort until more medication is given. So how can we give the right amount of sedatives to the right patient without the patient waking up?
- Why should we lubricate the tip of the fiducial device?
- Is the tip of the PAM spray bottle cleaned before spraying?
- Why doesn’t the fiducial device have enough lubrication from the beginning to avoid further problems?
Links to some of the images:
Needs Statements
This week we learned about developing a need statements. A need statement consists of a population and an outcome. The needs statement starts off very simple, but through more research into the are, we can narrow down to a very detailed/specific needs statement.
This week in lab, we saw attending GI specialists use lubrications such as endoglide gel, or something as far as PAM cooking spray. We see that lubrication is needed for patient comfort, but the medical devices are not pre-lubricated. The three iteration of the needs statement is shown below:
A way to improve instrument lubrication for physicians performing a endoscopy or a colonoscopy.
- A way to improve instrument lubrication in medical devices for physicians.
- A way to improve instrument lubrication for physicians performing a endoscopy or a colonoscopy.
- A way to improve instrument lubrication for physicians performing fiducial placement that eliminates the need for outside materials.
Criteria/Specifications
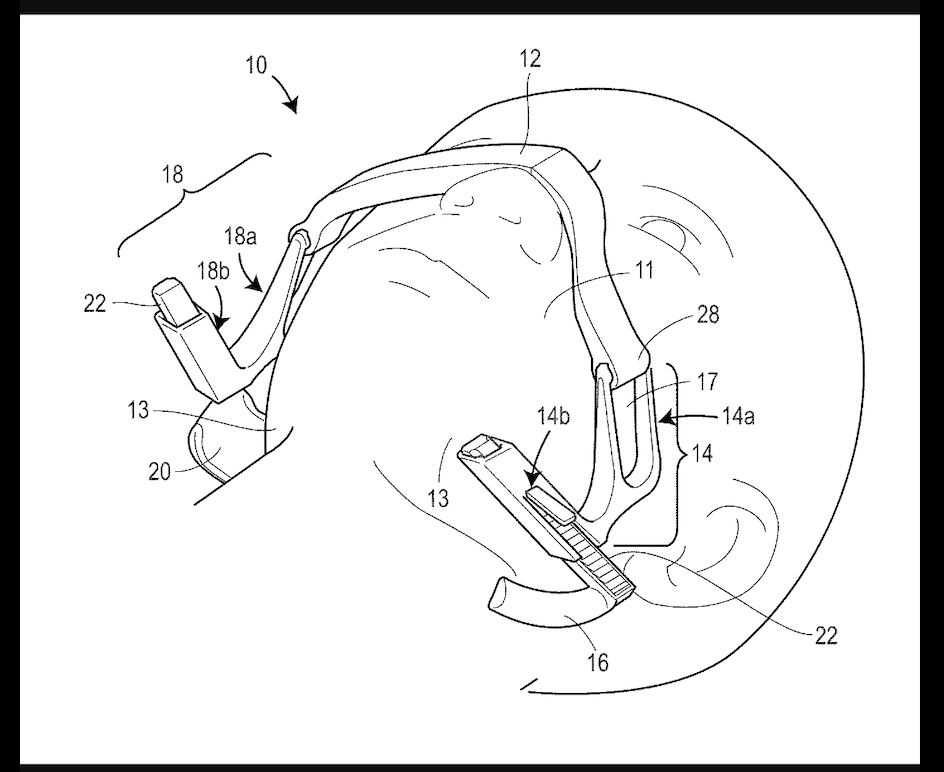
This week in our internship, we had to brainstorm ideas for our device and list criteria and specifications for them. Since we had two needs statement the previous week, we brainstormed ideas for both, and ranked each criteria and specification from a 1-5 scale with 5 being the best. After averaging both rankings, we realized we could prototype the jaw thrusting device since the benefits of that device outweighed the benefits of ERCP guide wires.
The device is used mainly on patients with obstructed air way disease. We decided to go on this route, since it causes a physical burden on CRNAs if they have to perform a jaw thrust maneuver in the middle of the procedure. So after accounting for all of the problems and brainstorming some ideas, we came up with some criteria and specifications for our device listed below.
Criteria:
- Device should be disposable
- Device should be portable
- Device should not cause harm or strain to patient
- Device should be ready to use immediately
- Device should be cost-effective
- Device should take no longer than 1 minute to set up
- Device should require minimal training
- Device should be operable by anyone in the procedure room
Specifications:
- Device should perform jaw thrust and maintain an open airway
- Device should maintain selected end-range positioning
- Device should be adjustable to accommodate various anatomical differences
- Device should not require any sort of power source
- Device should apply no more than 23N and 17N of force to the right and left jaw respectively
- Device should apply no more than 14N of force to lift up the chin
Concept Cards
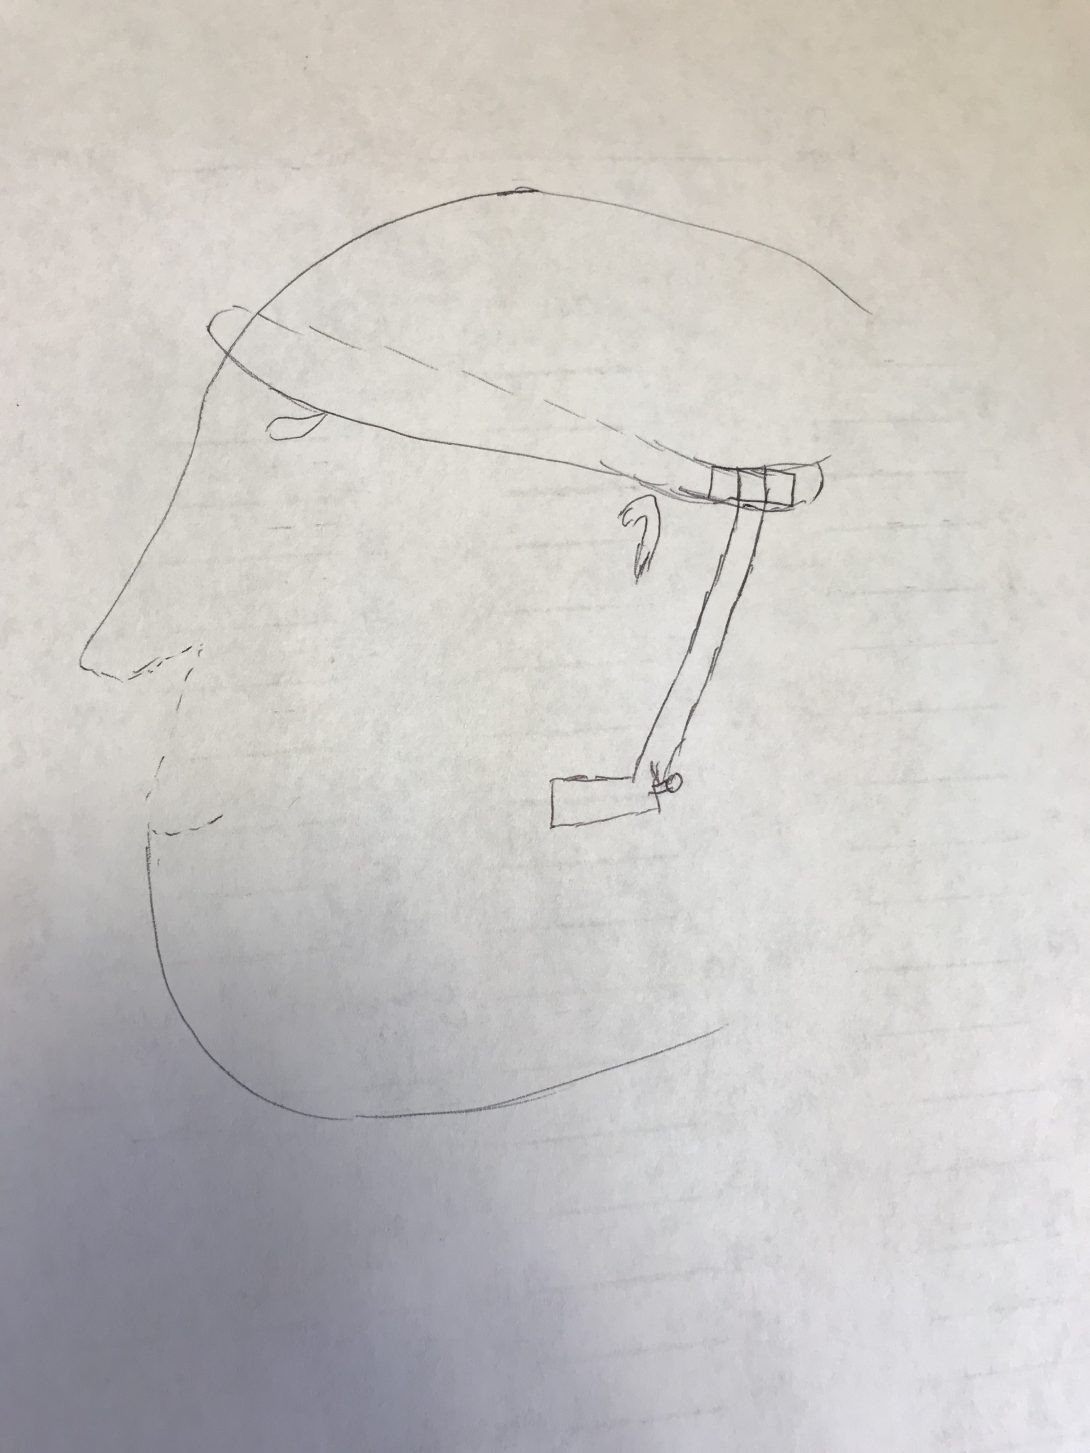
This week we had to create concept cards on our models as we wrapped up brainstorming ideas on our jaw elevation device. The concept card consisted of 4 sections: Team name, needs statement, benefits, and a sketch.
Needs statement: A way to decrease airway obstruction and incidence of subsequent intubation in patients with underlying obstructive airway conditions that decreases physical burden on staff.
Benefits: Creating a jaw elevation device that lets you perform the jaw thrust maneuver in any position allows a airways in the patient to be open. The direct impact is on the Nurses performing the maneuver for a long period of time (Over 15 mintes). Overtime, the maneuver does cause a physical burden on staff, so implementing this device into the procedure, we would be able to have one less nurse in the room which could potentially save labor as well as crowding in the rooms.
We decided to bring the force down from the forehead instead of the nasal region because there is a higher change to break cartilage in that region. The force is created from the tightness of the strap on the forehead, and that force is carried downwards to the joint, and into the jaw region to push forward. A rough sketch of of this device is shown below.
This device would cost less than $30 while the original jaw elevation device cost around $300+. Along with this, the new device would allow the physicians to perform endoscopic procedures on the patients side whereas if you use a JED the patient would have to be in the supine position.